
So recently one of my friends asked me if I was interested in shooting some photos of her brothers coffee company and of course I was down. Their coffee company is called Retrograde Coffee Roasters and they’re located in Sebastopol, California
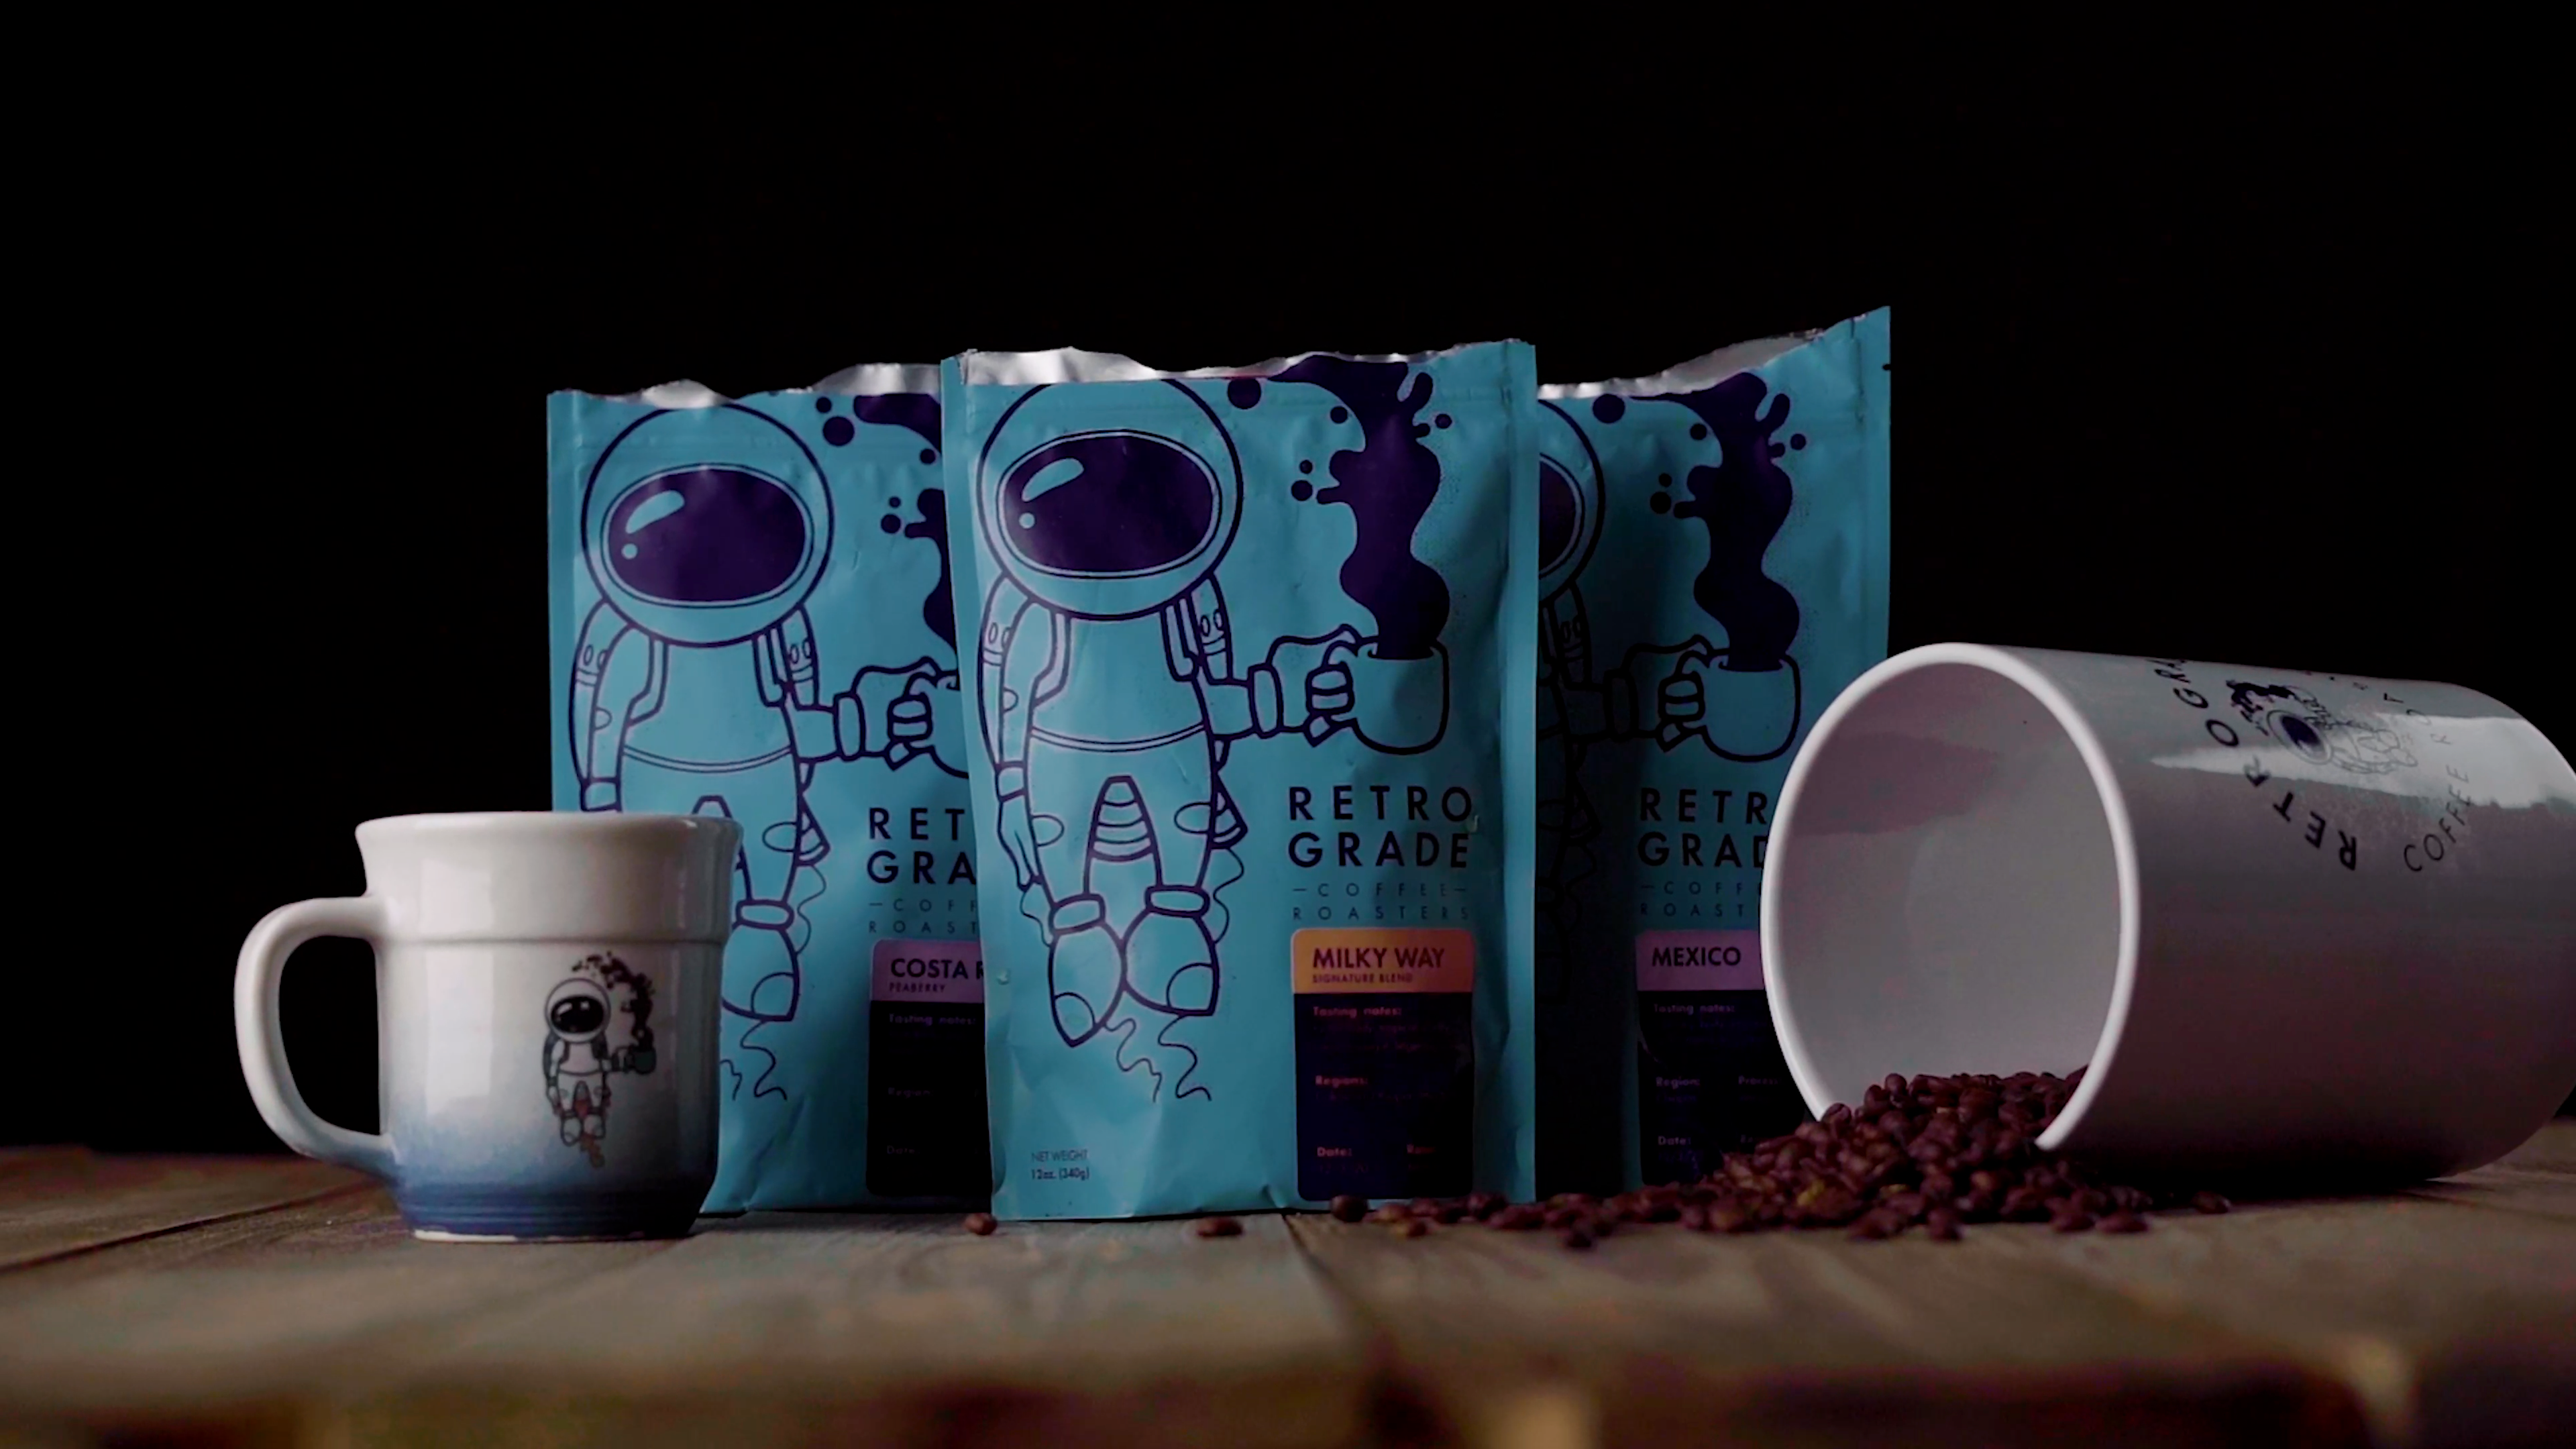
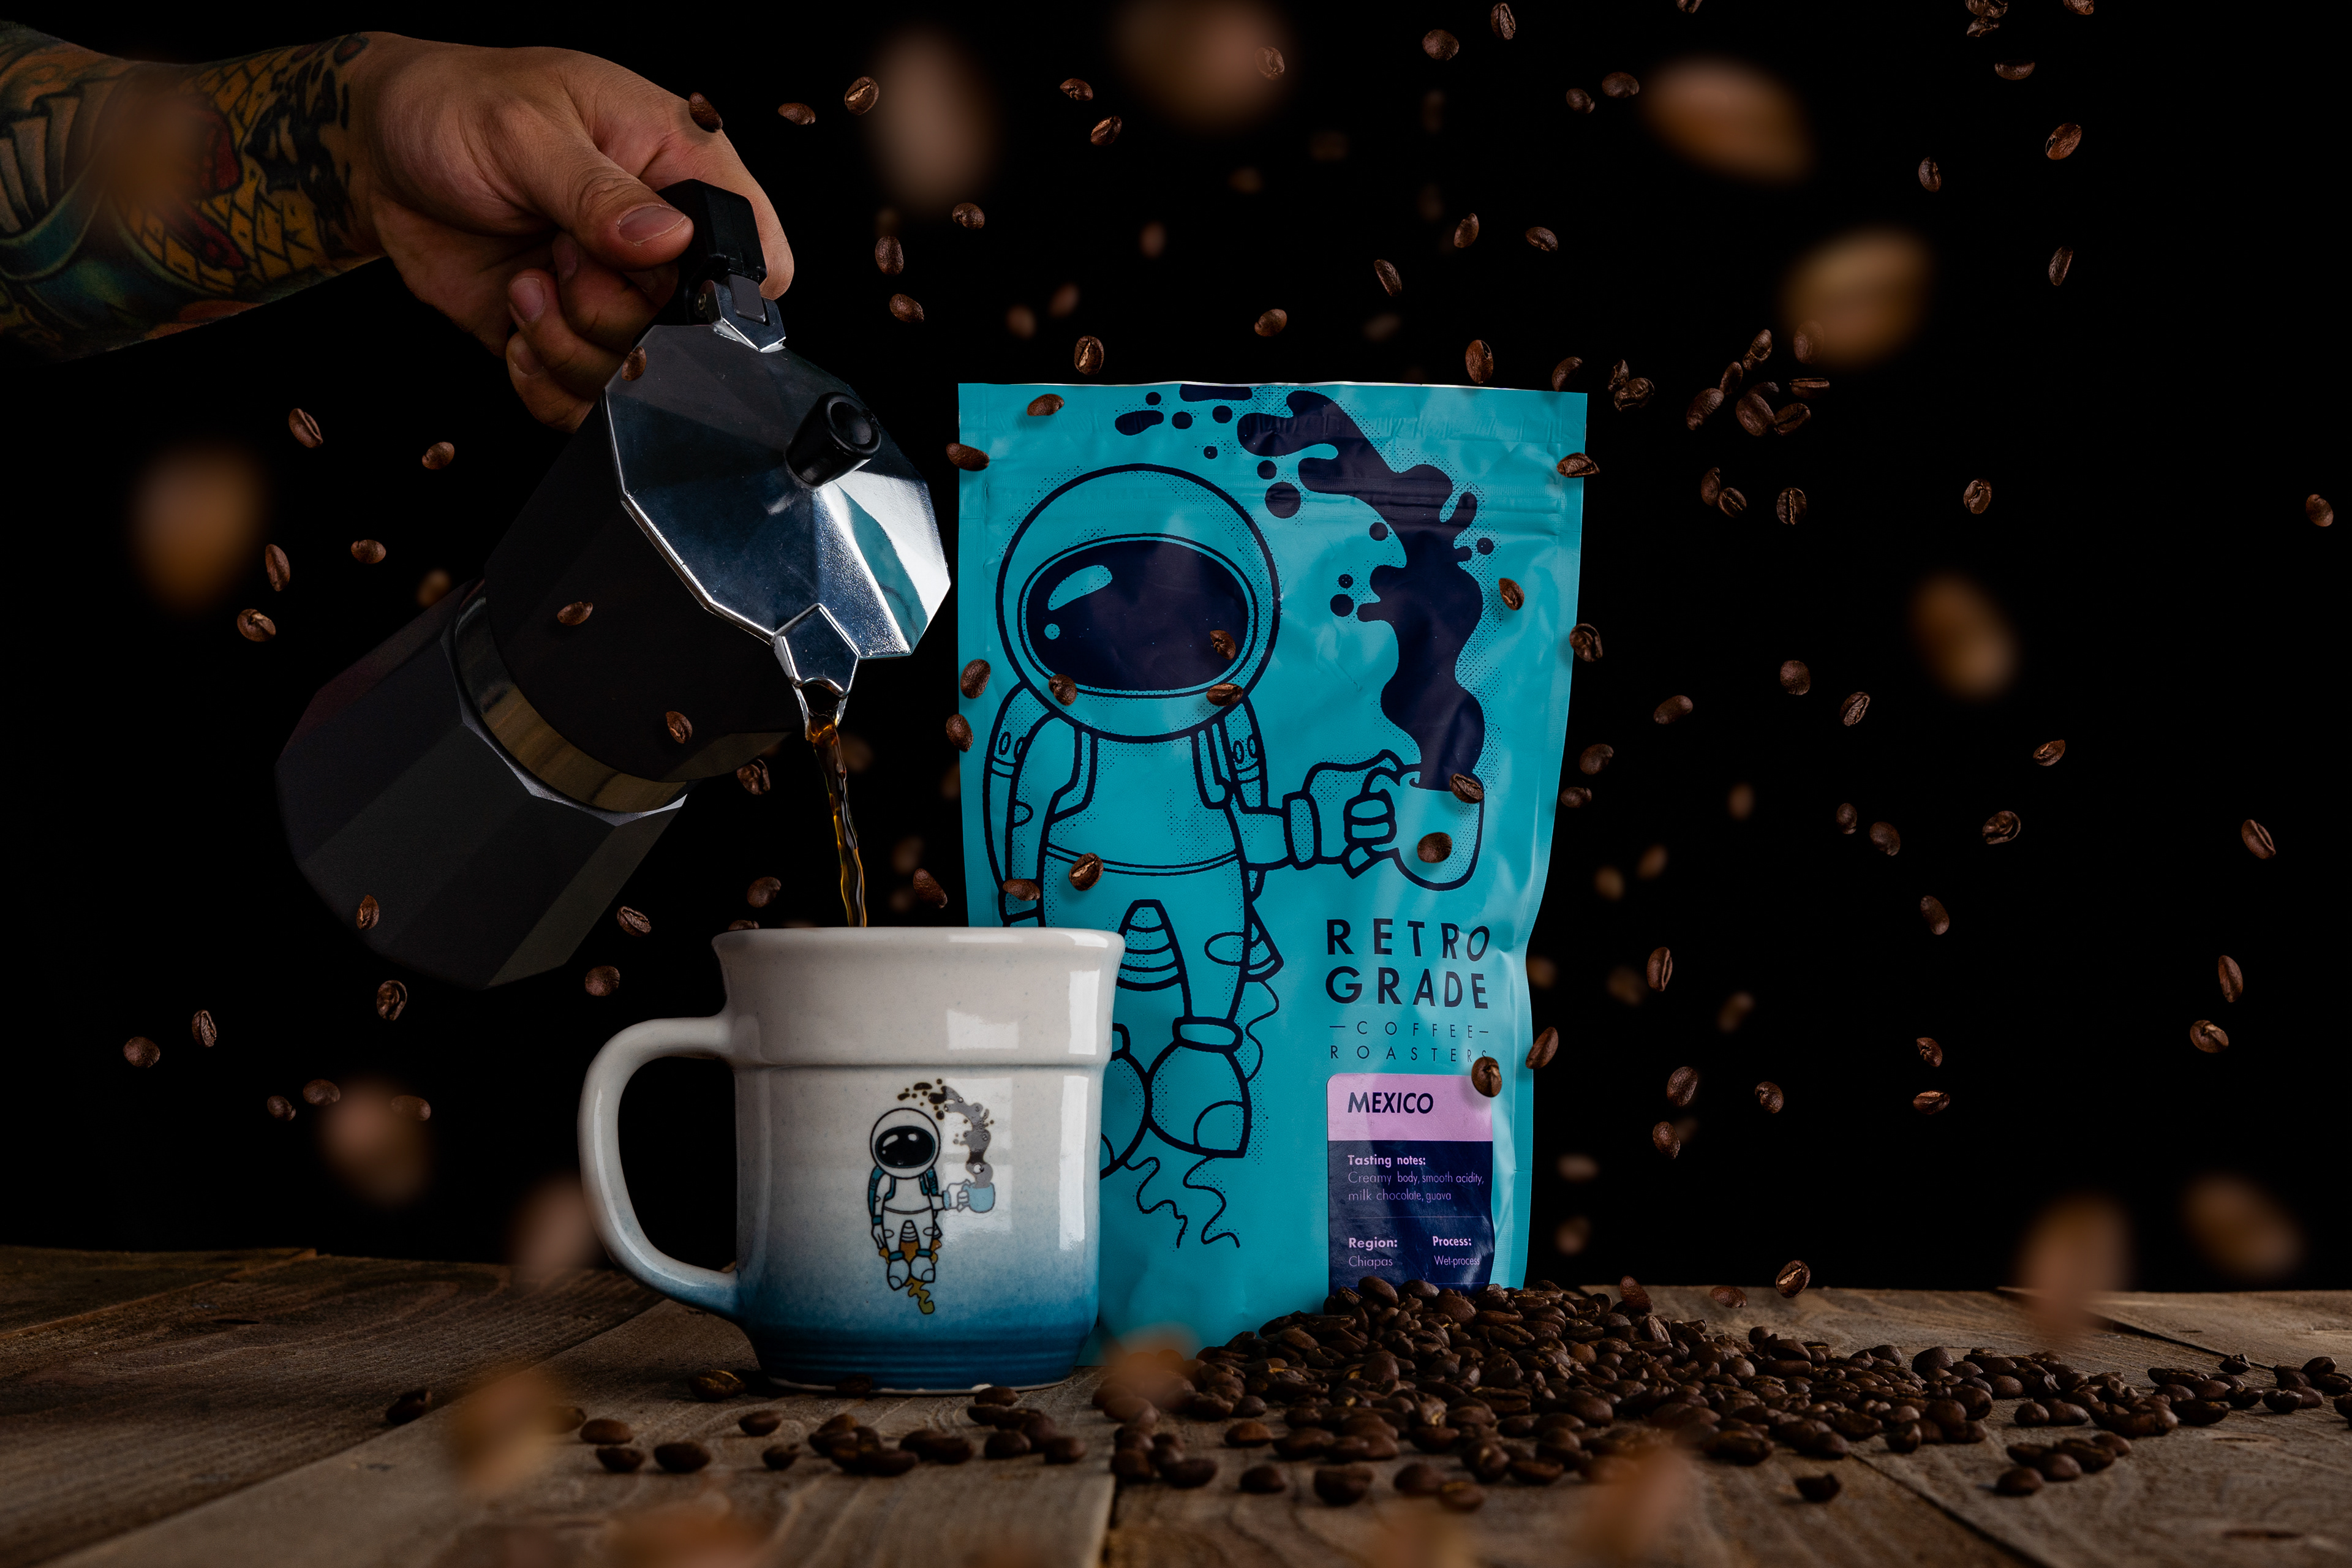
If you guys like coffee make sure to go give them a follow and check out their shop if you are ever in the area! Retrogrades branding is very fun with this little cartoon illustration of an astronaut on their bag with coffee floating out of its mug So I instantly wanted to shoot some floating photography as soon as I saw this.
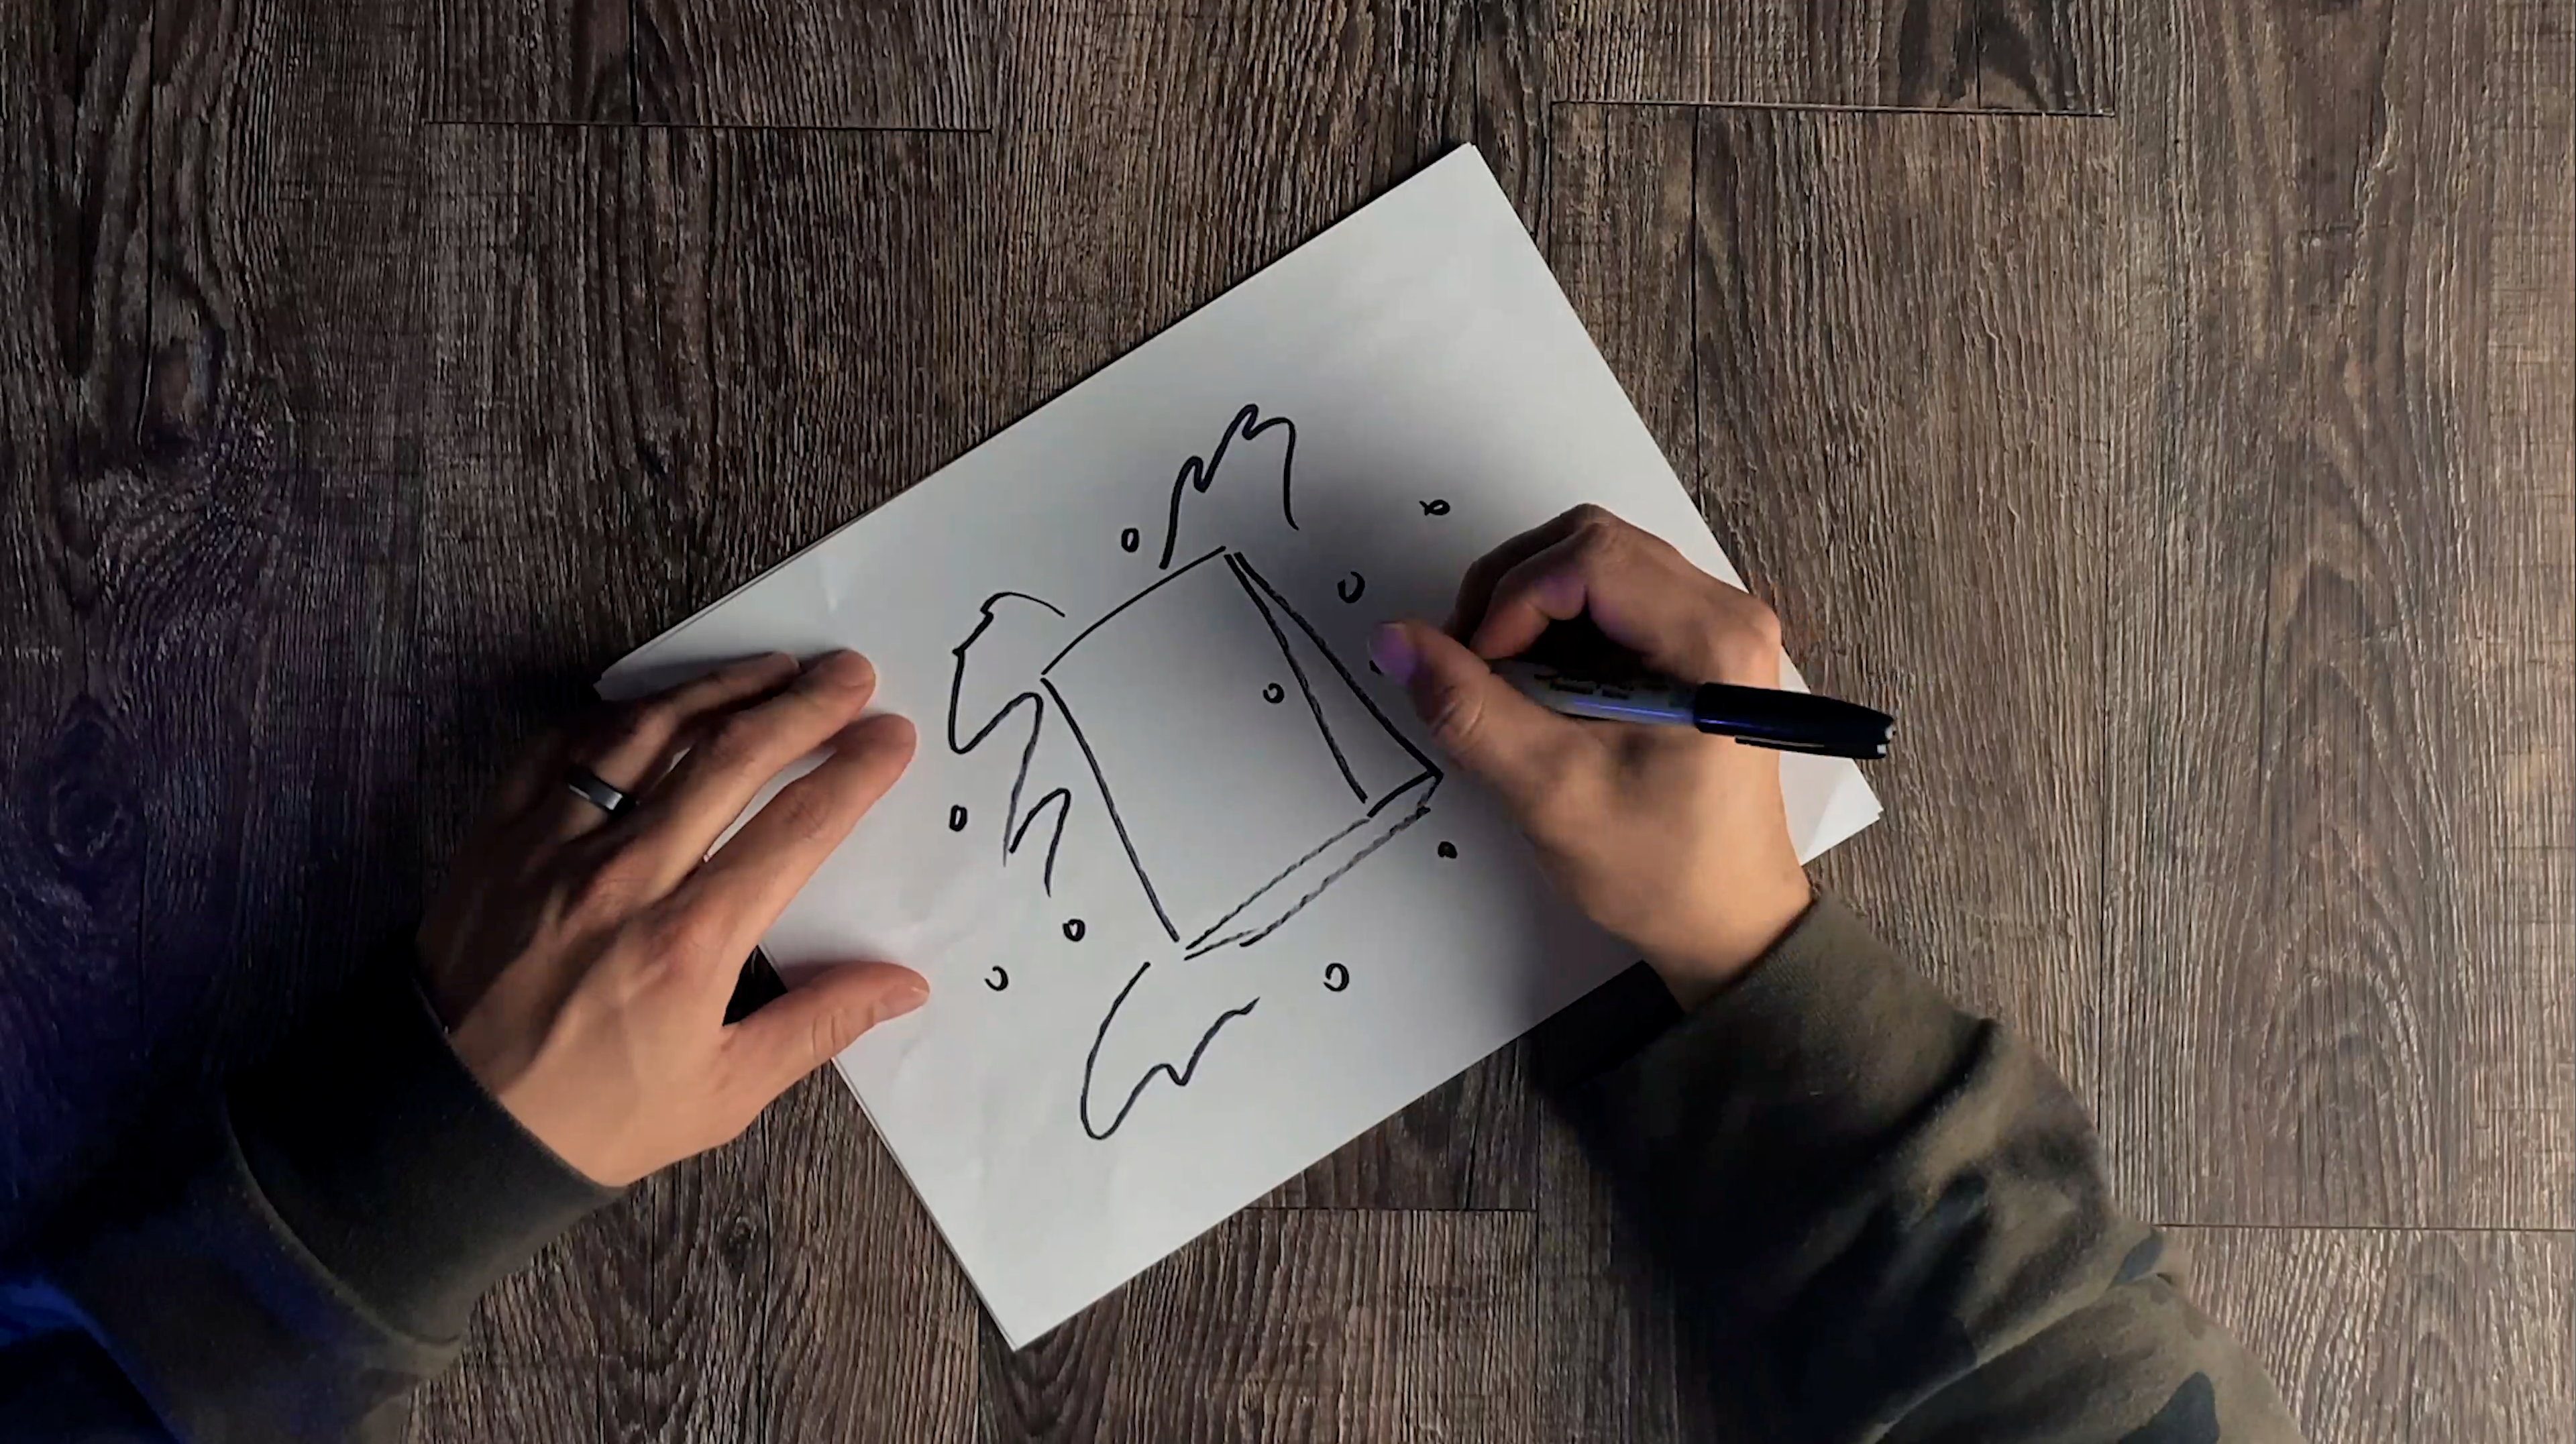
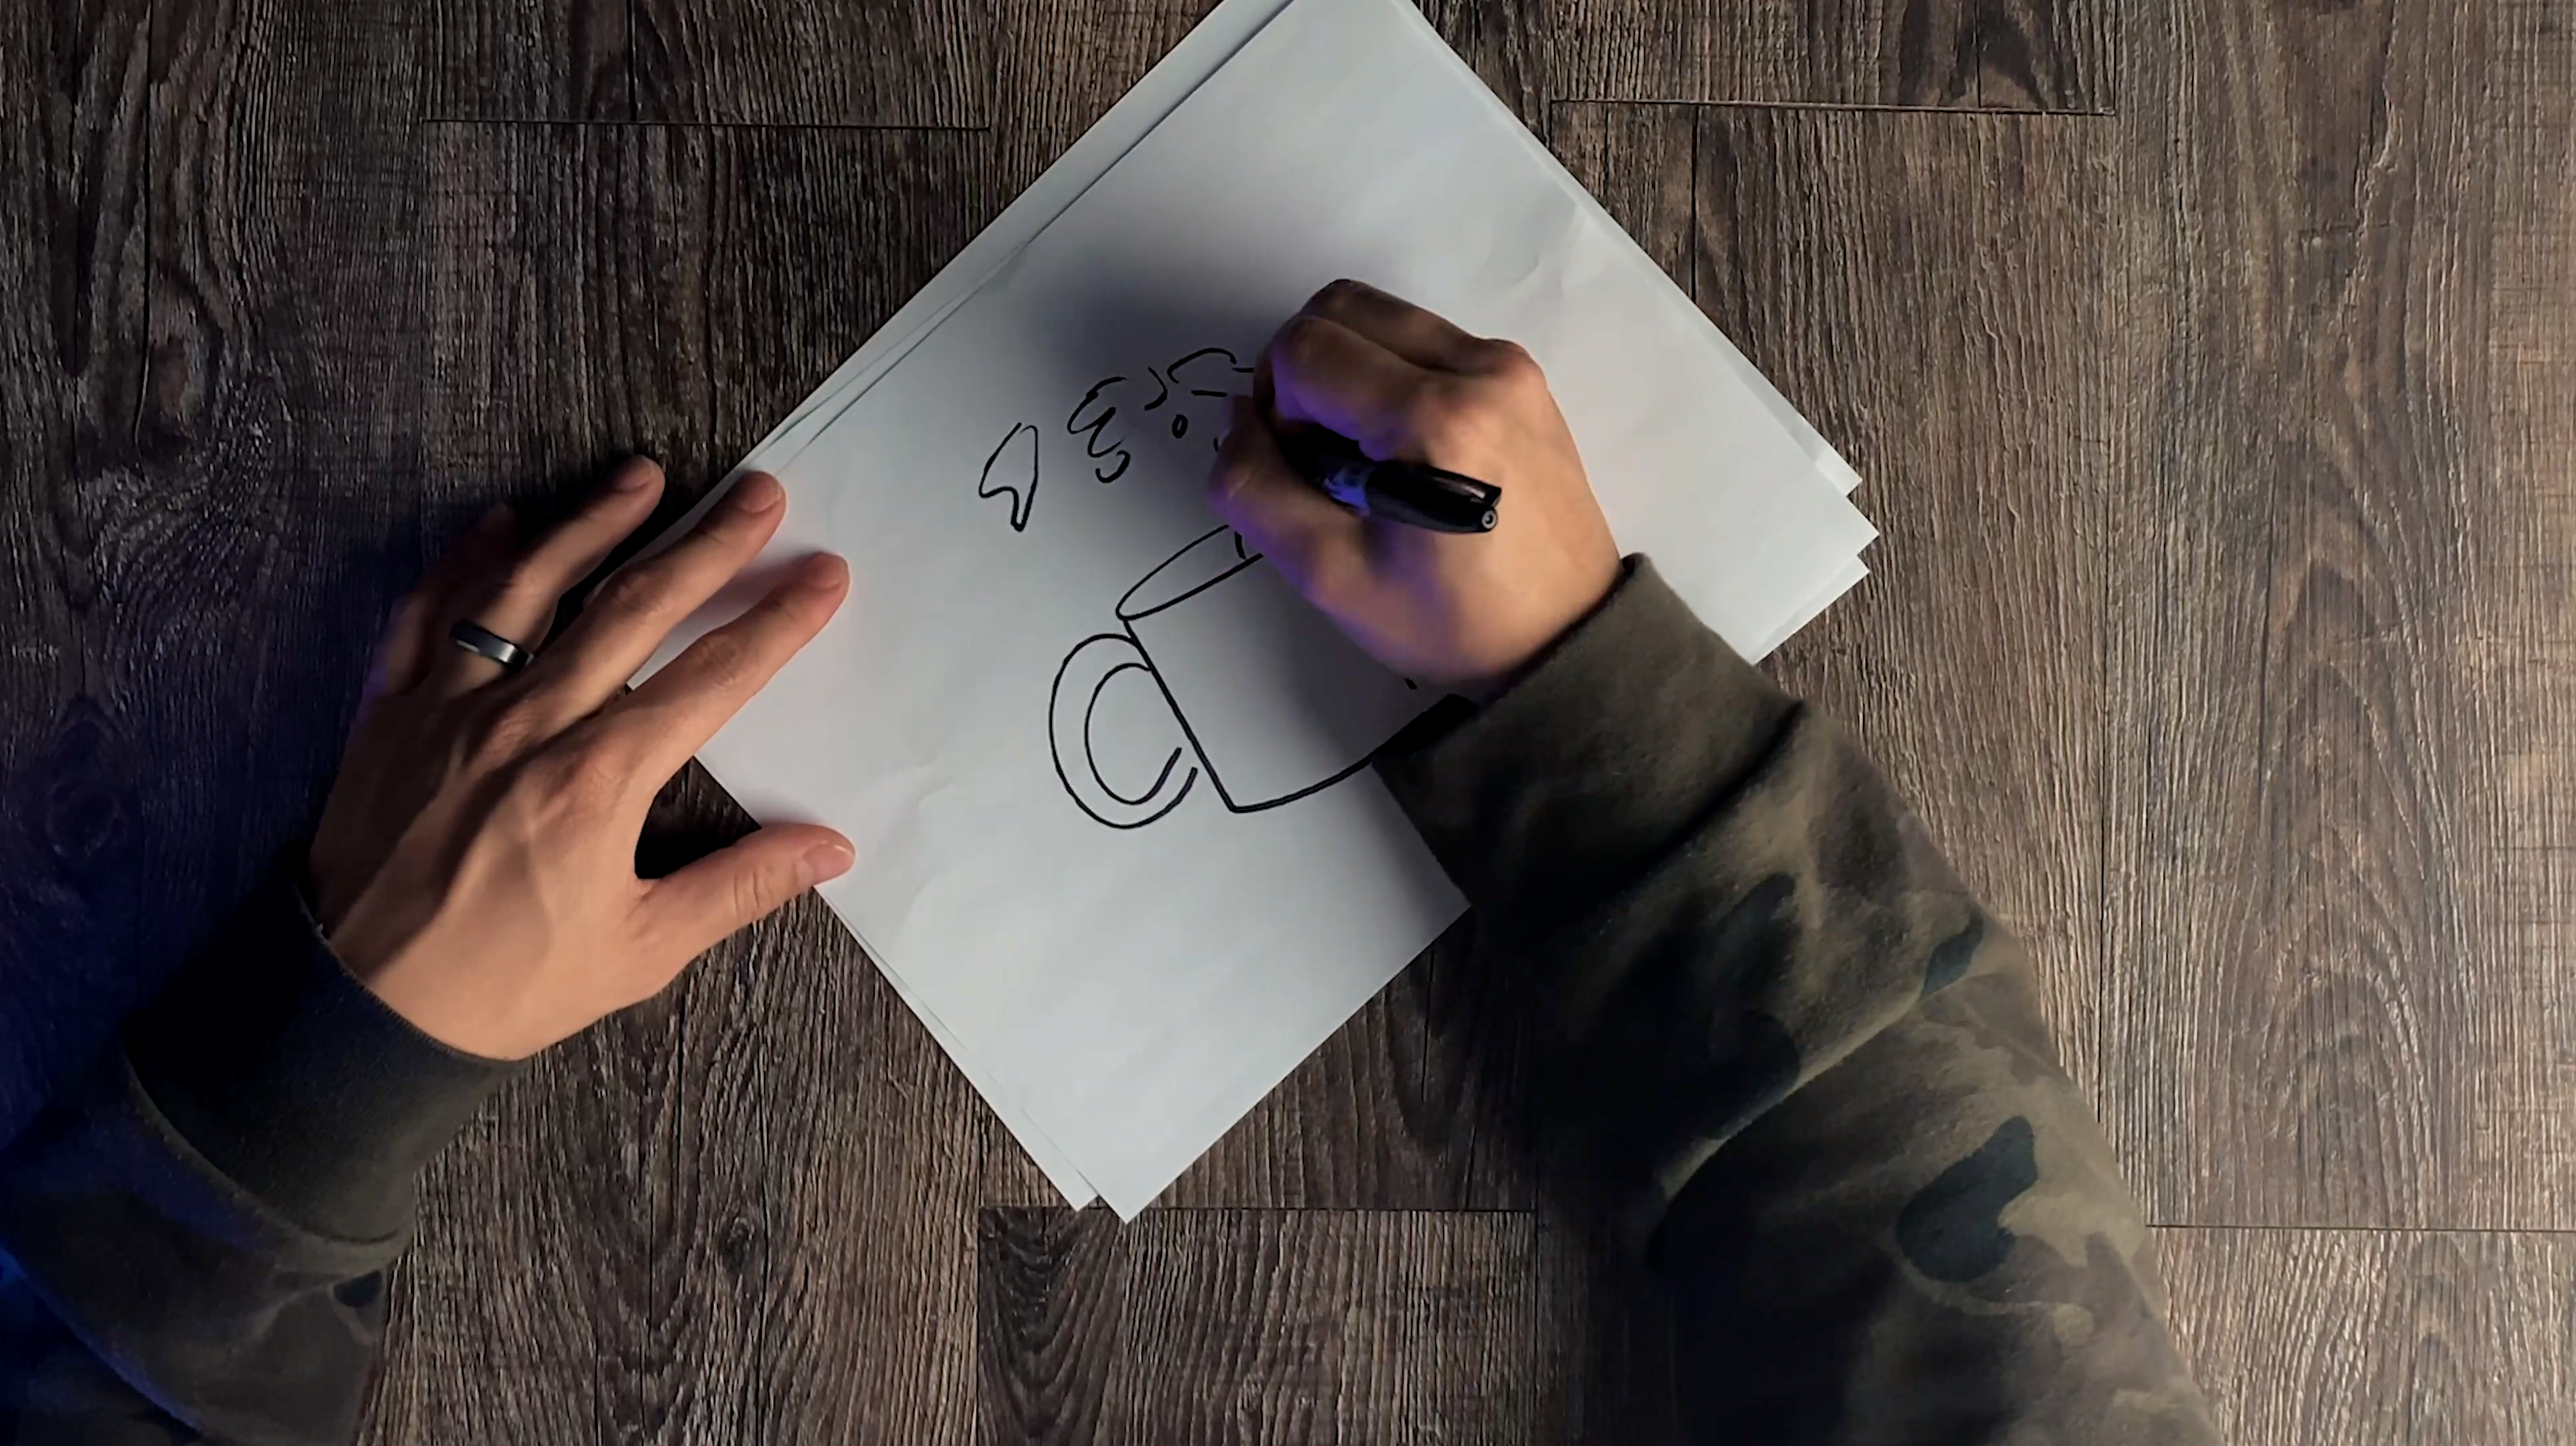
So one thing that helps me out a ton when shooting shots that are a little more technical like this is to actually sketch out my ideas onto paper. Even though I have an idea in my head seeing it on paper helps me to visualize my setup better and will help me work more efficiently.
For my first idea I want to make it feel like the bag is floating through space with coffee splashing around it and then add in some beans for a little extra depth. Just like we did in my first video when I shot the pecans.
If you guys haven’t watched that video I’ll make sure to link it here.
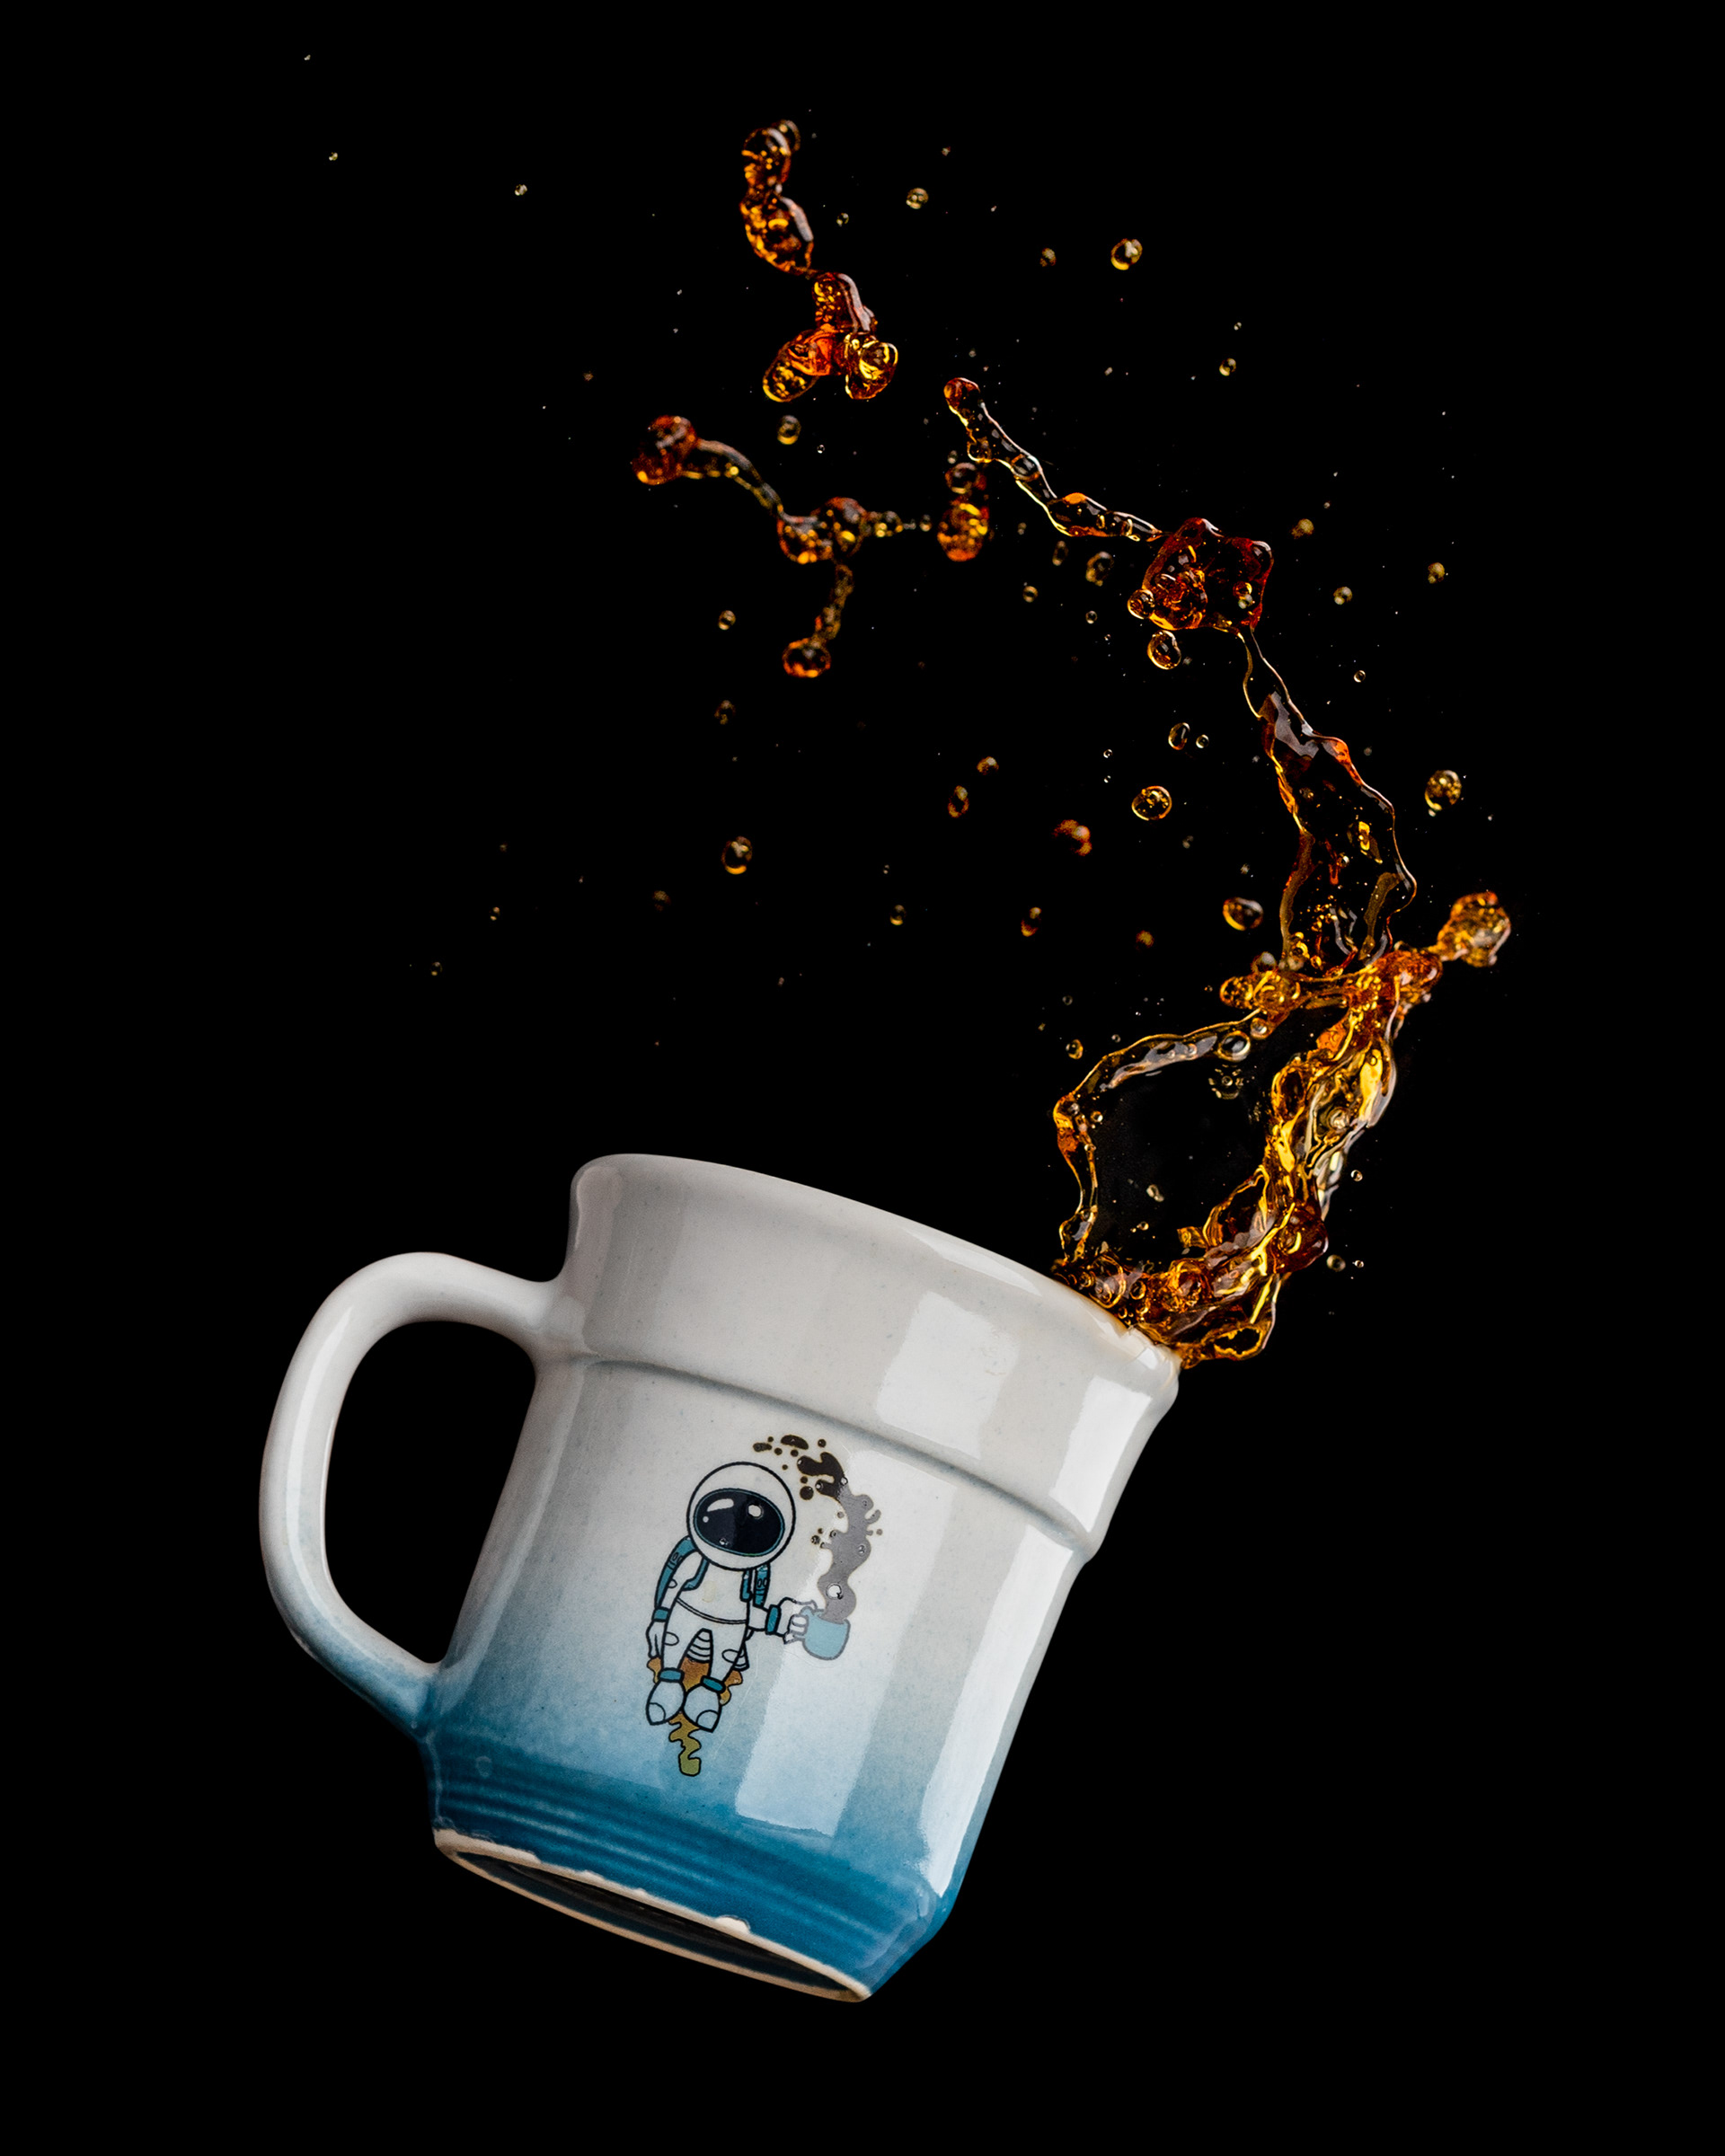
For my second idea I actually want to replicate the mug with the coffee flying out of it the best we can, but adding maybe a slight tilt to the cup to make it feel like its floating through the frame.
Let’s go ahead and start with my second idea since we can shoot it way quicker than my first idea.
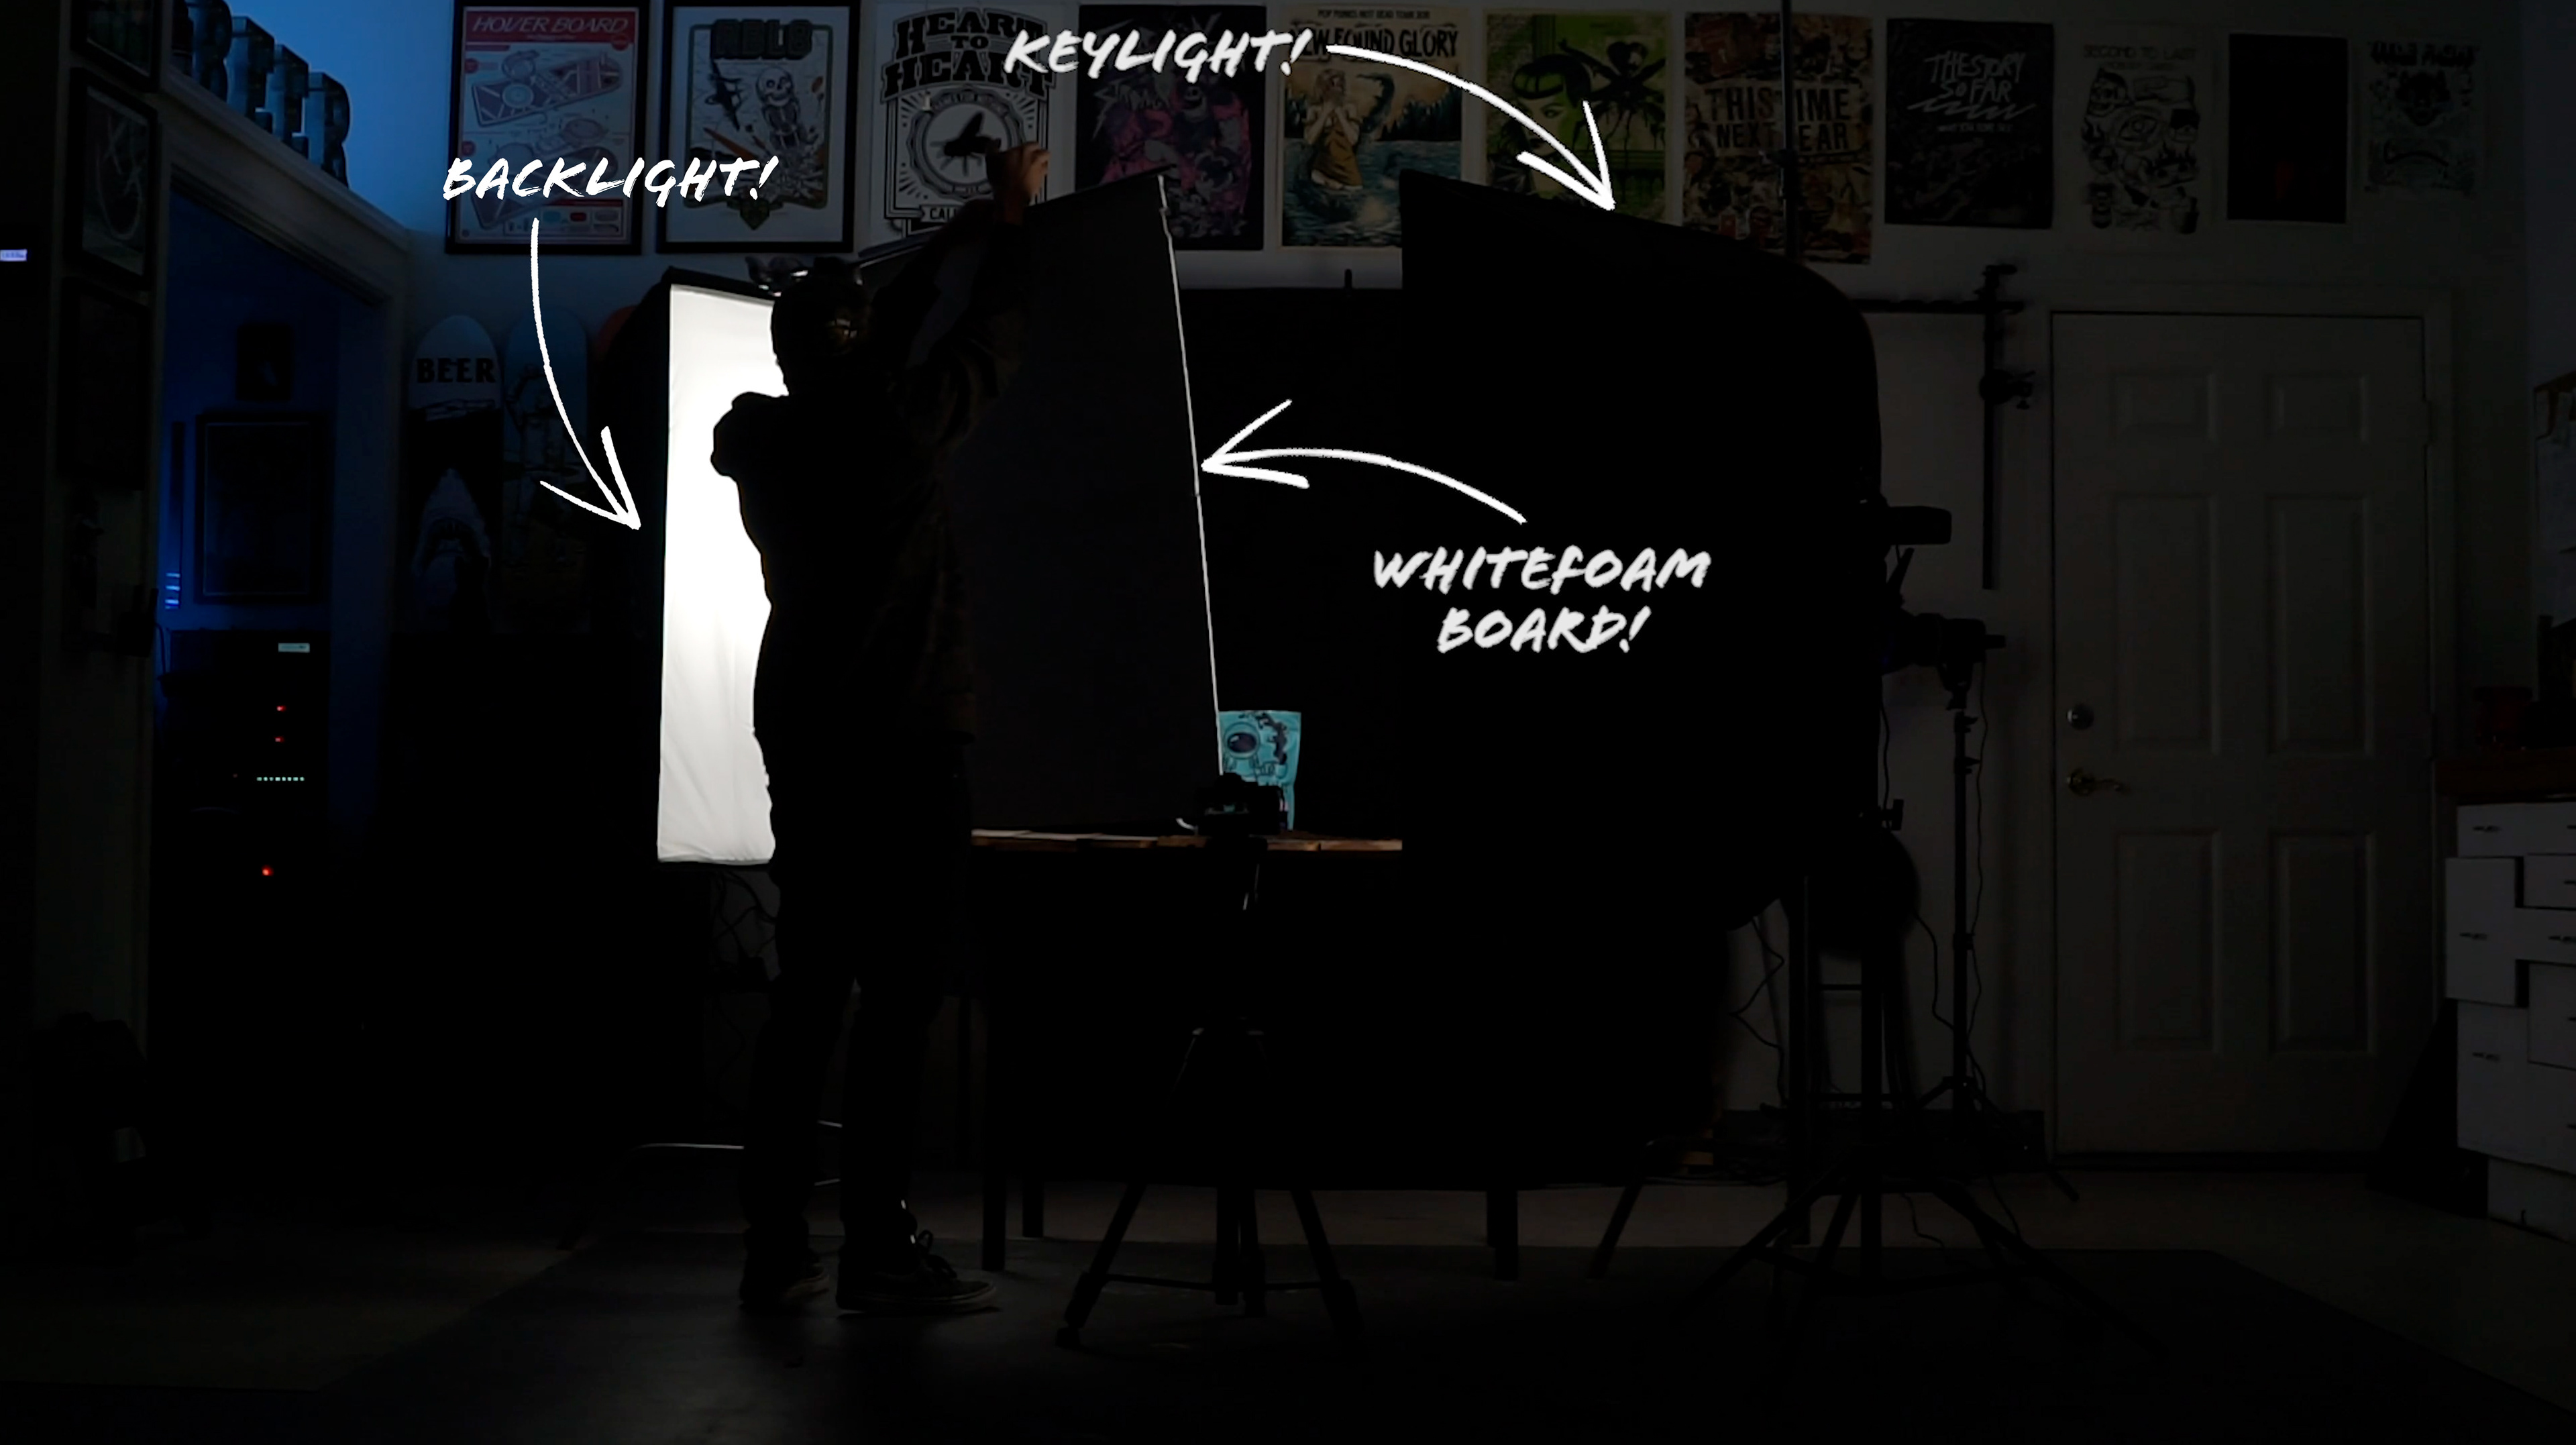
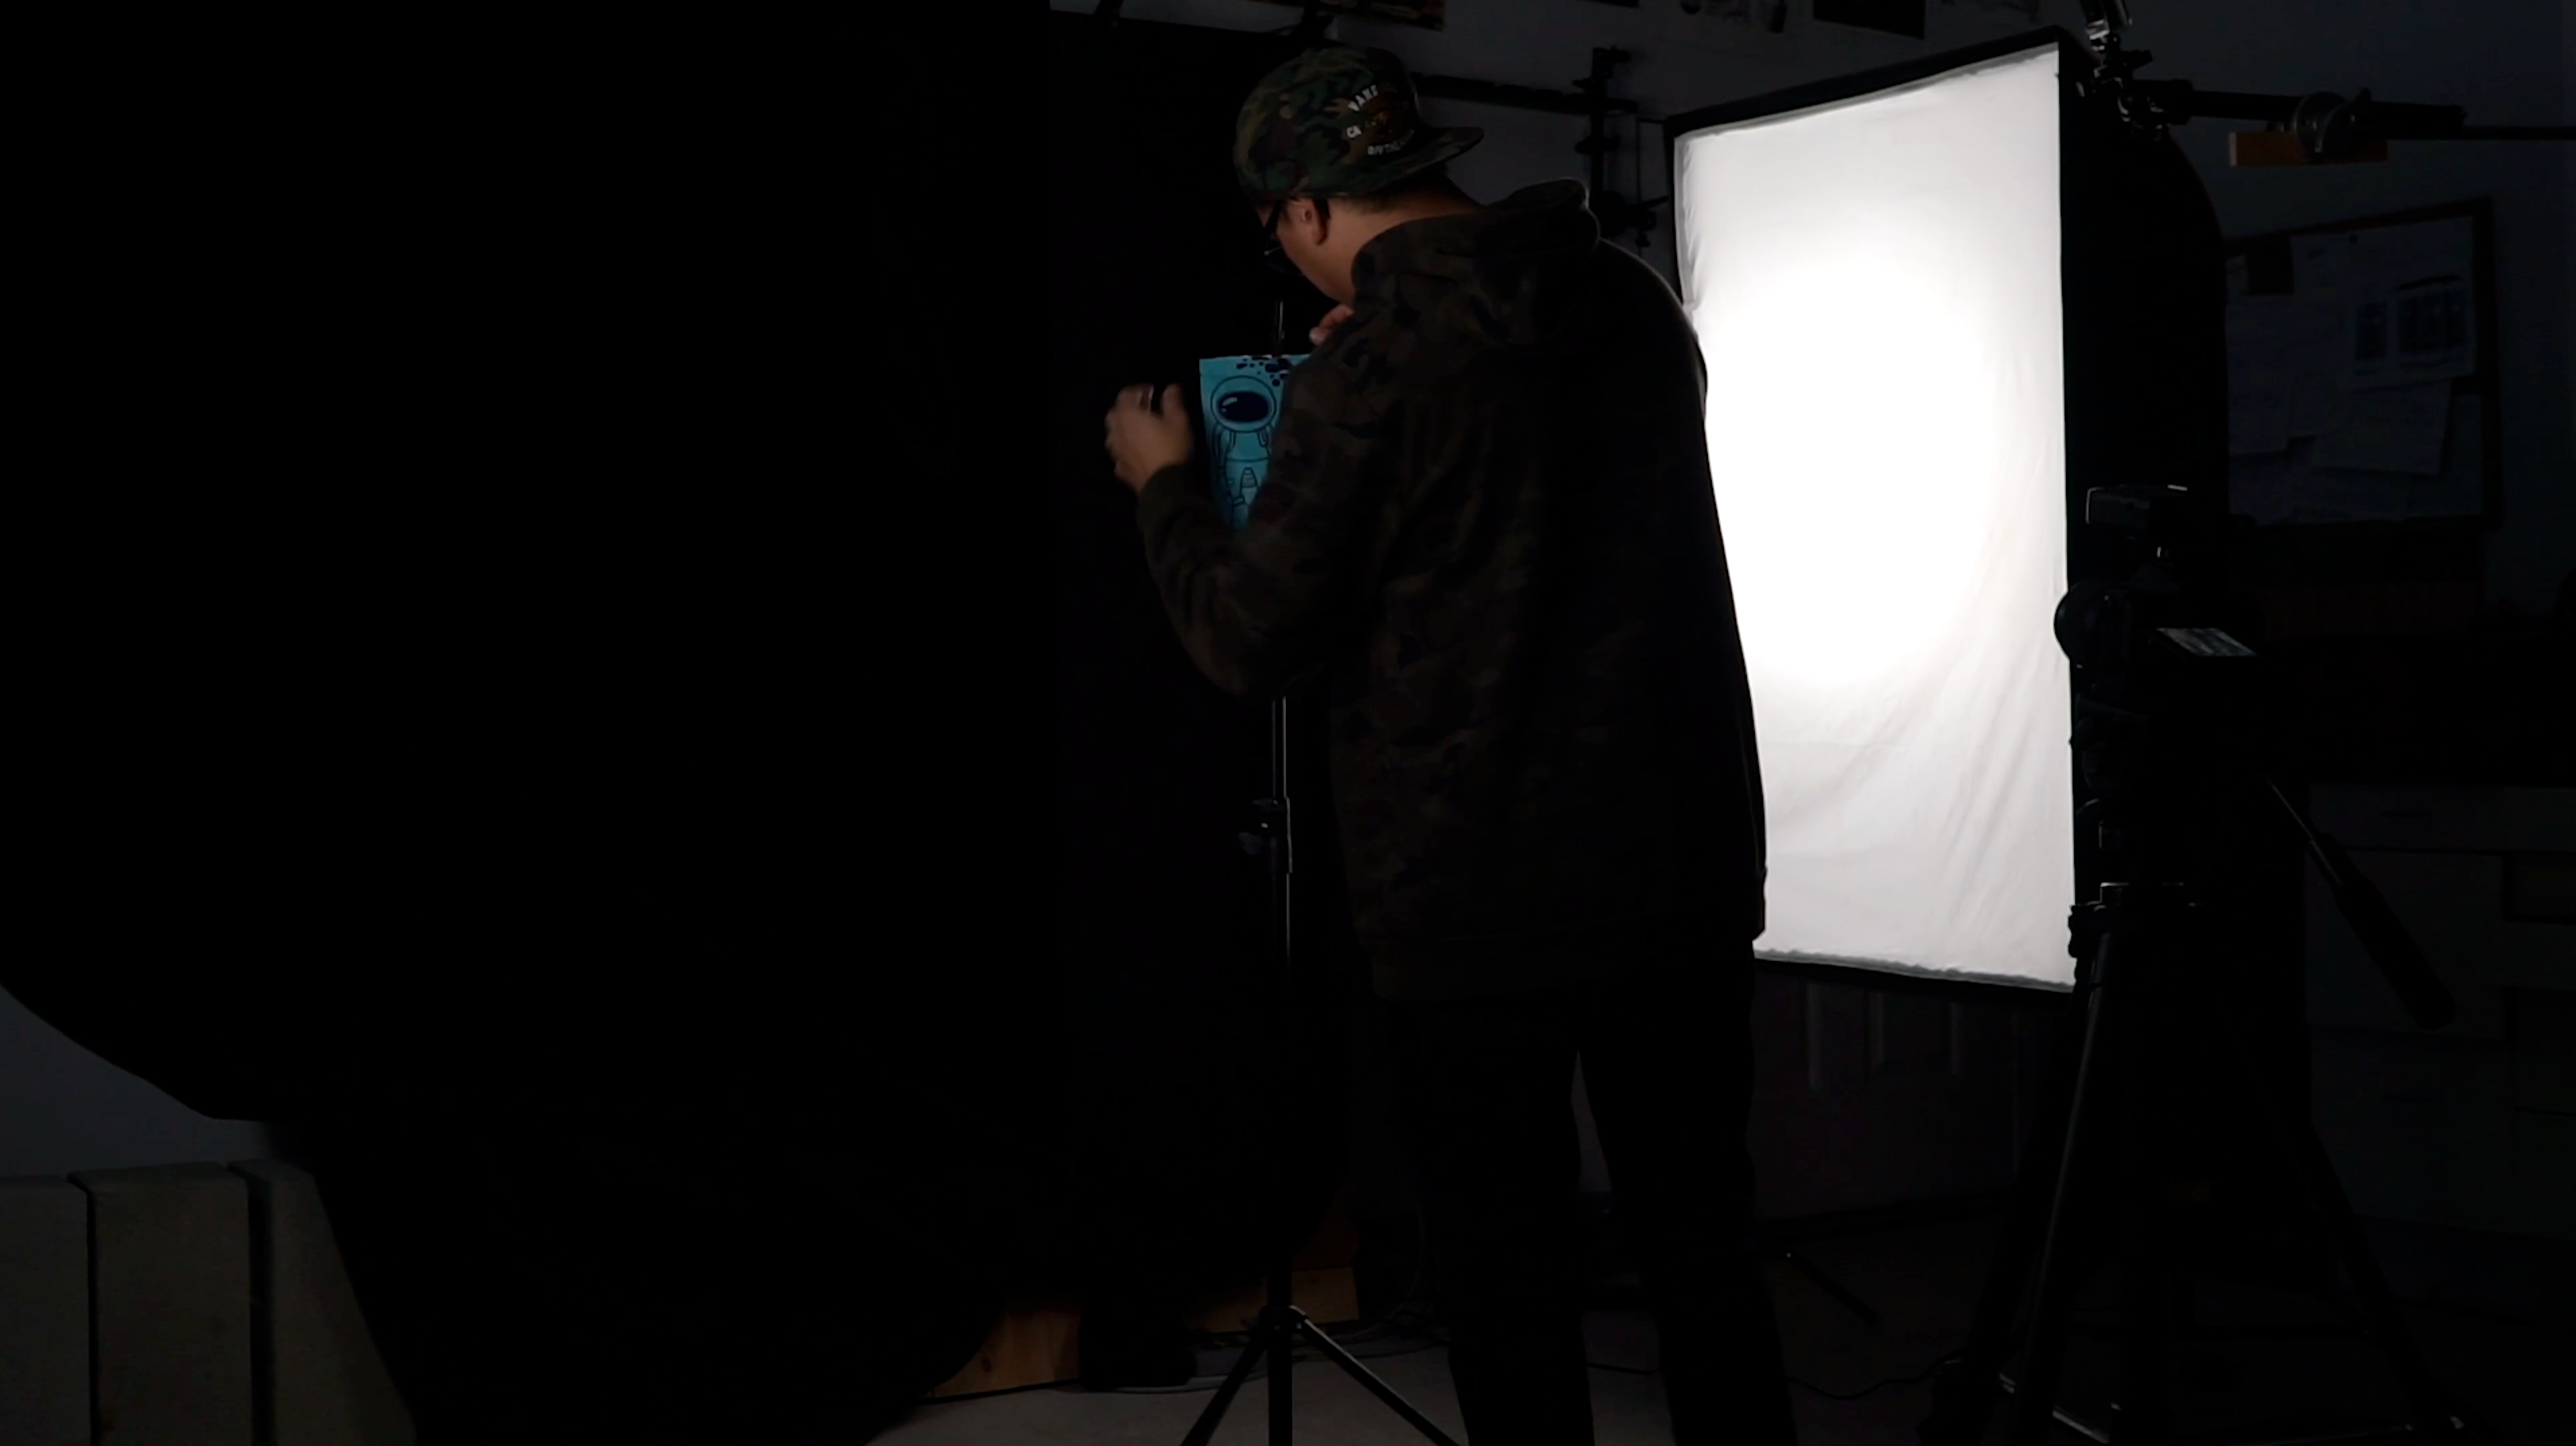
And once again I will be shooting on my Sony A7iii with a 50mm 1.8 and two flashpoint AD200s inside some large rectangle soft boxes that will help soften up my light and add some nice clean highlights.
For this first floating mug shot we’re going to start by capturing our liquid coming out of the mug by splashing it.
We're going to light this one with one backlight that will help the coffee really pop off of my black background then add my key light with a white foam board on the opposite side to help add in some fill light.
Before we start splashing the coffee we’re going to take a clean shot of the mug just in case we might need to clean anything up in post. Once your lights are setup and you’ve taken a clean shot go ahead and start capturing some splashes.
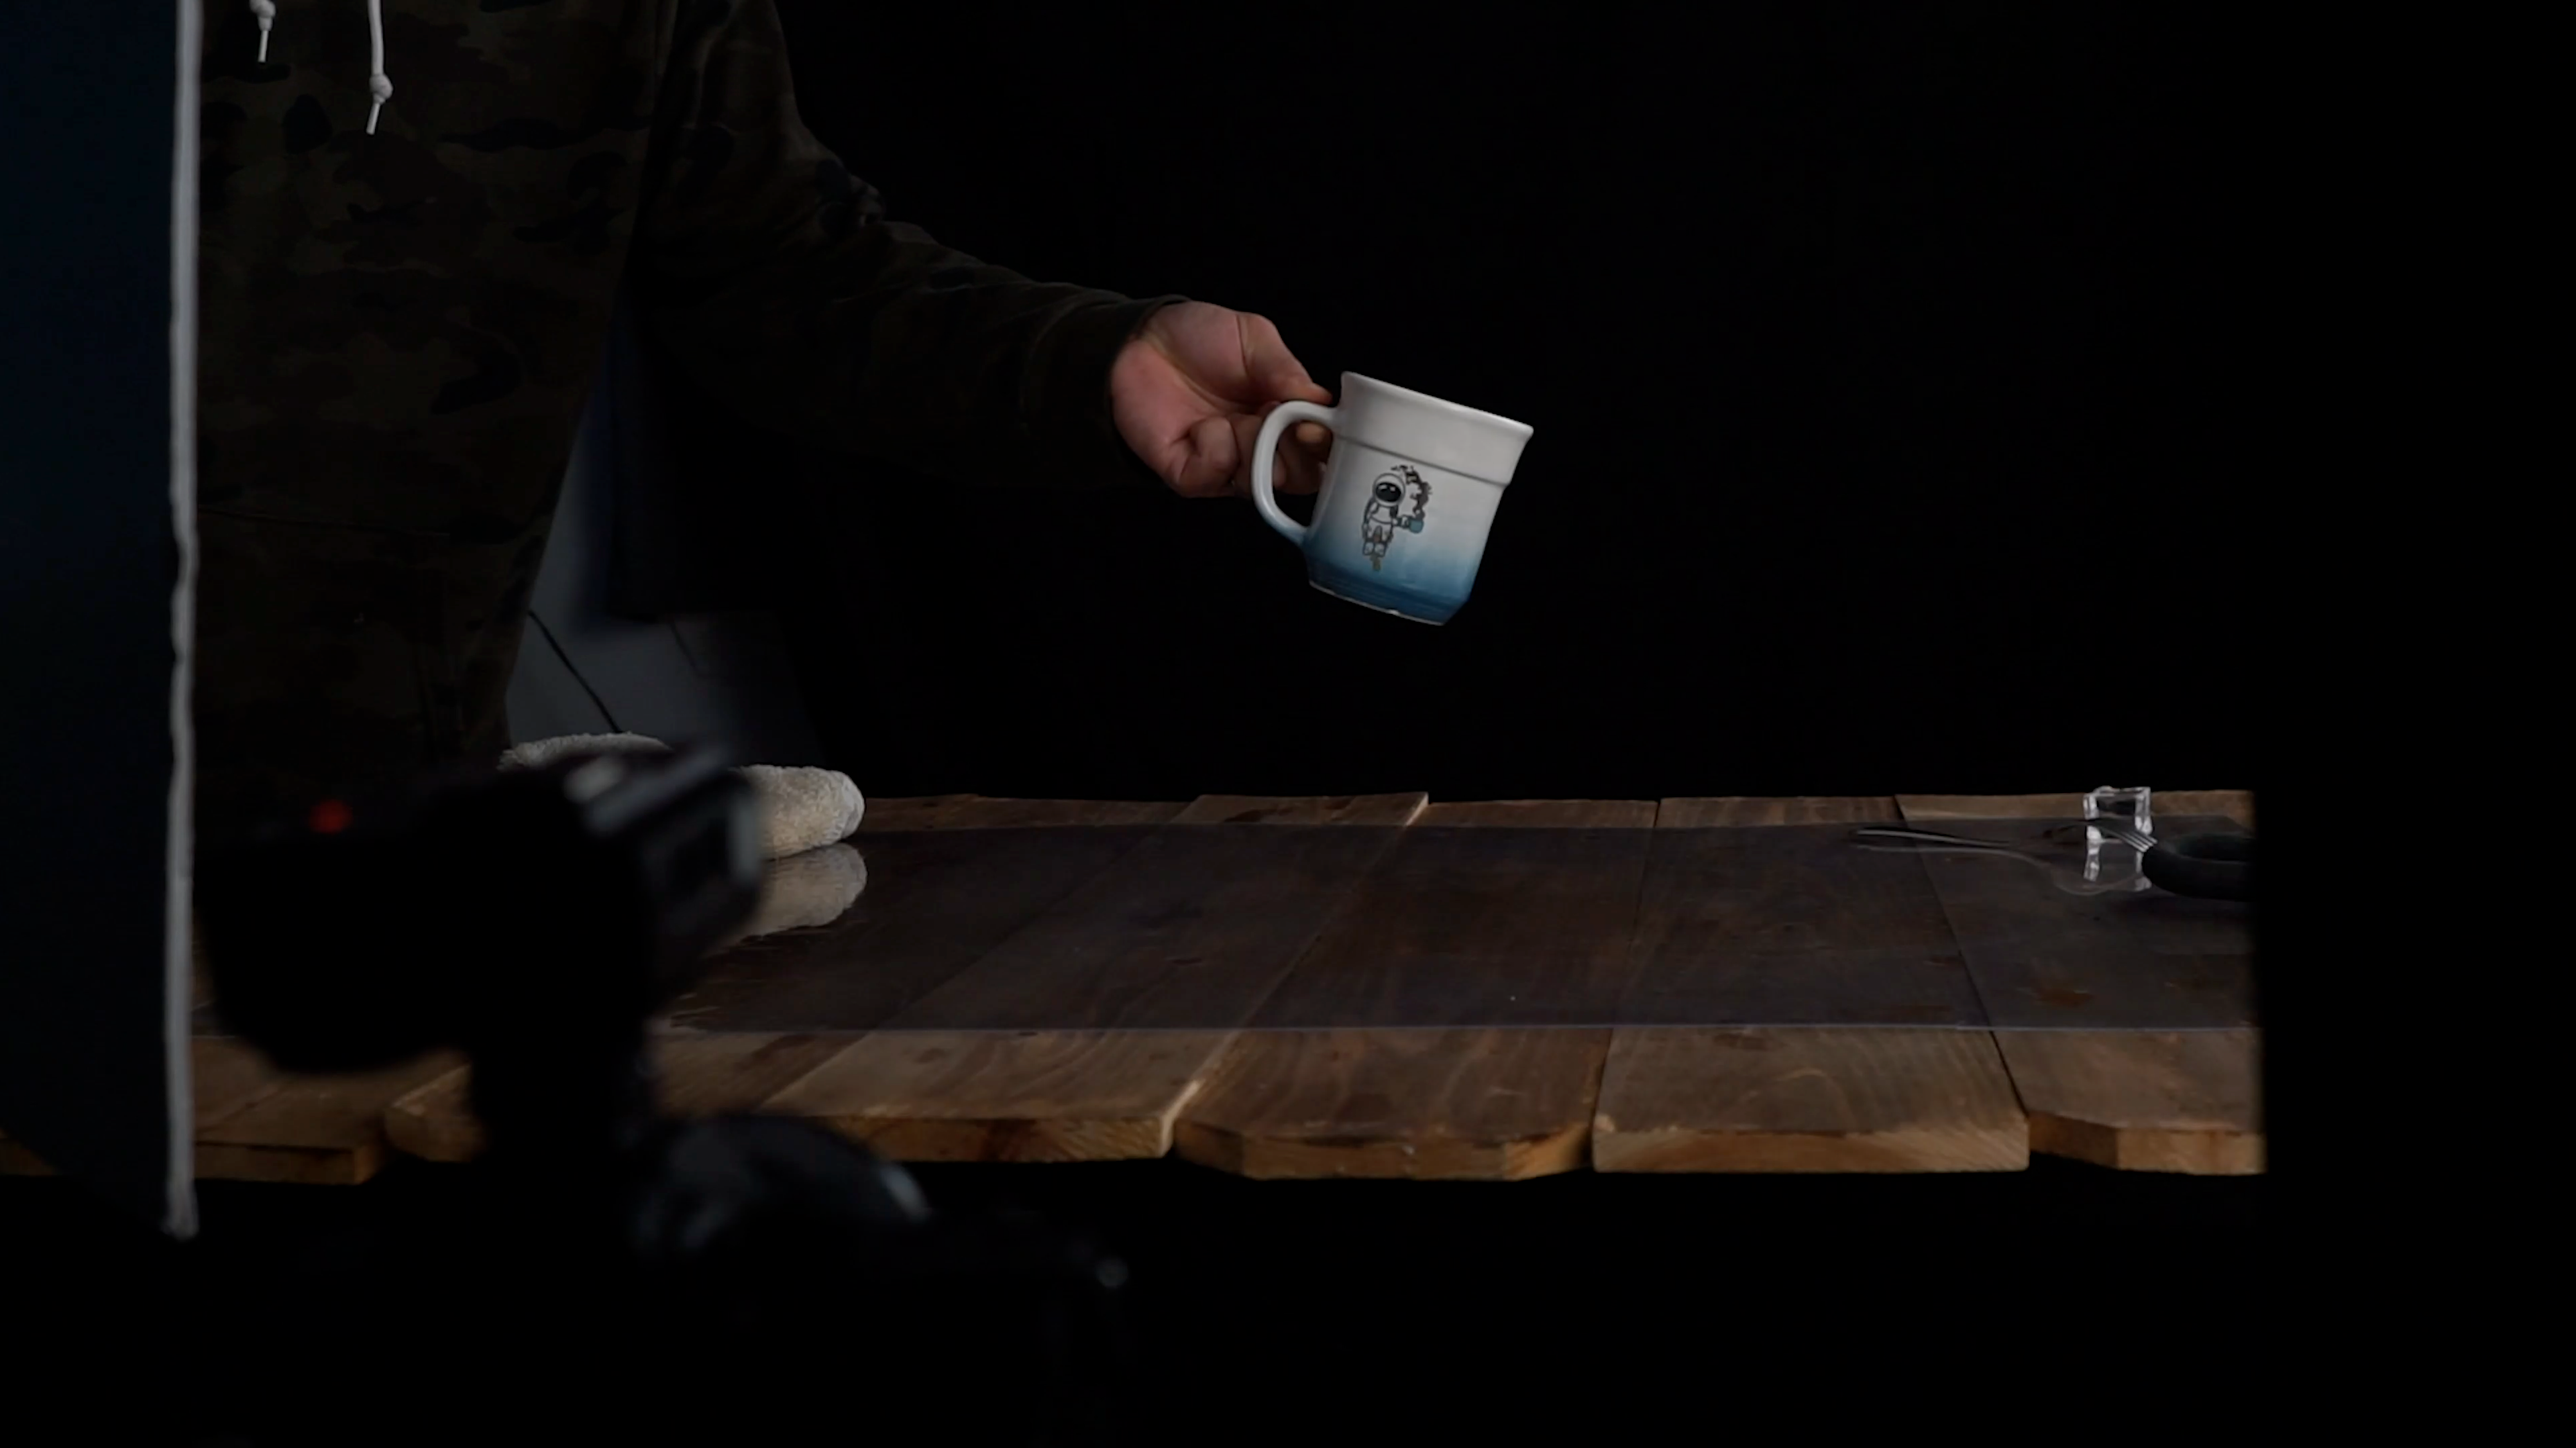
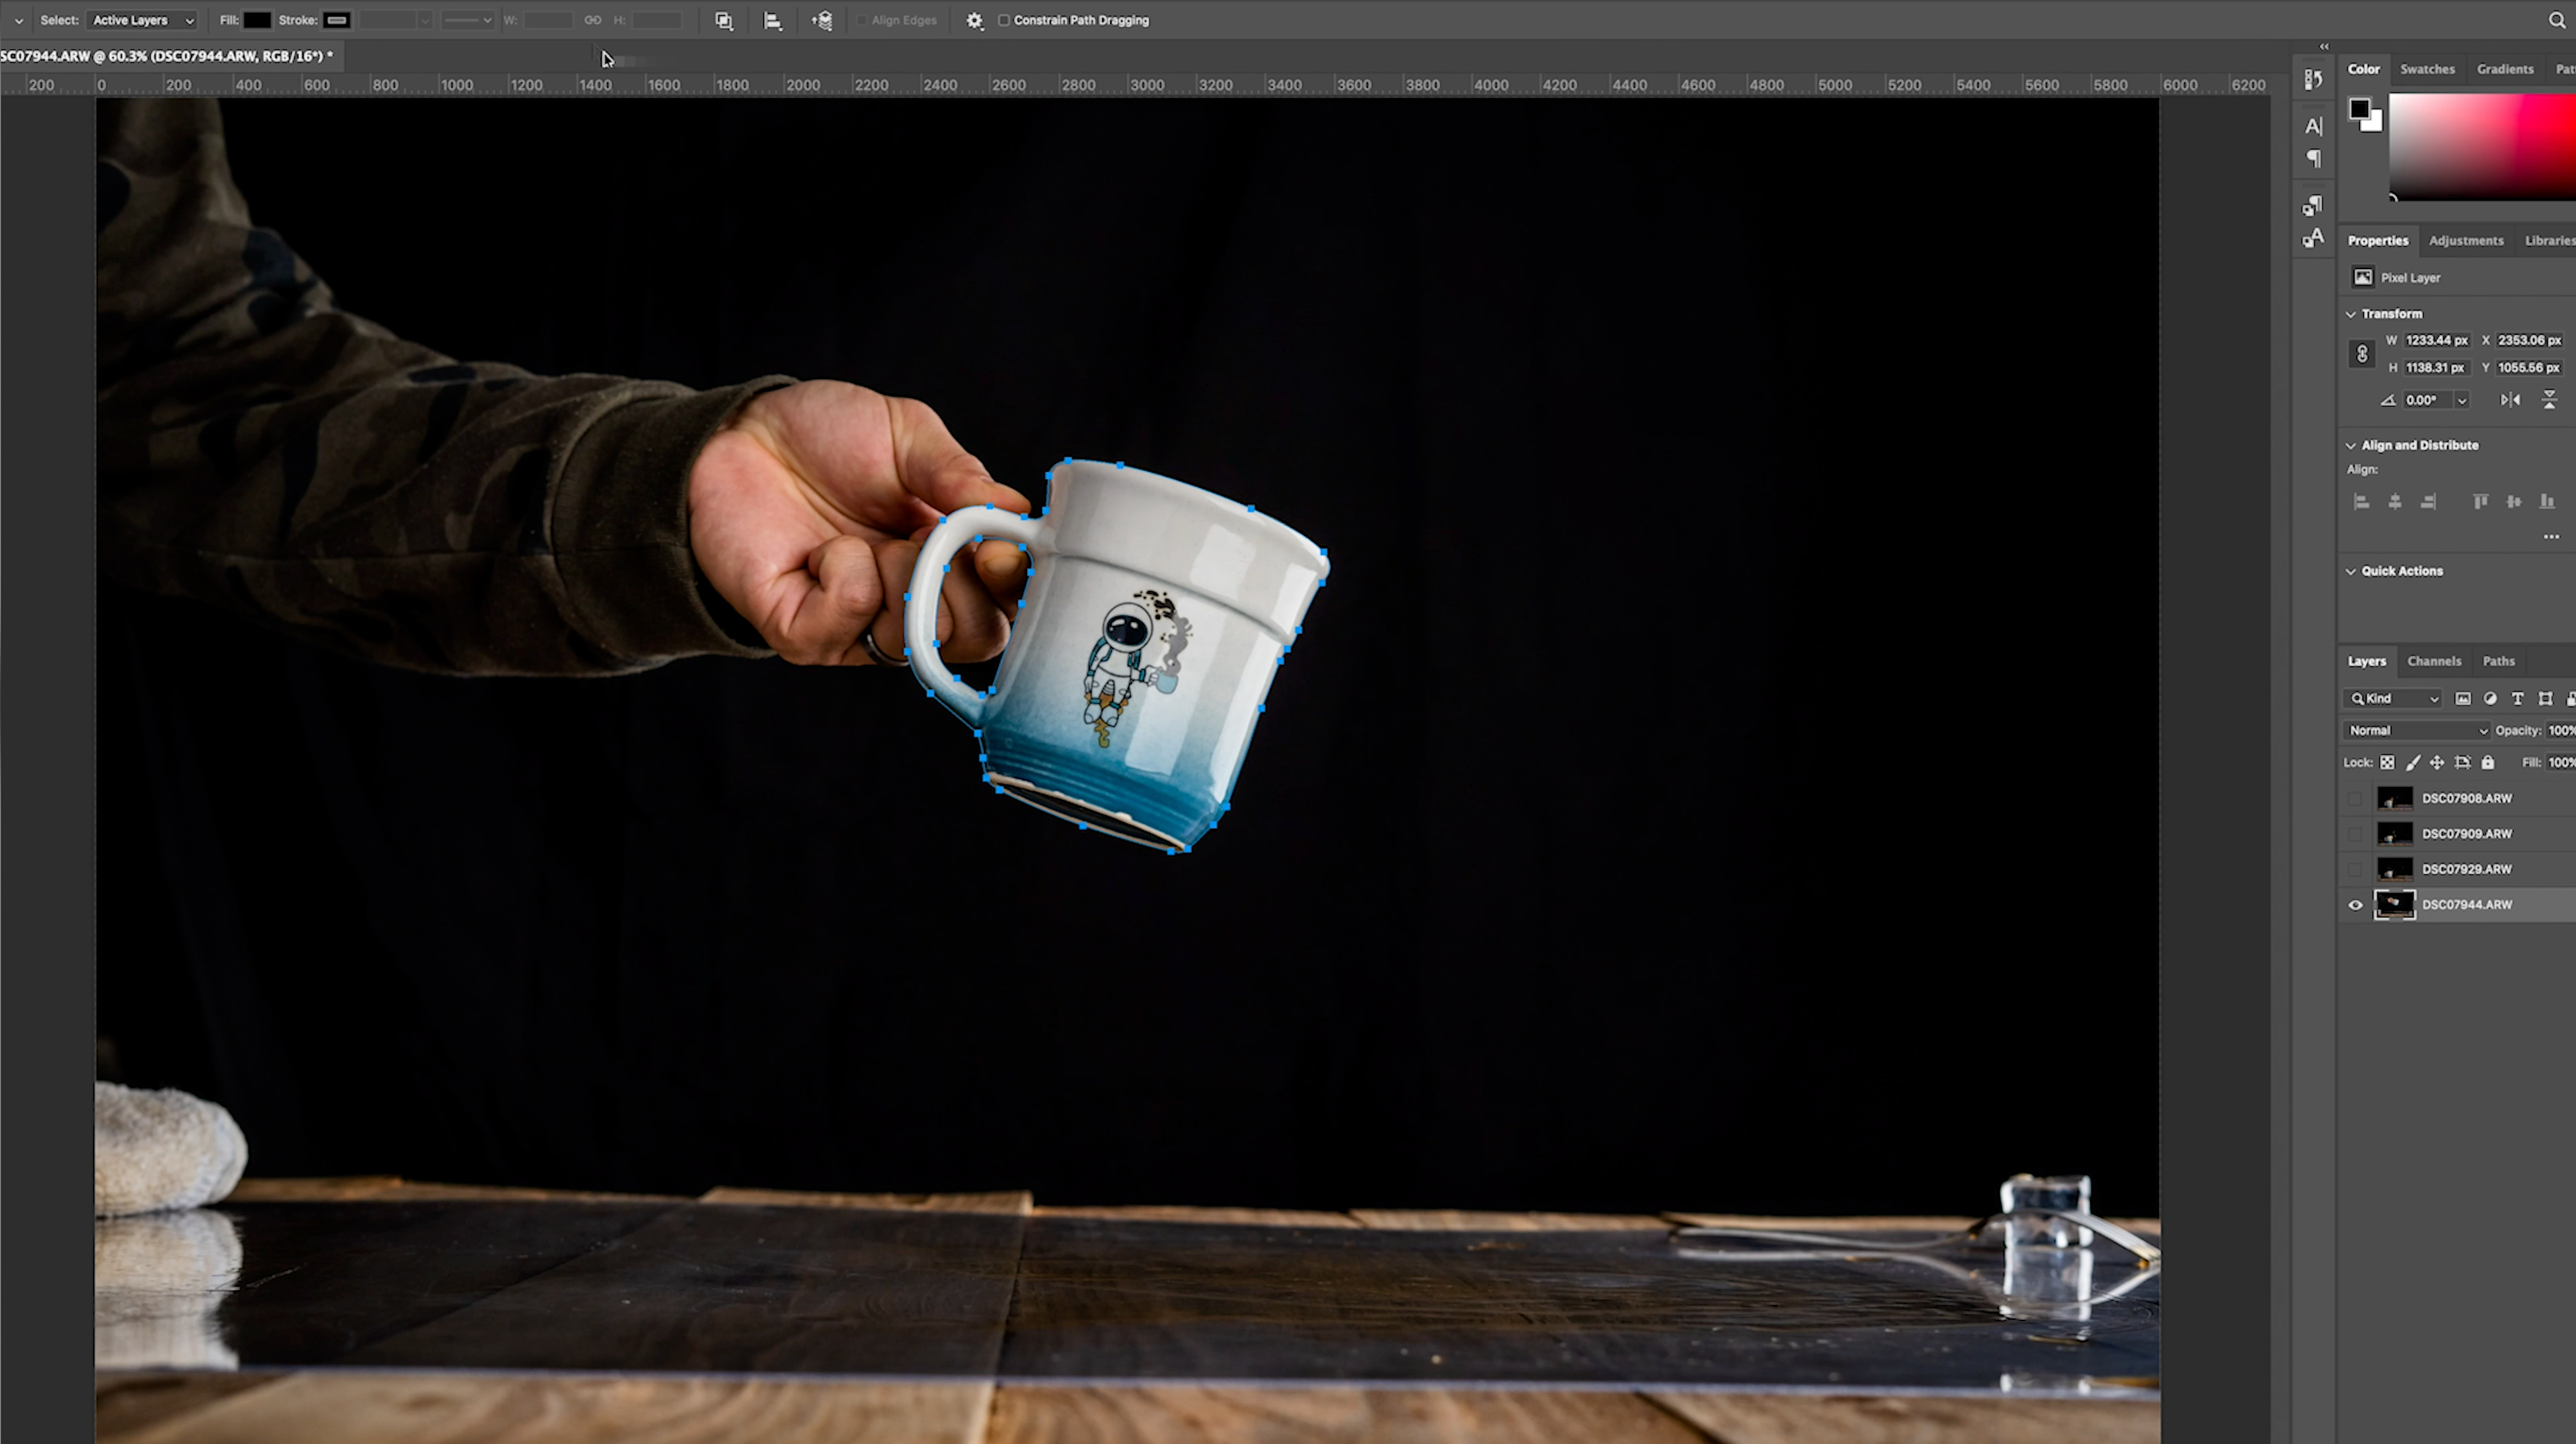
From here we’re going to make the mug actually float! And we’re going to do this in a more simple fashion. We’re just going to very carefully grip the mug making sure we don’t wrap our fingers around the handle too much to make it easy for us to cut out our hand in post.
You could do this using fishing line if you really want, but this mug is pretty heavy and it would take me more time rigging the mug up for a shot than it would to remove my hand out in post.
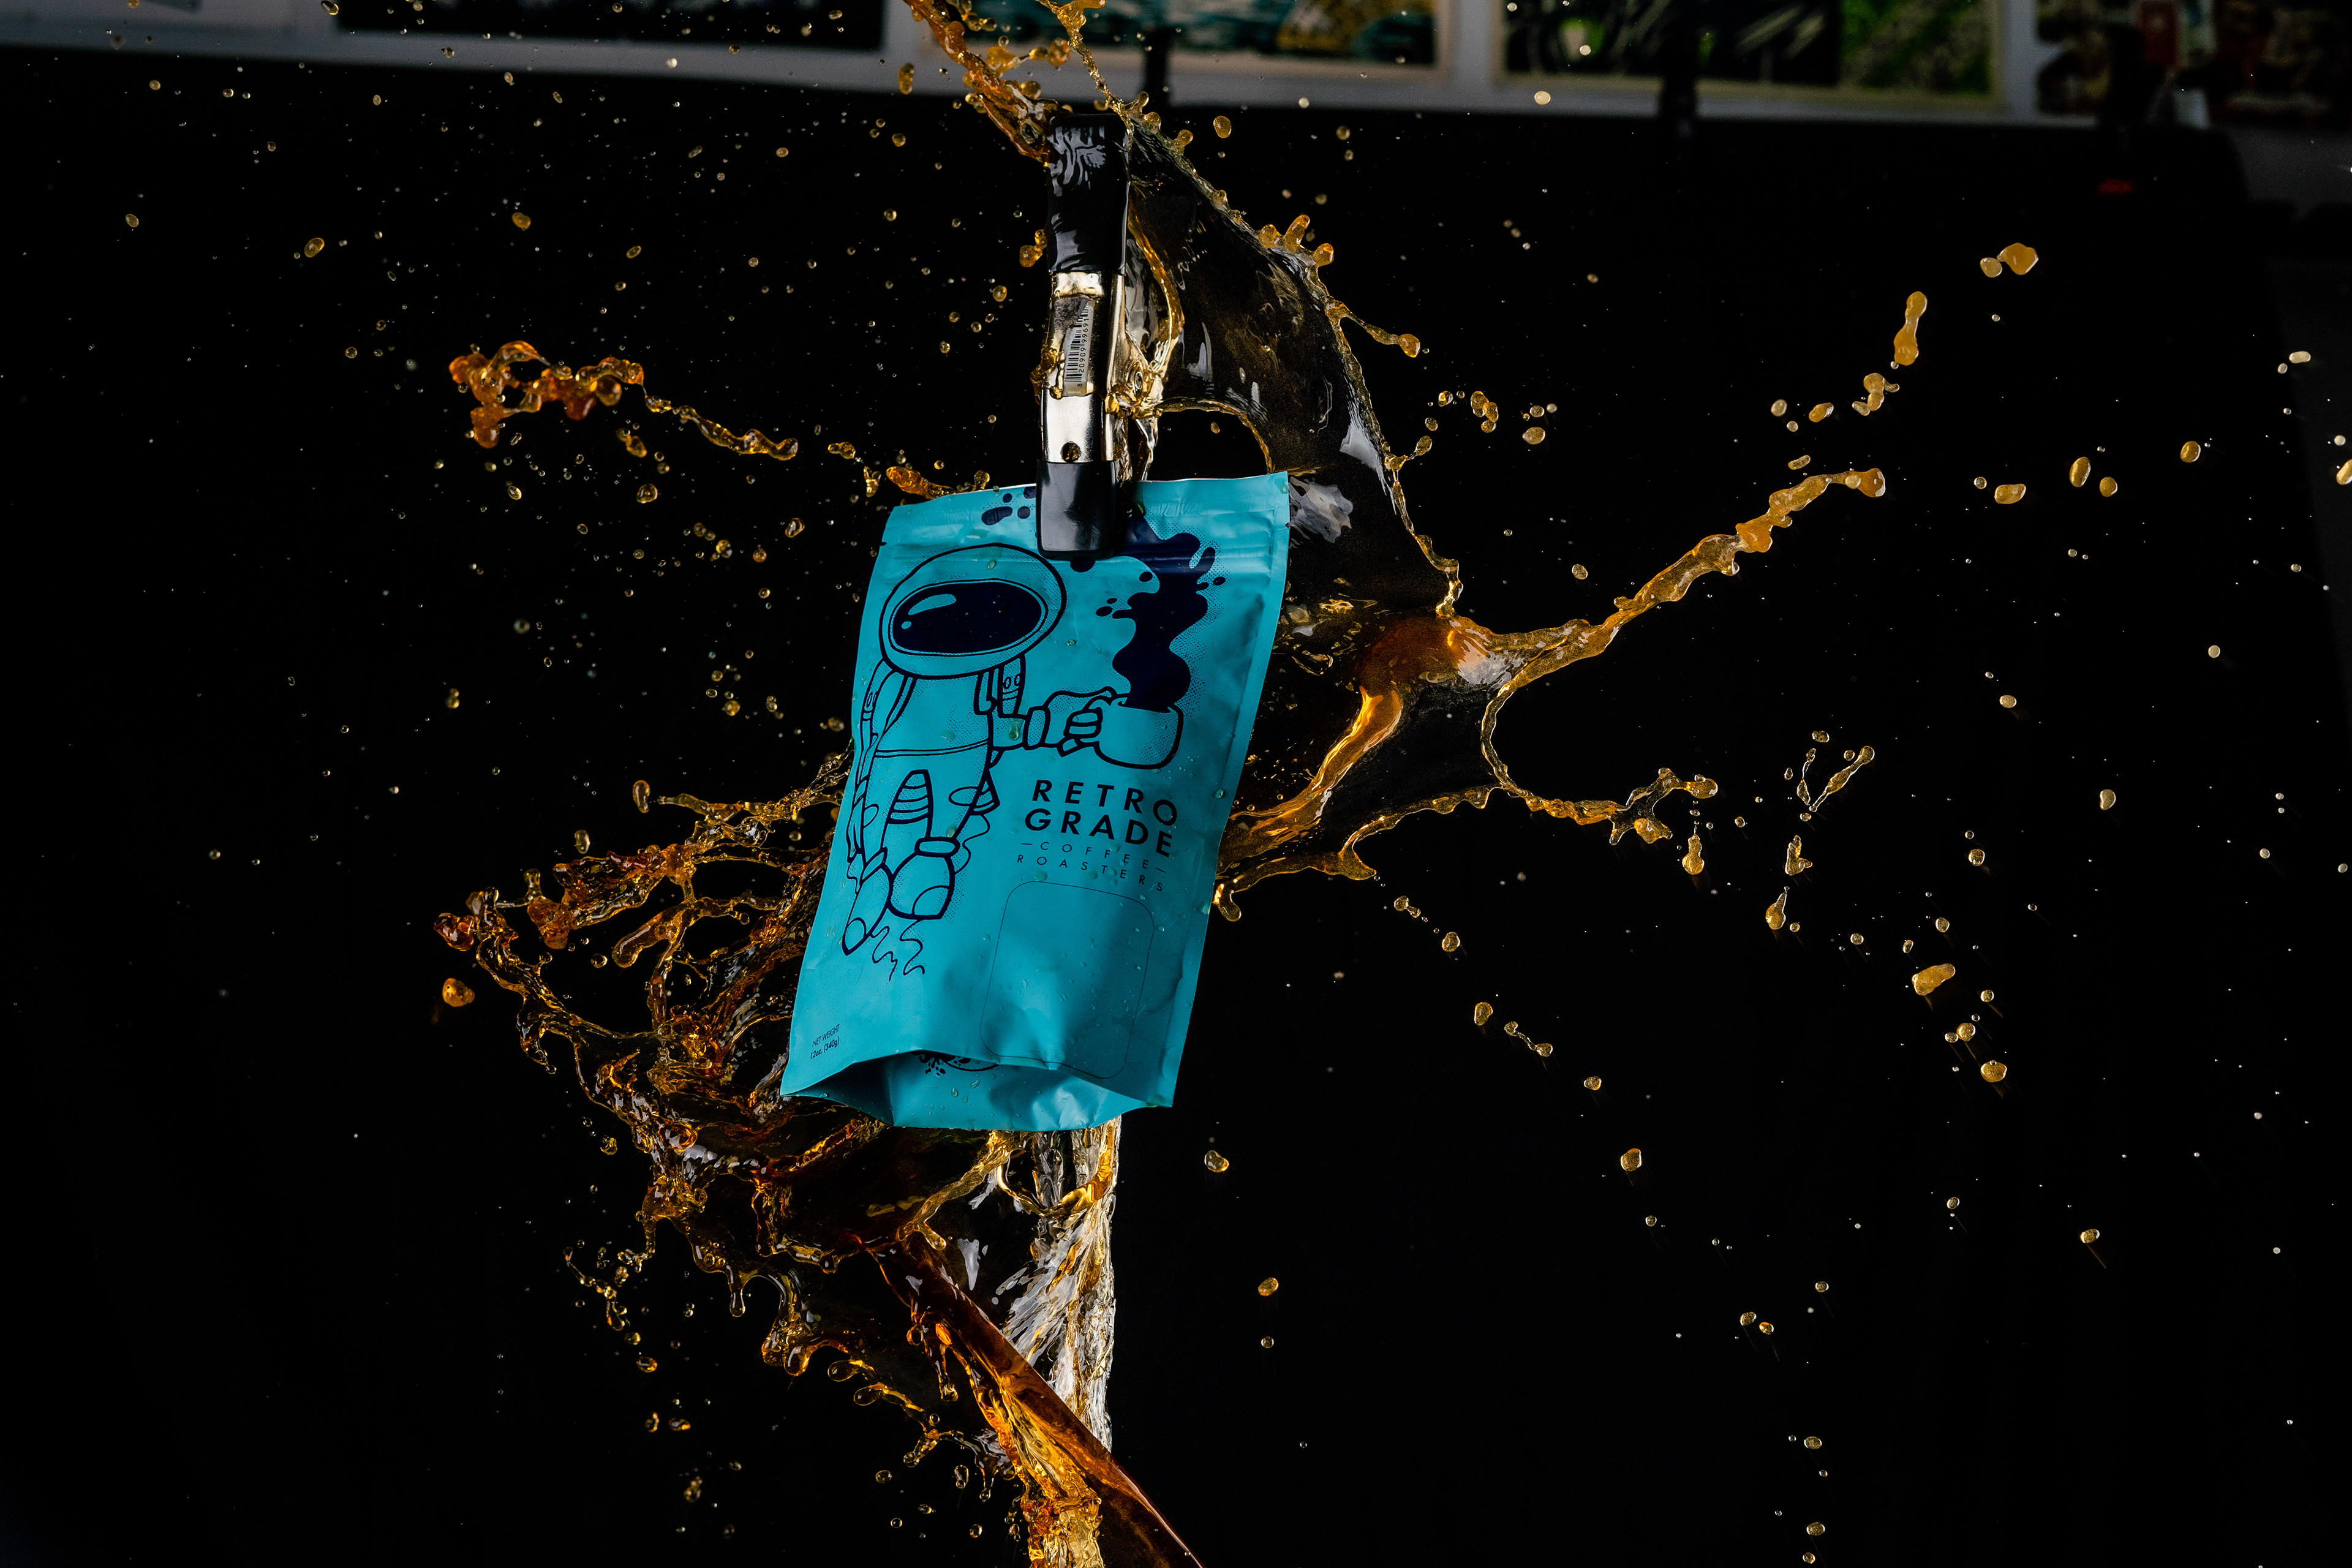
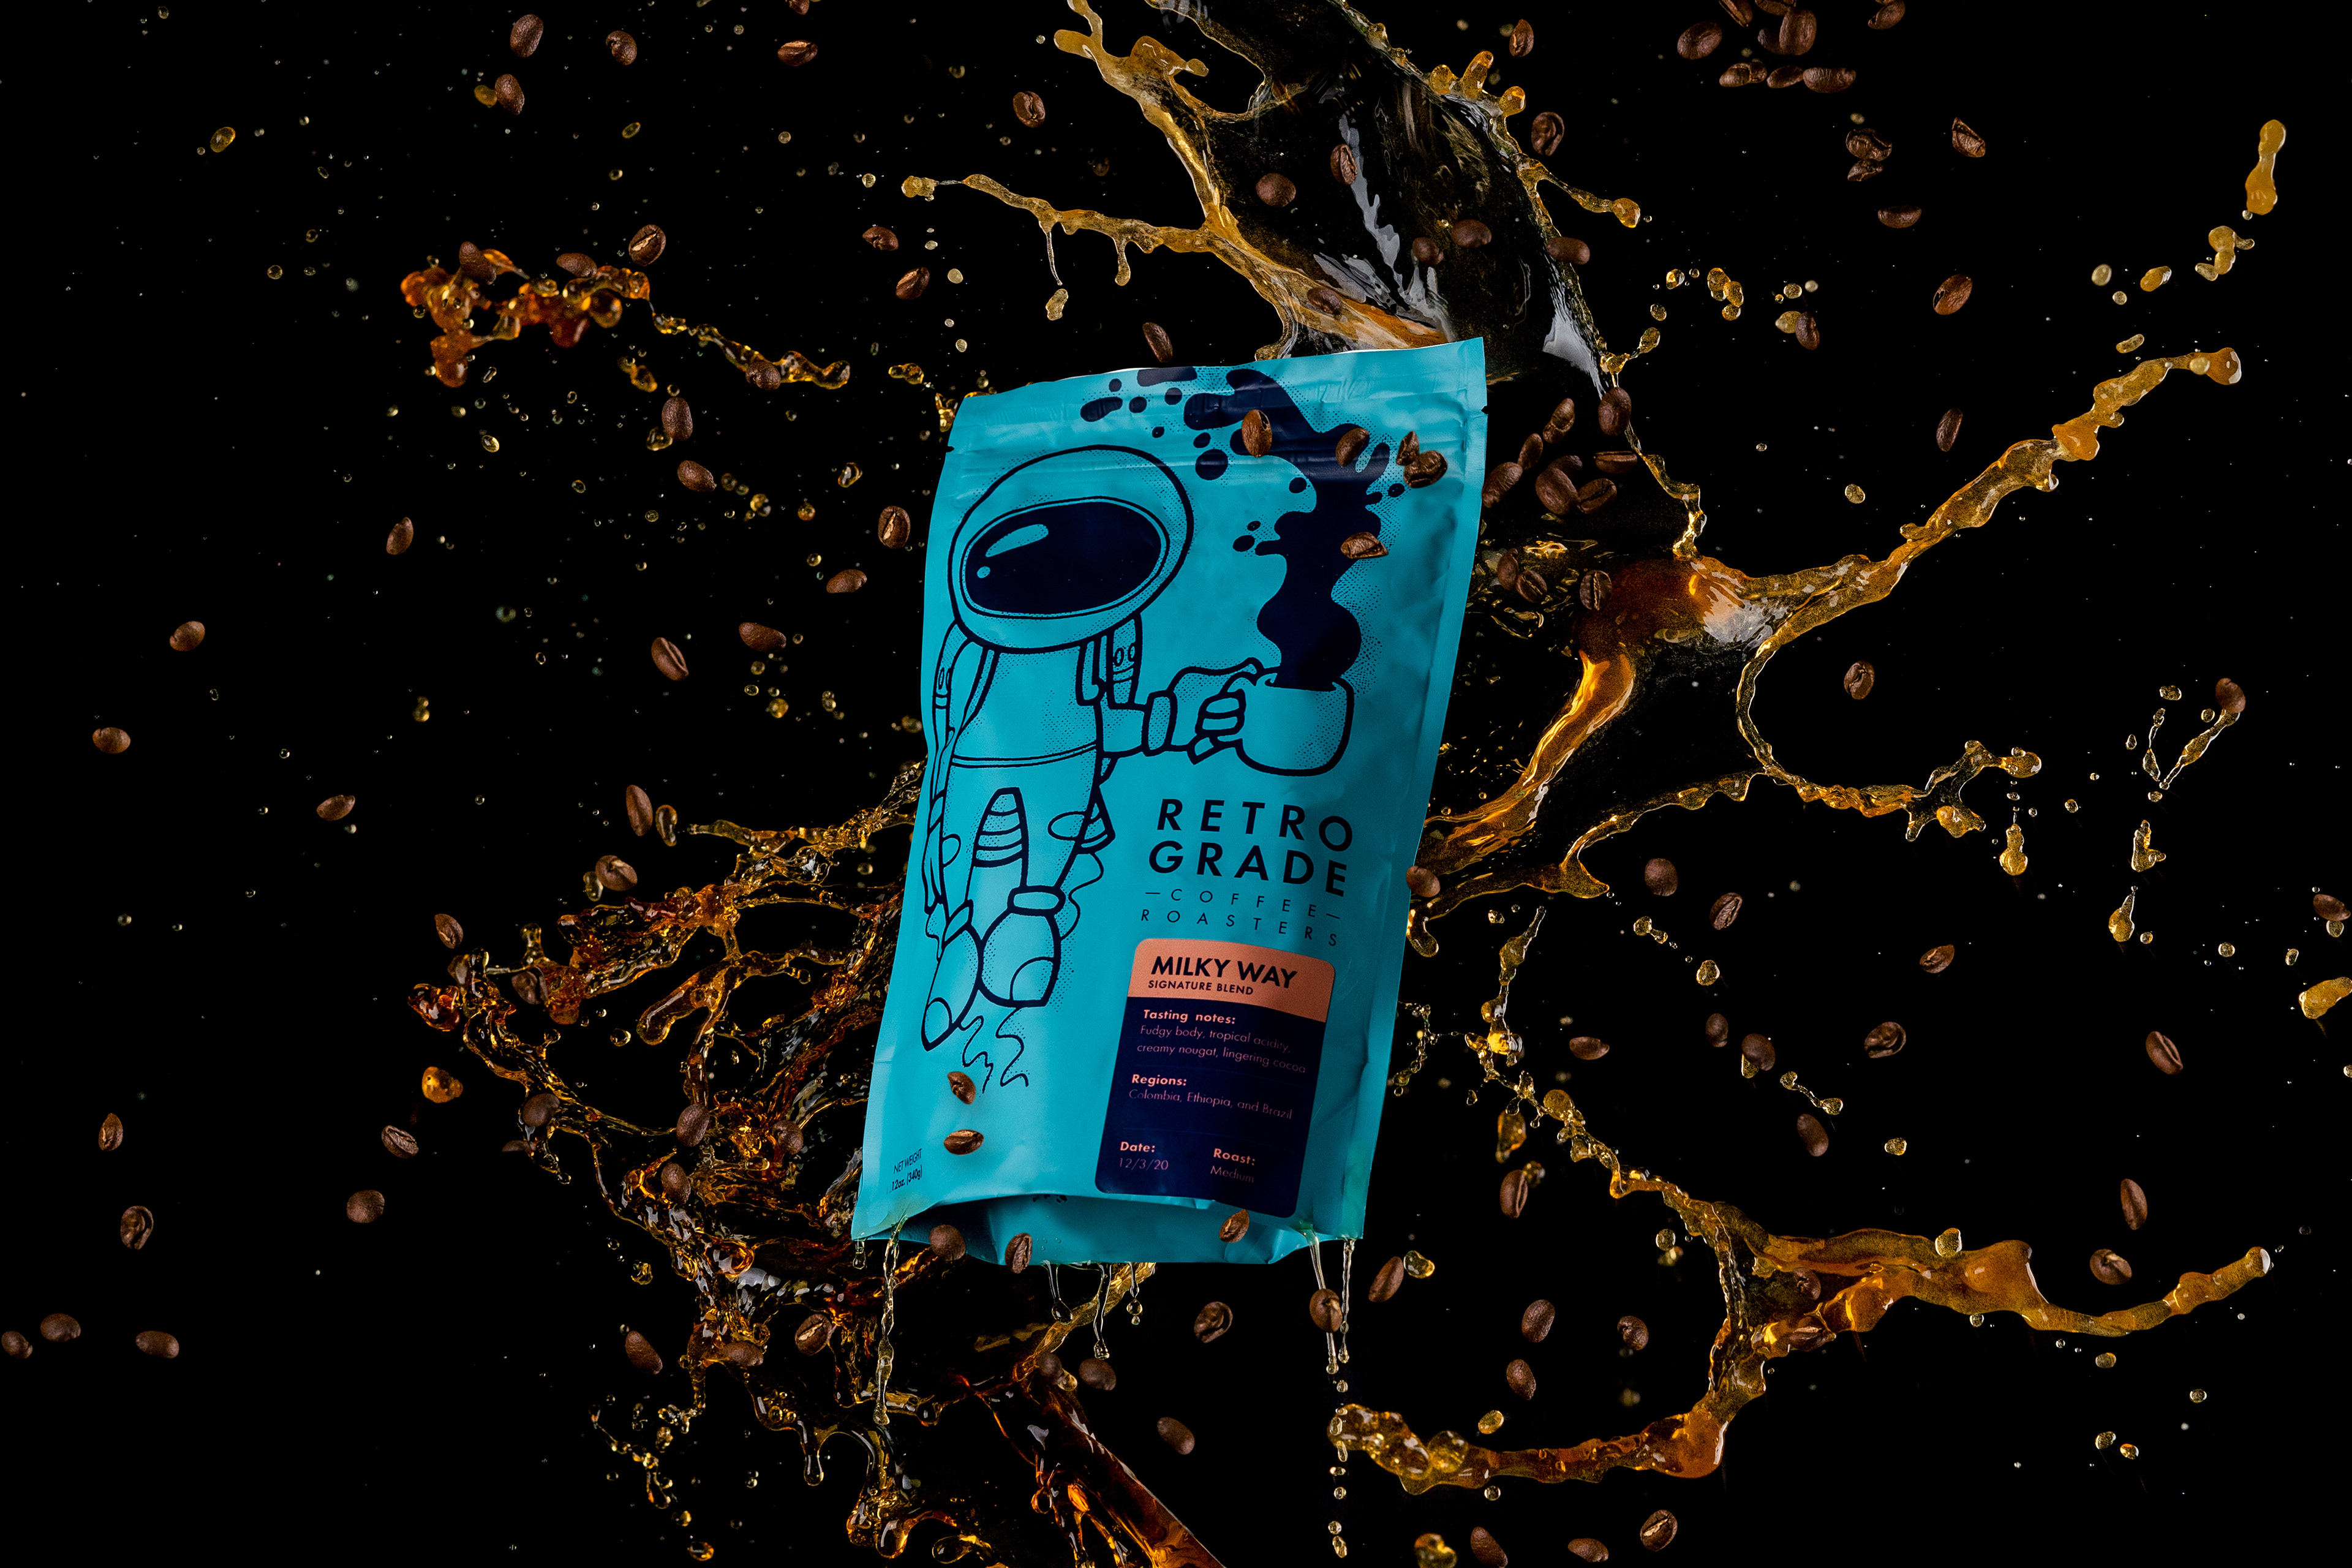
So let's jump back to my first idea with the bag floating with the liquid splashing around the bag. I thought the easiest way to shoot this one would be by simply clamping the bag onto a light stand that we can remove in post. Then shooting the bag at slightly lower angle will allow us to see the bottom of the bag to help with that floating aspect we're looking for.
So just like our mug shot we’re going to shoot one clean shot of the bag to have to work with before we start splashing liquid onto our product.

And as an extra precaution for the sake of my gear for this shot I decided to take some plastic wrap and wrap my lightstand and even my camera in hopes of protecting them from the liquid as best as I could since I was going to be throwing coffee straight at the bag and across the room. I think my camera is weather proofed, but I didn’t want to risk anything.
So after I got everything wrapped I was ready to take my first and hopefully only shot at making this splash happen.
I really had no idea how to approach this except for to just throw a pitcher full of coffee at the bag and hope for the best.
So I just had to go for it and….

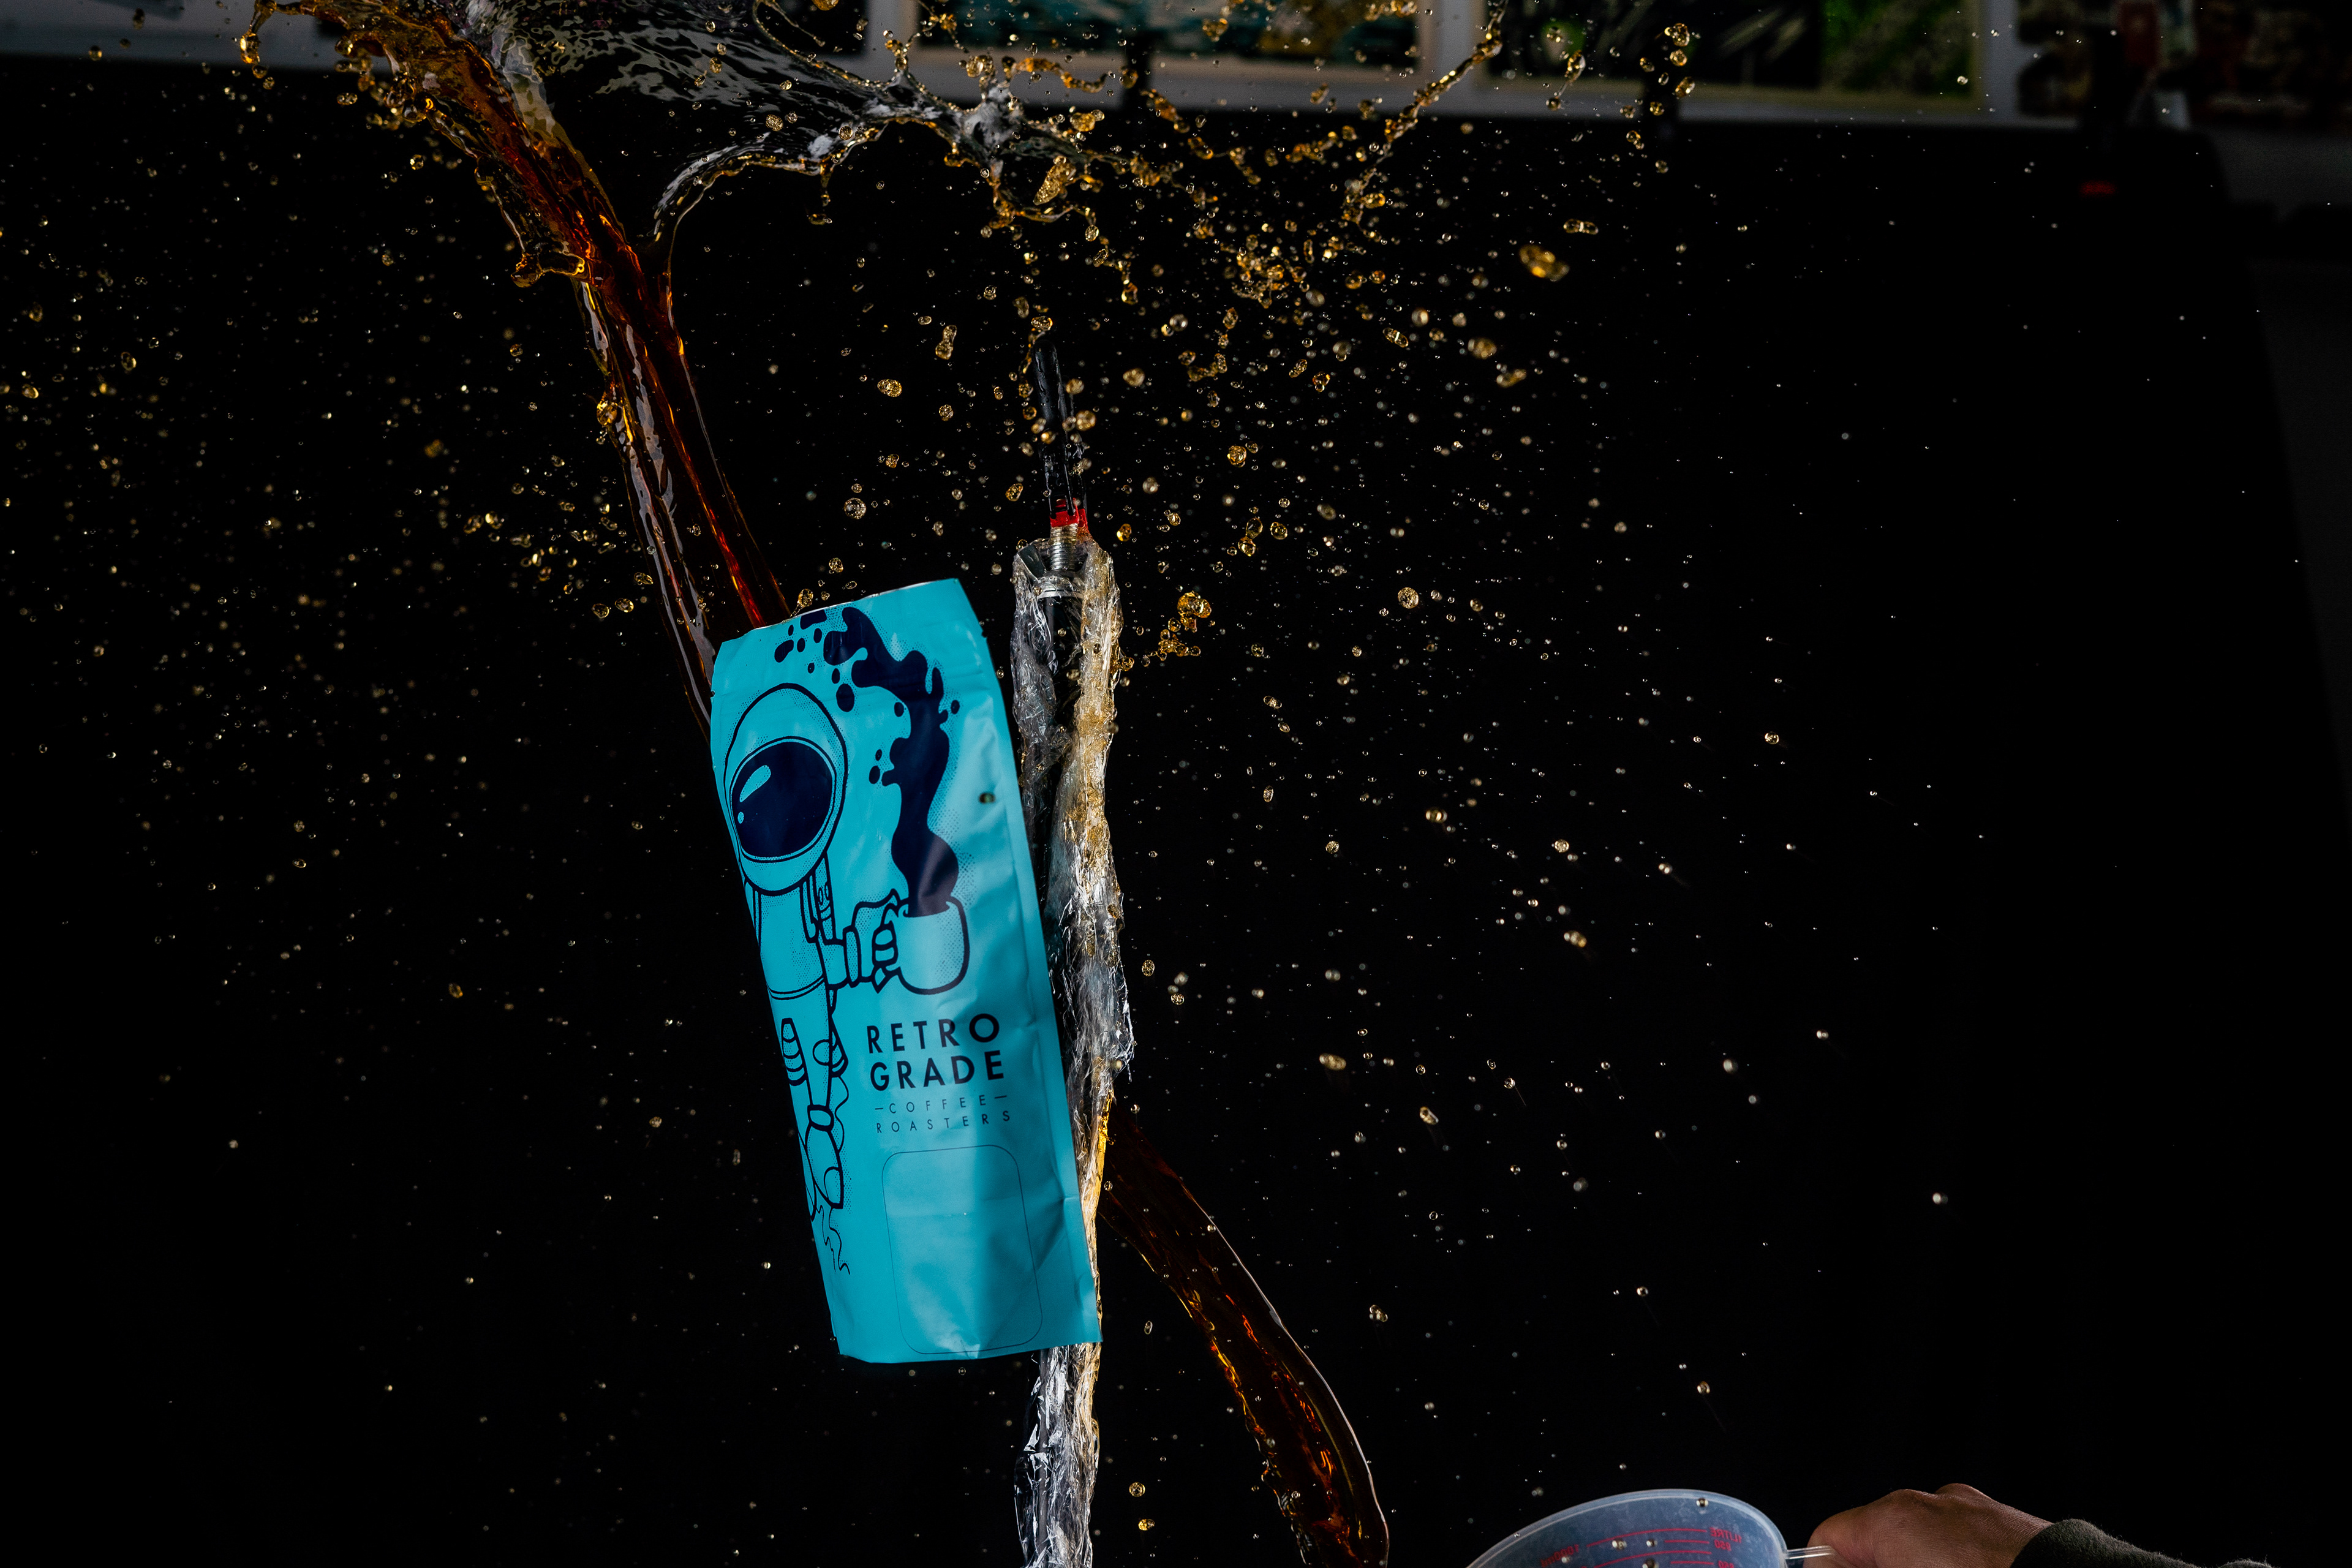
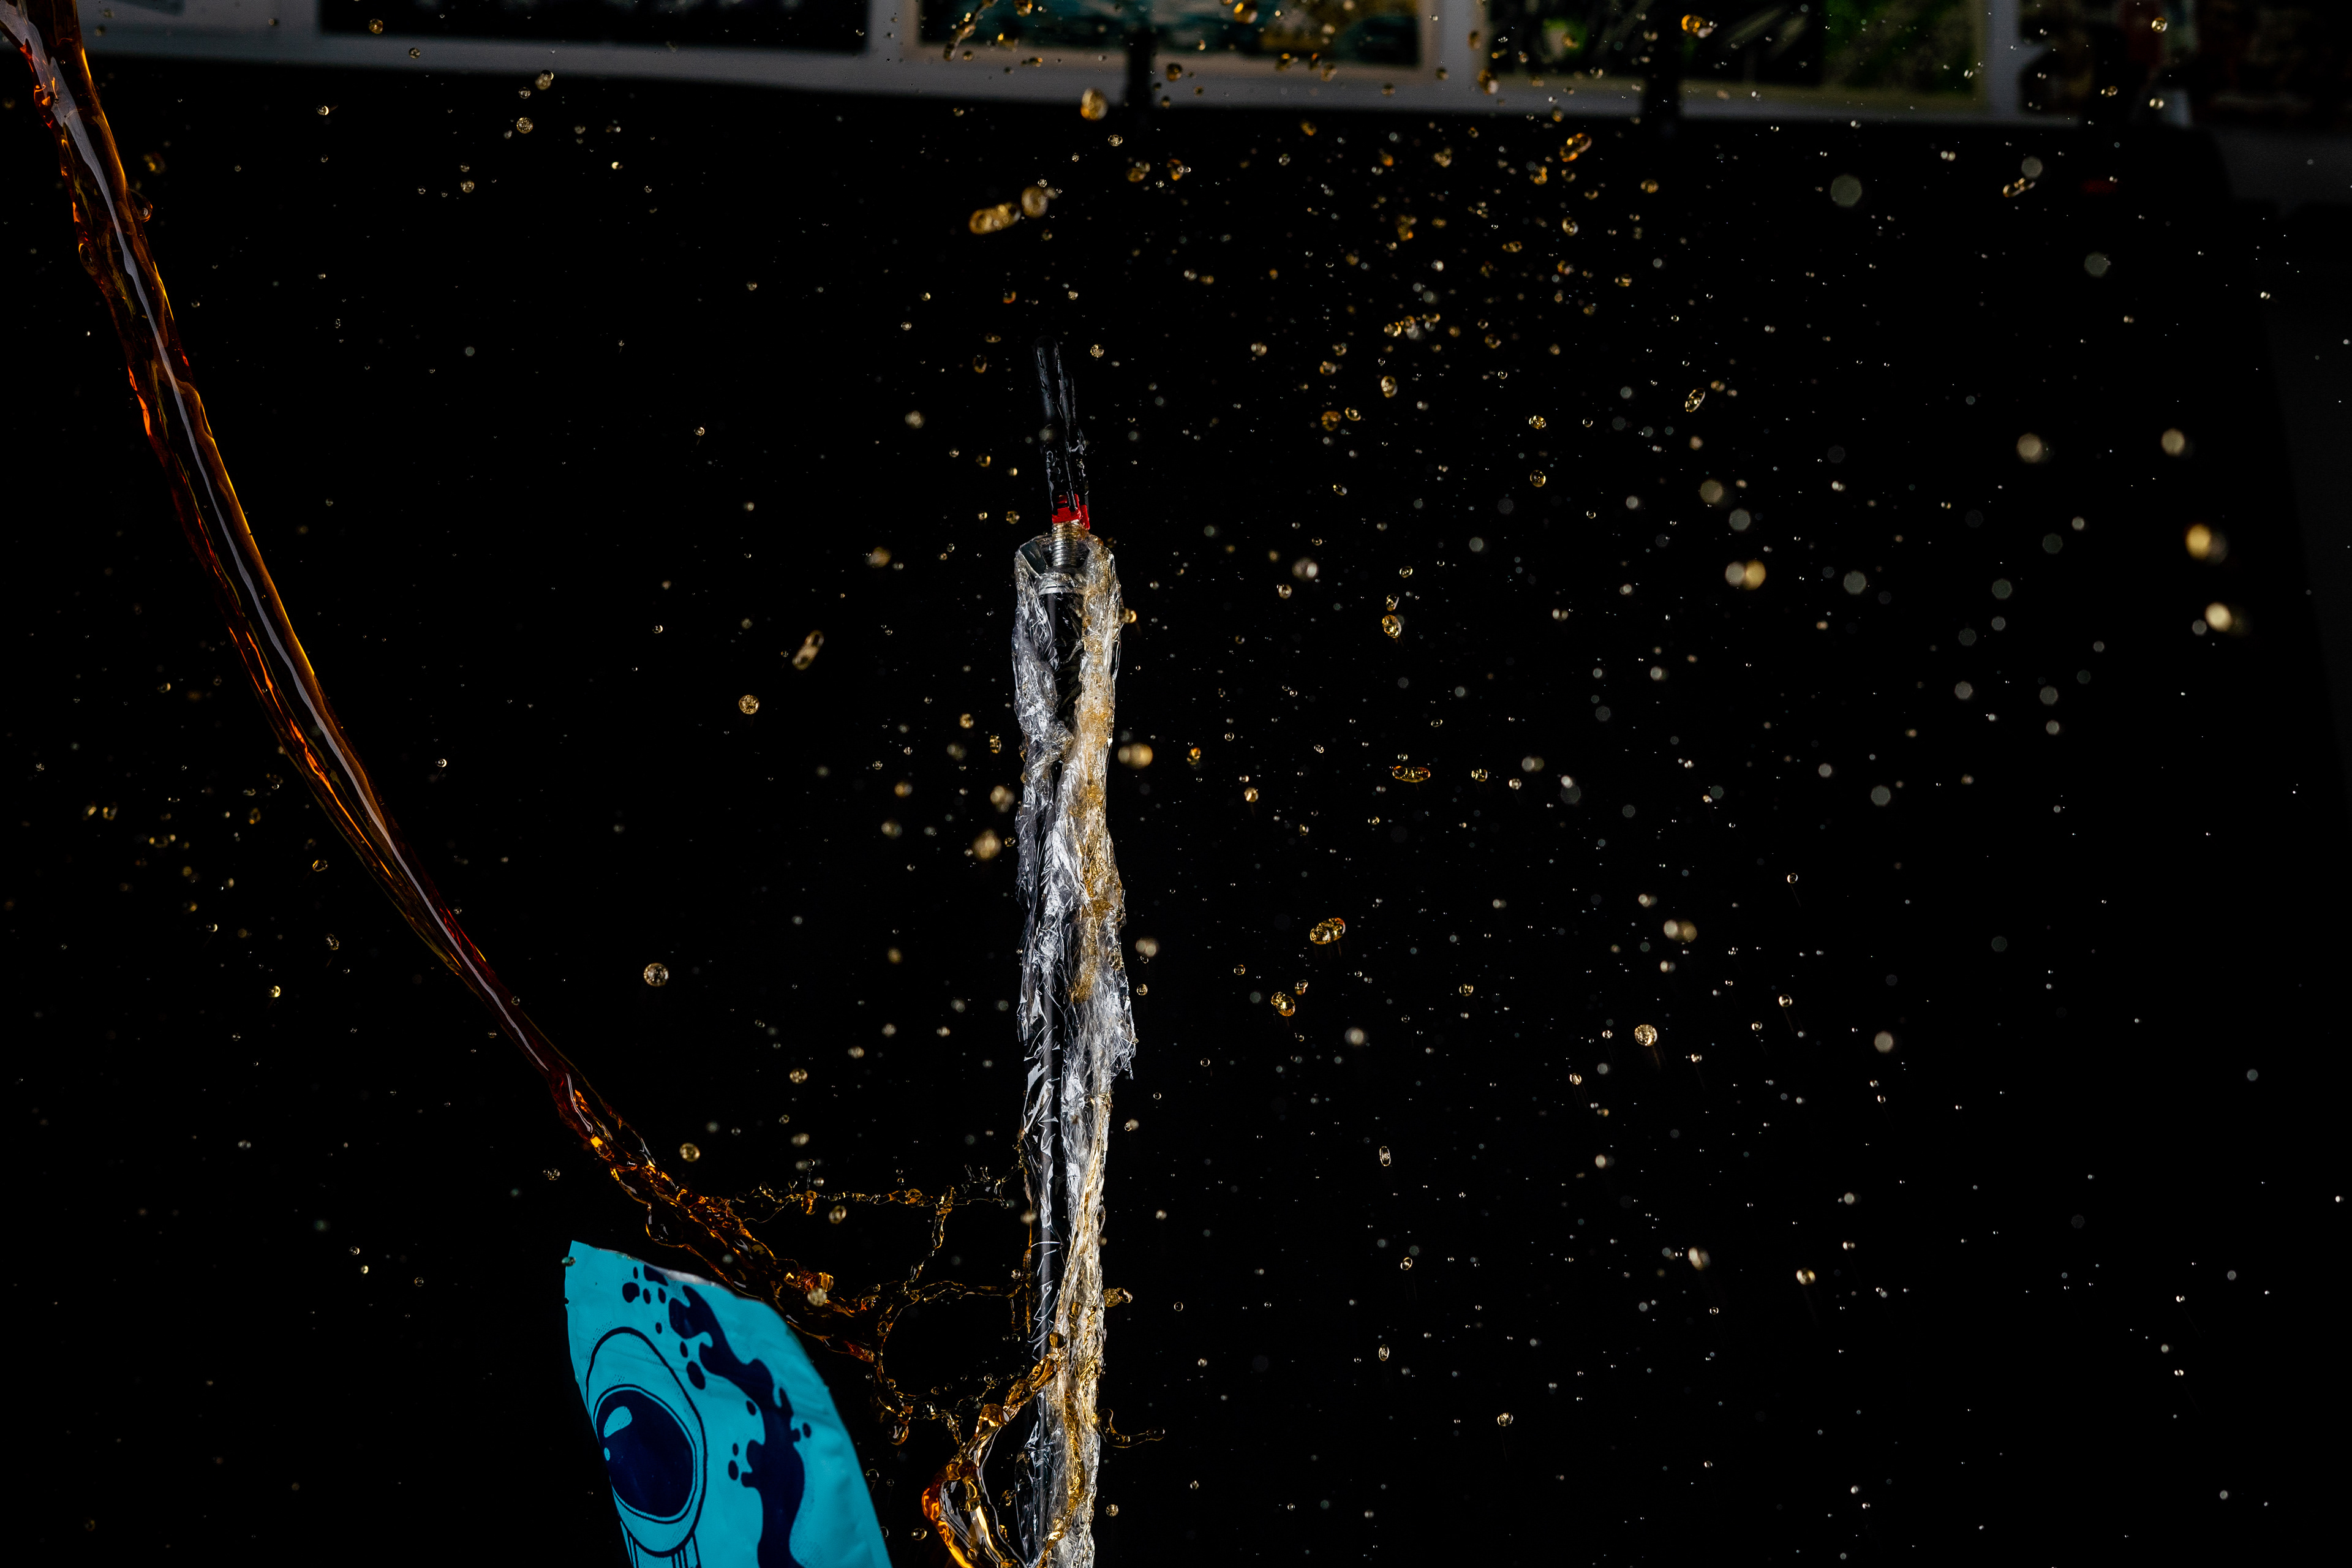
The clamp I used was super tiny and not strong at all so the bag went flying with the liquid and totally wasn’t what I was looking for. I thought the tiny clamp was going to be easier to remove in post, but I never thought about it being strong enough to hold the bag as something was hitting it.
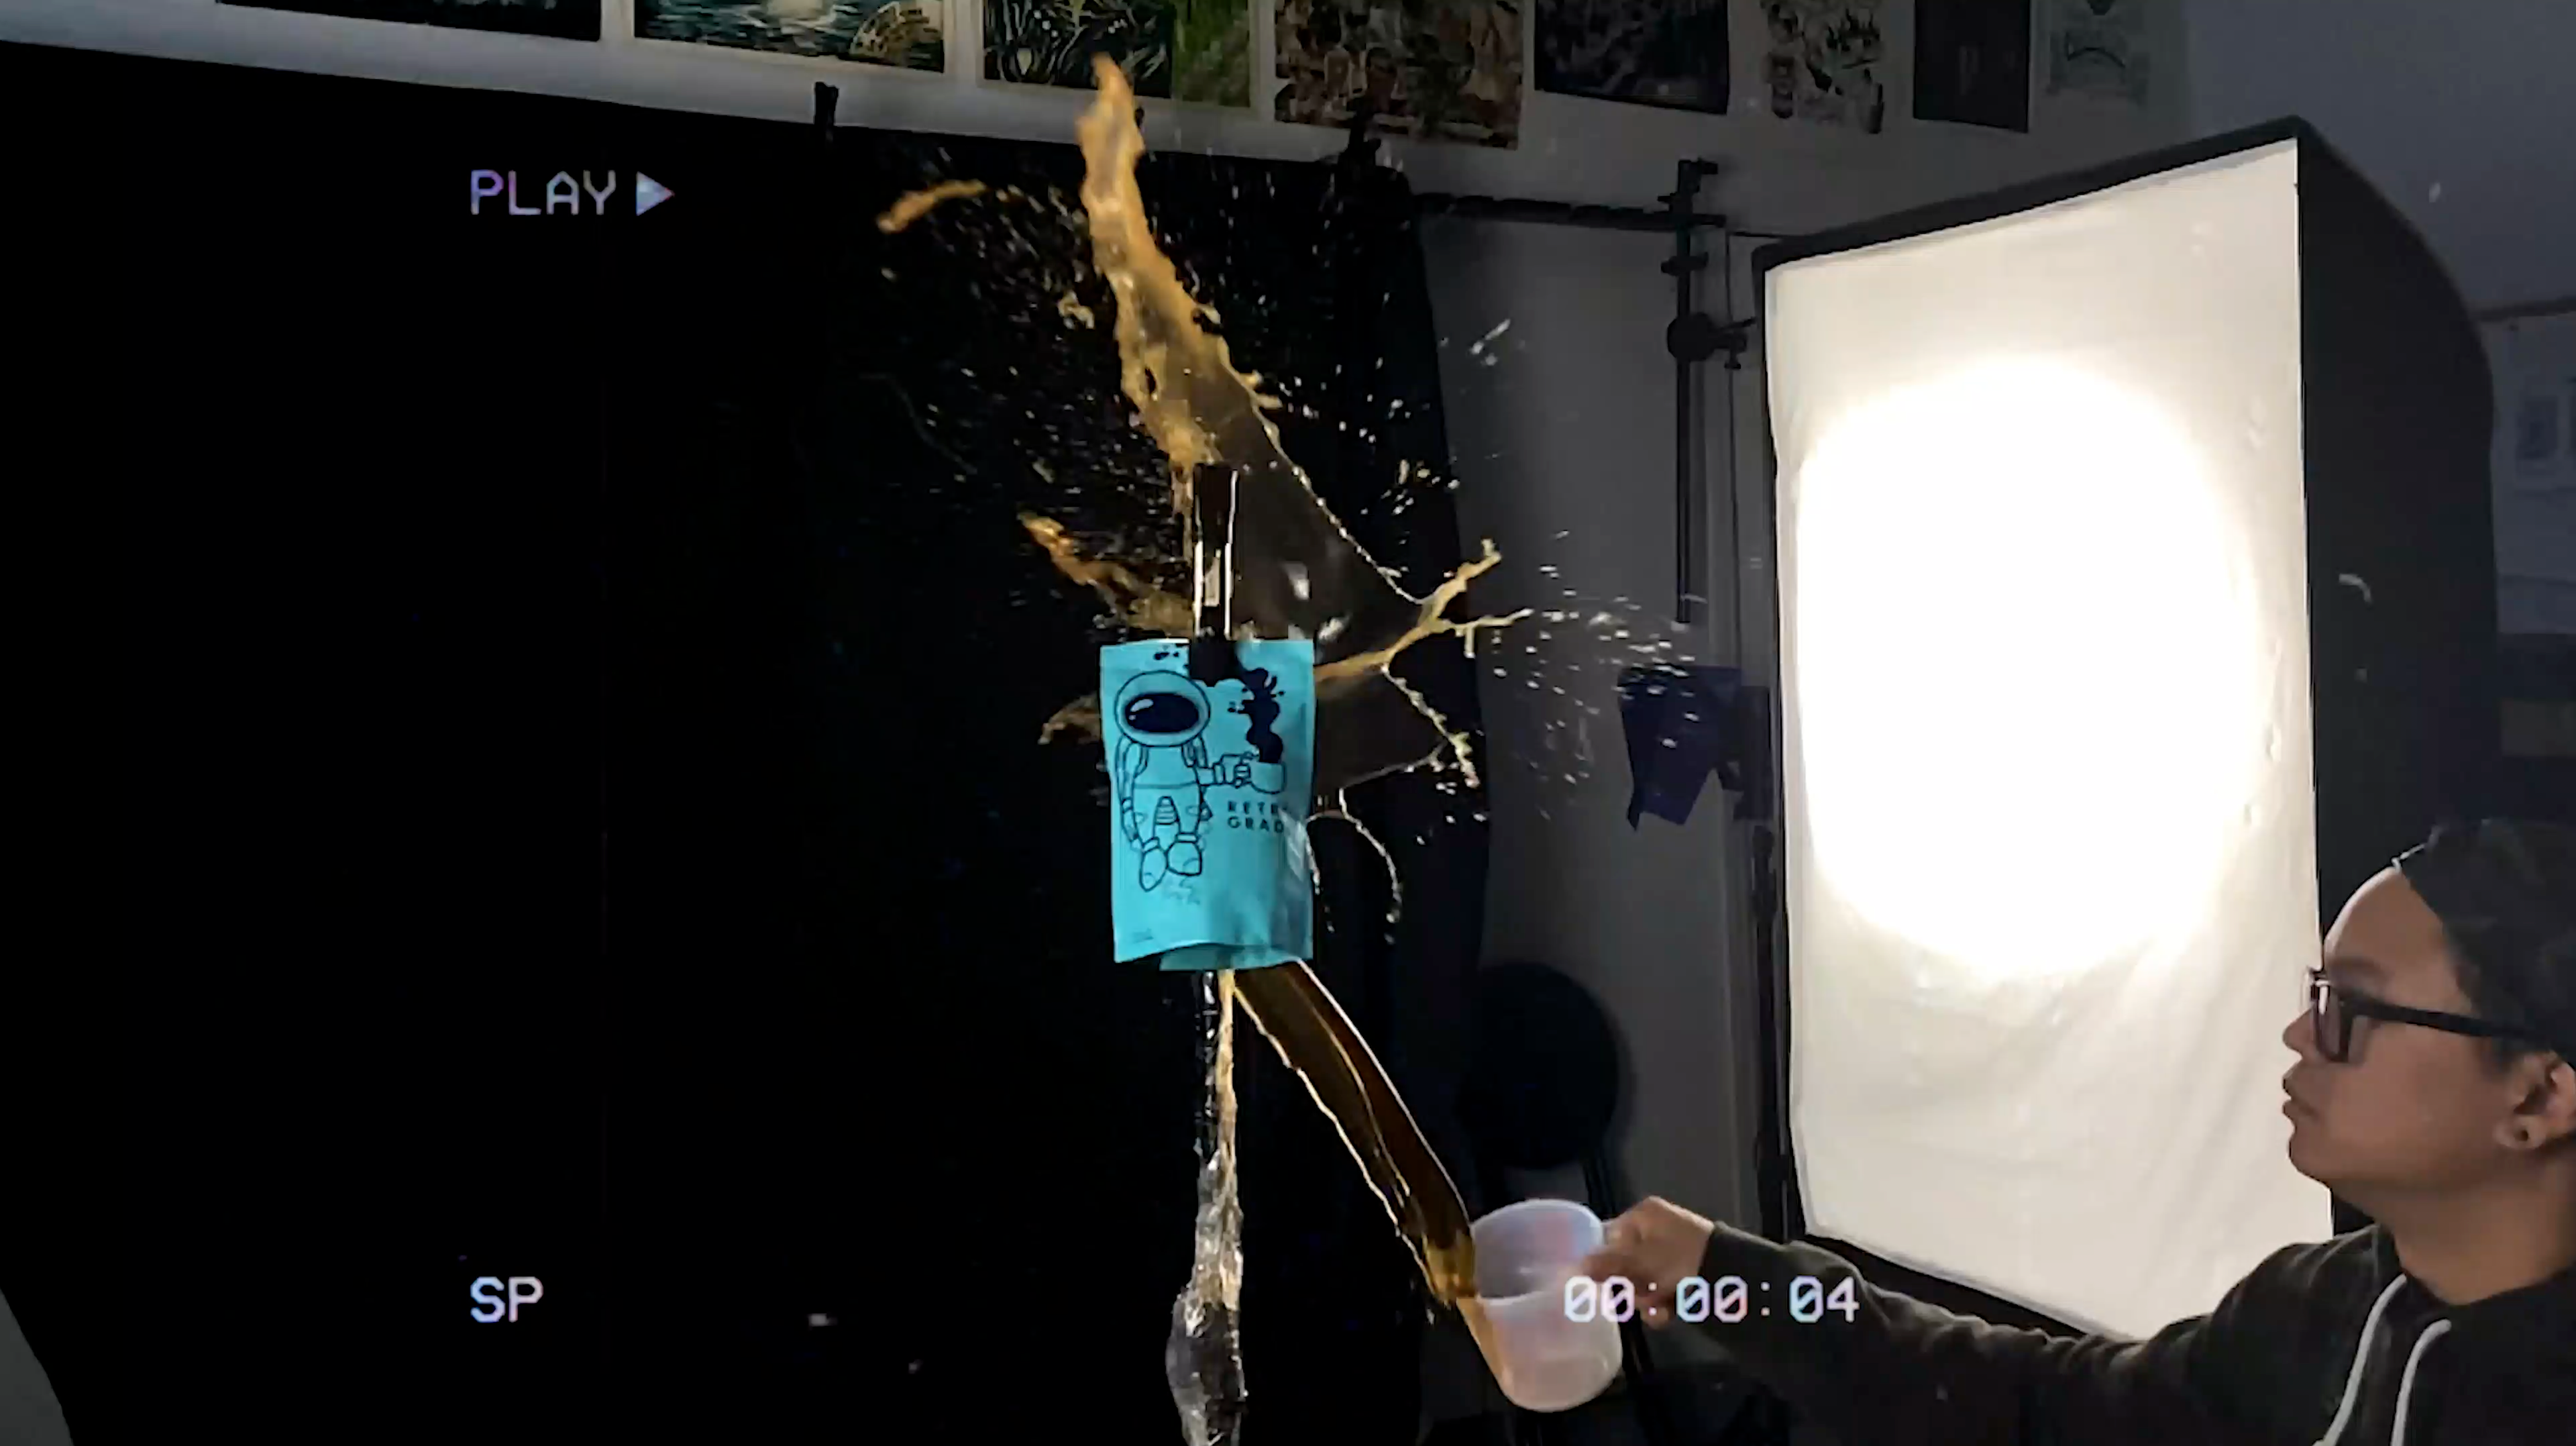
So I went and grabbed a more heavy duty clamp that I knew would work and just thought I would figure out how to remove it later in post. Now that I got my bag clamped properly this time we can give this one more try.


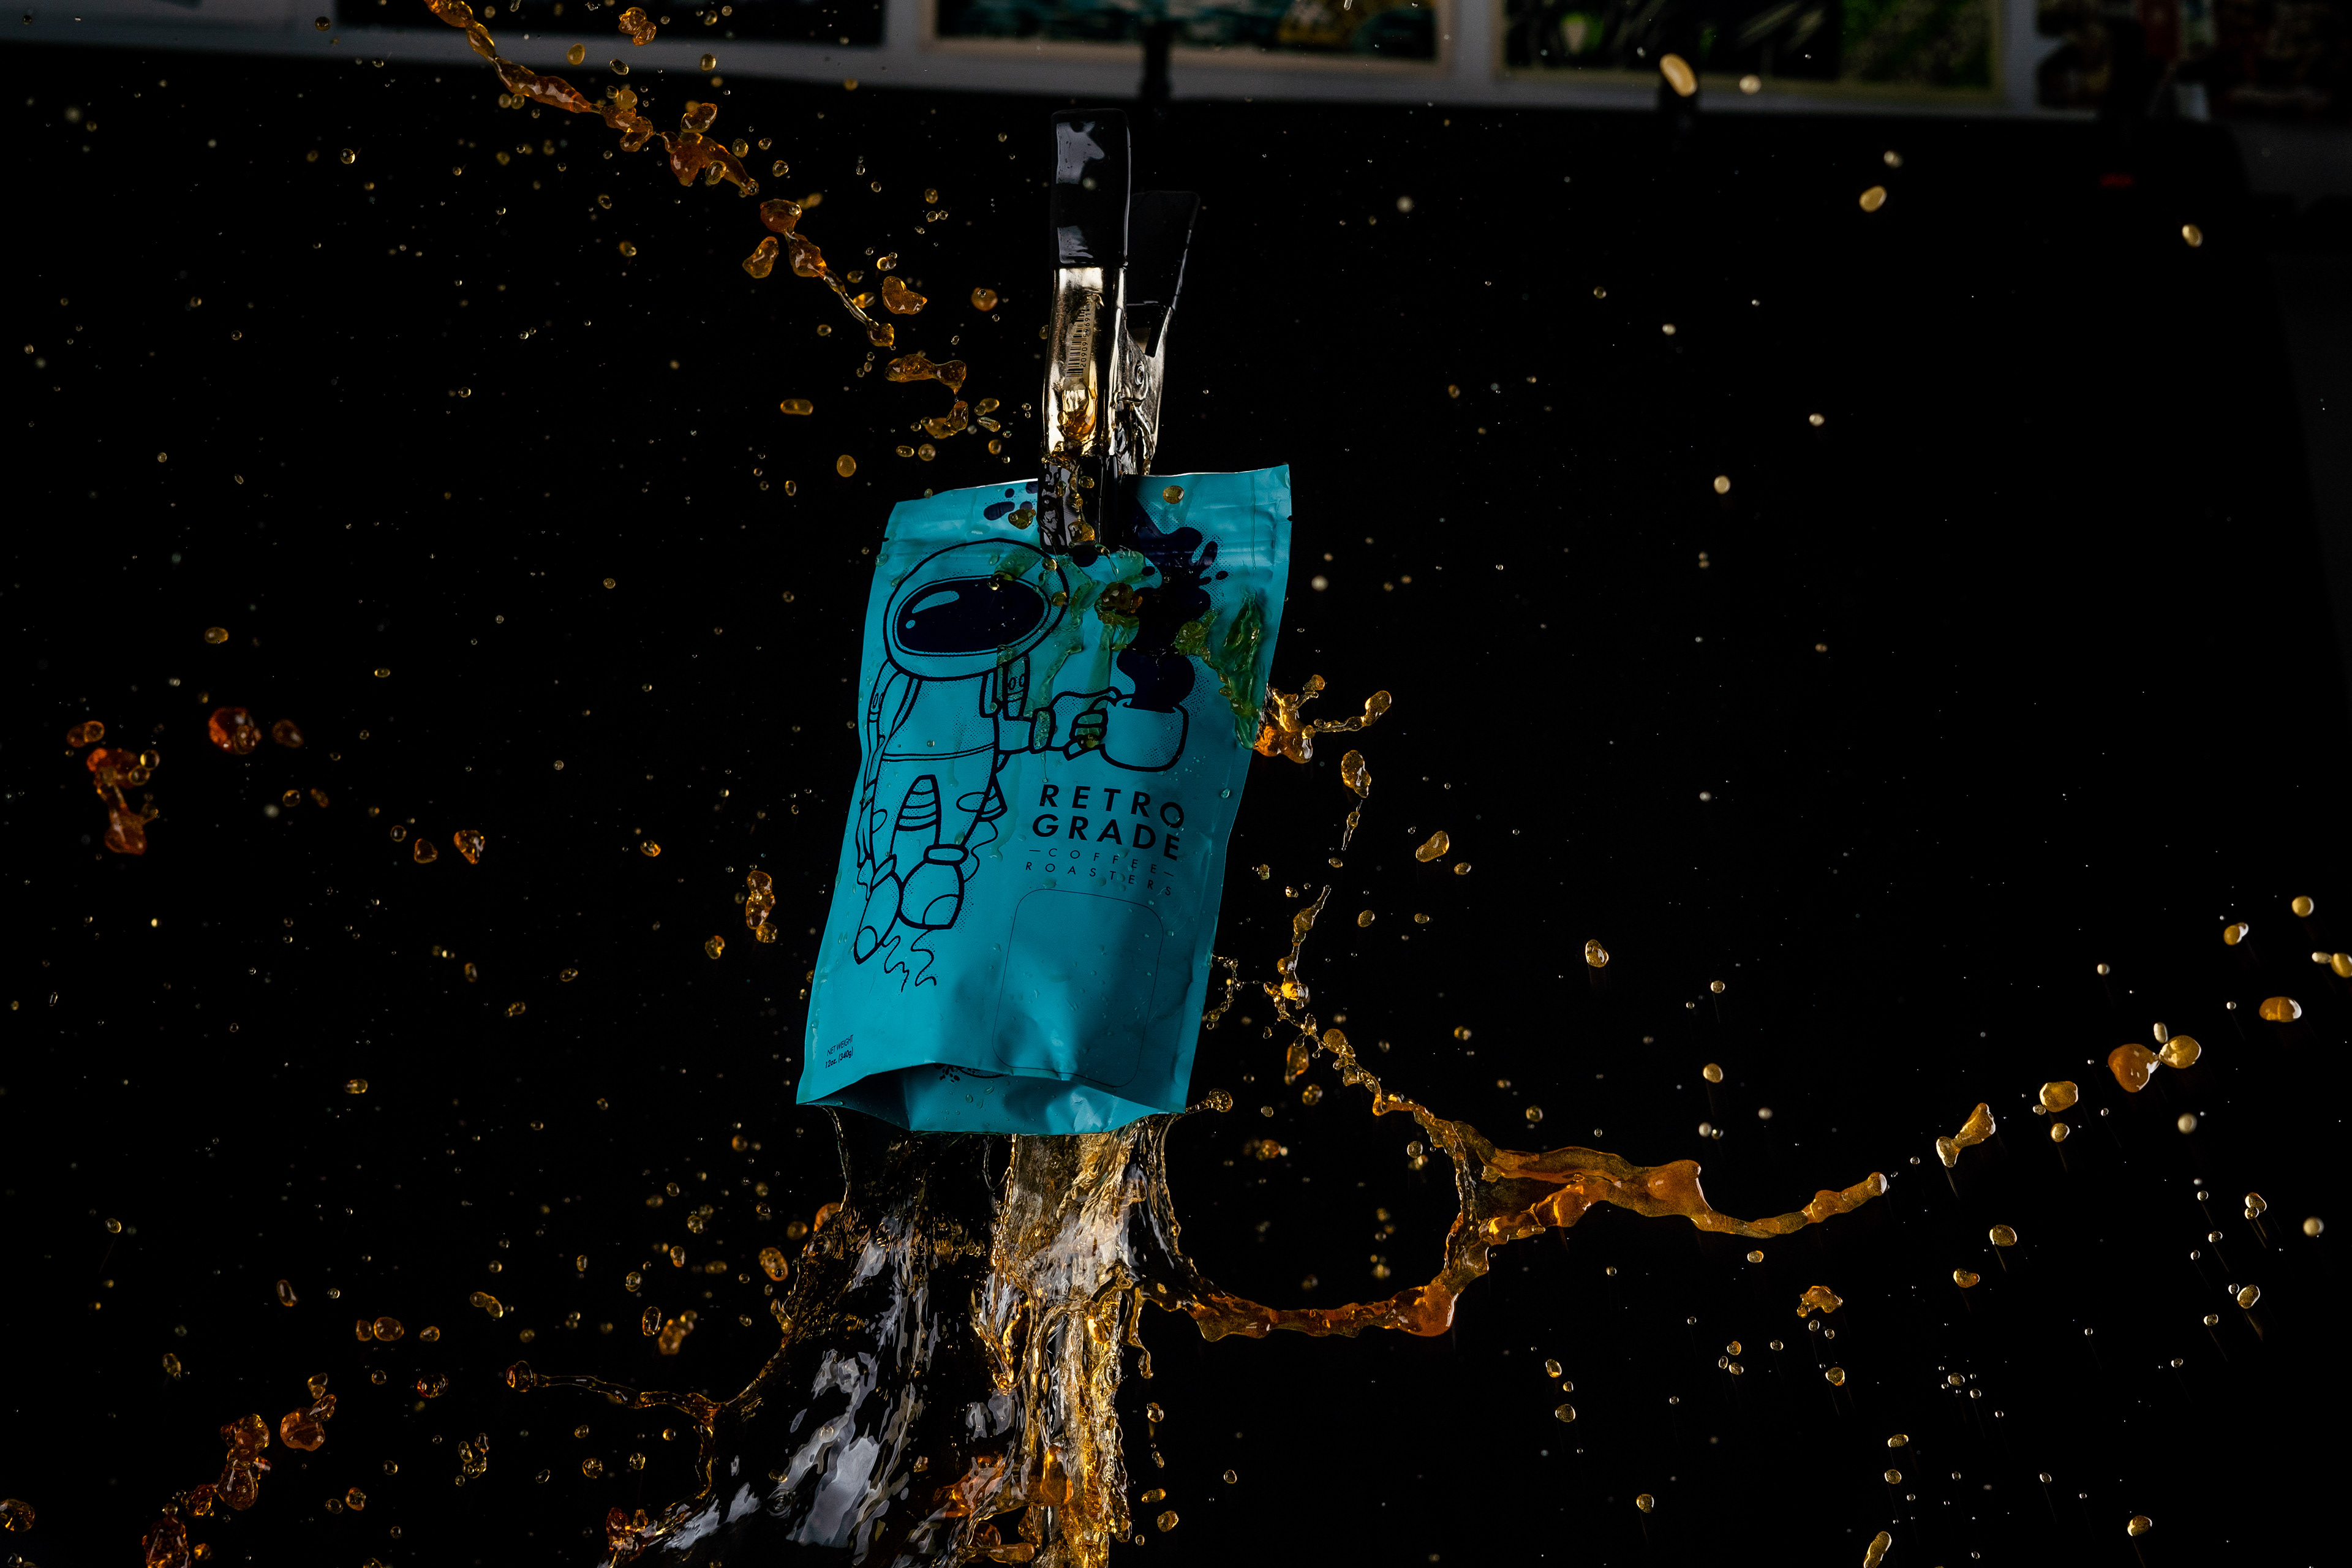
Thankfully this time the bag actually stayed in place and I think we captured exactly what we were looking for. So quickly after that I setup to captured a few quick images of the beans falling to composite in in post.
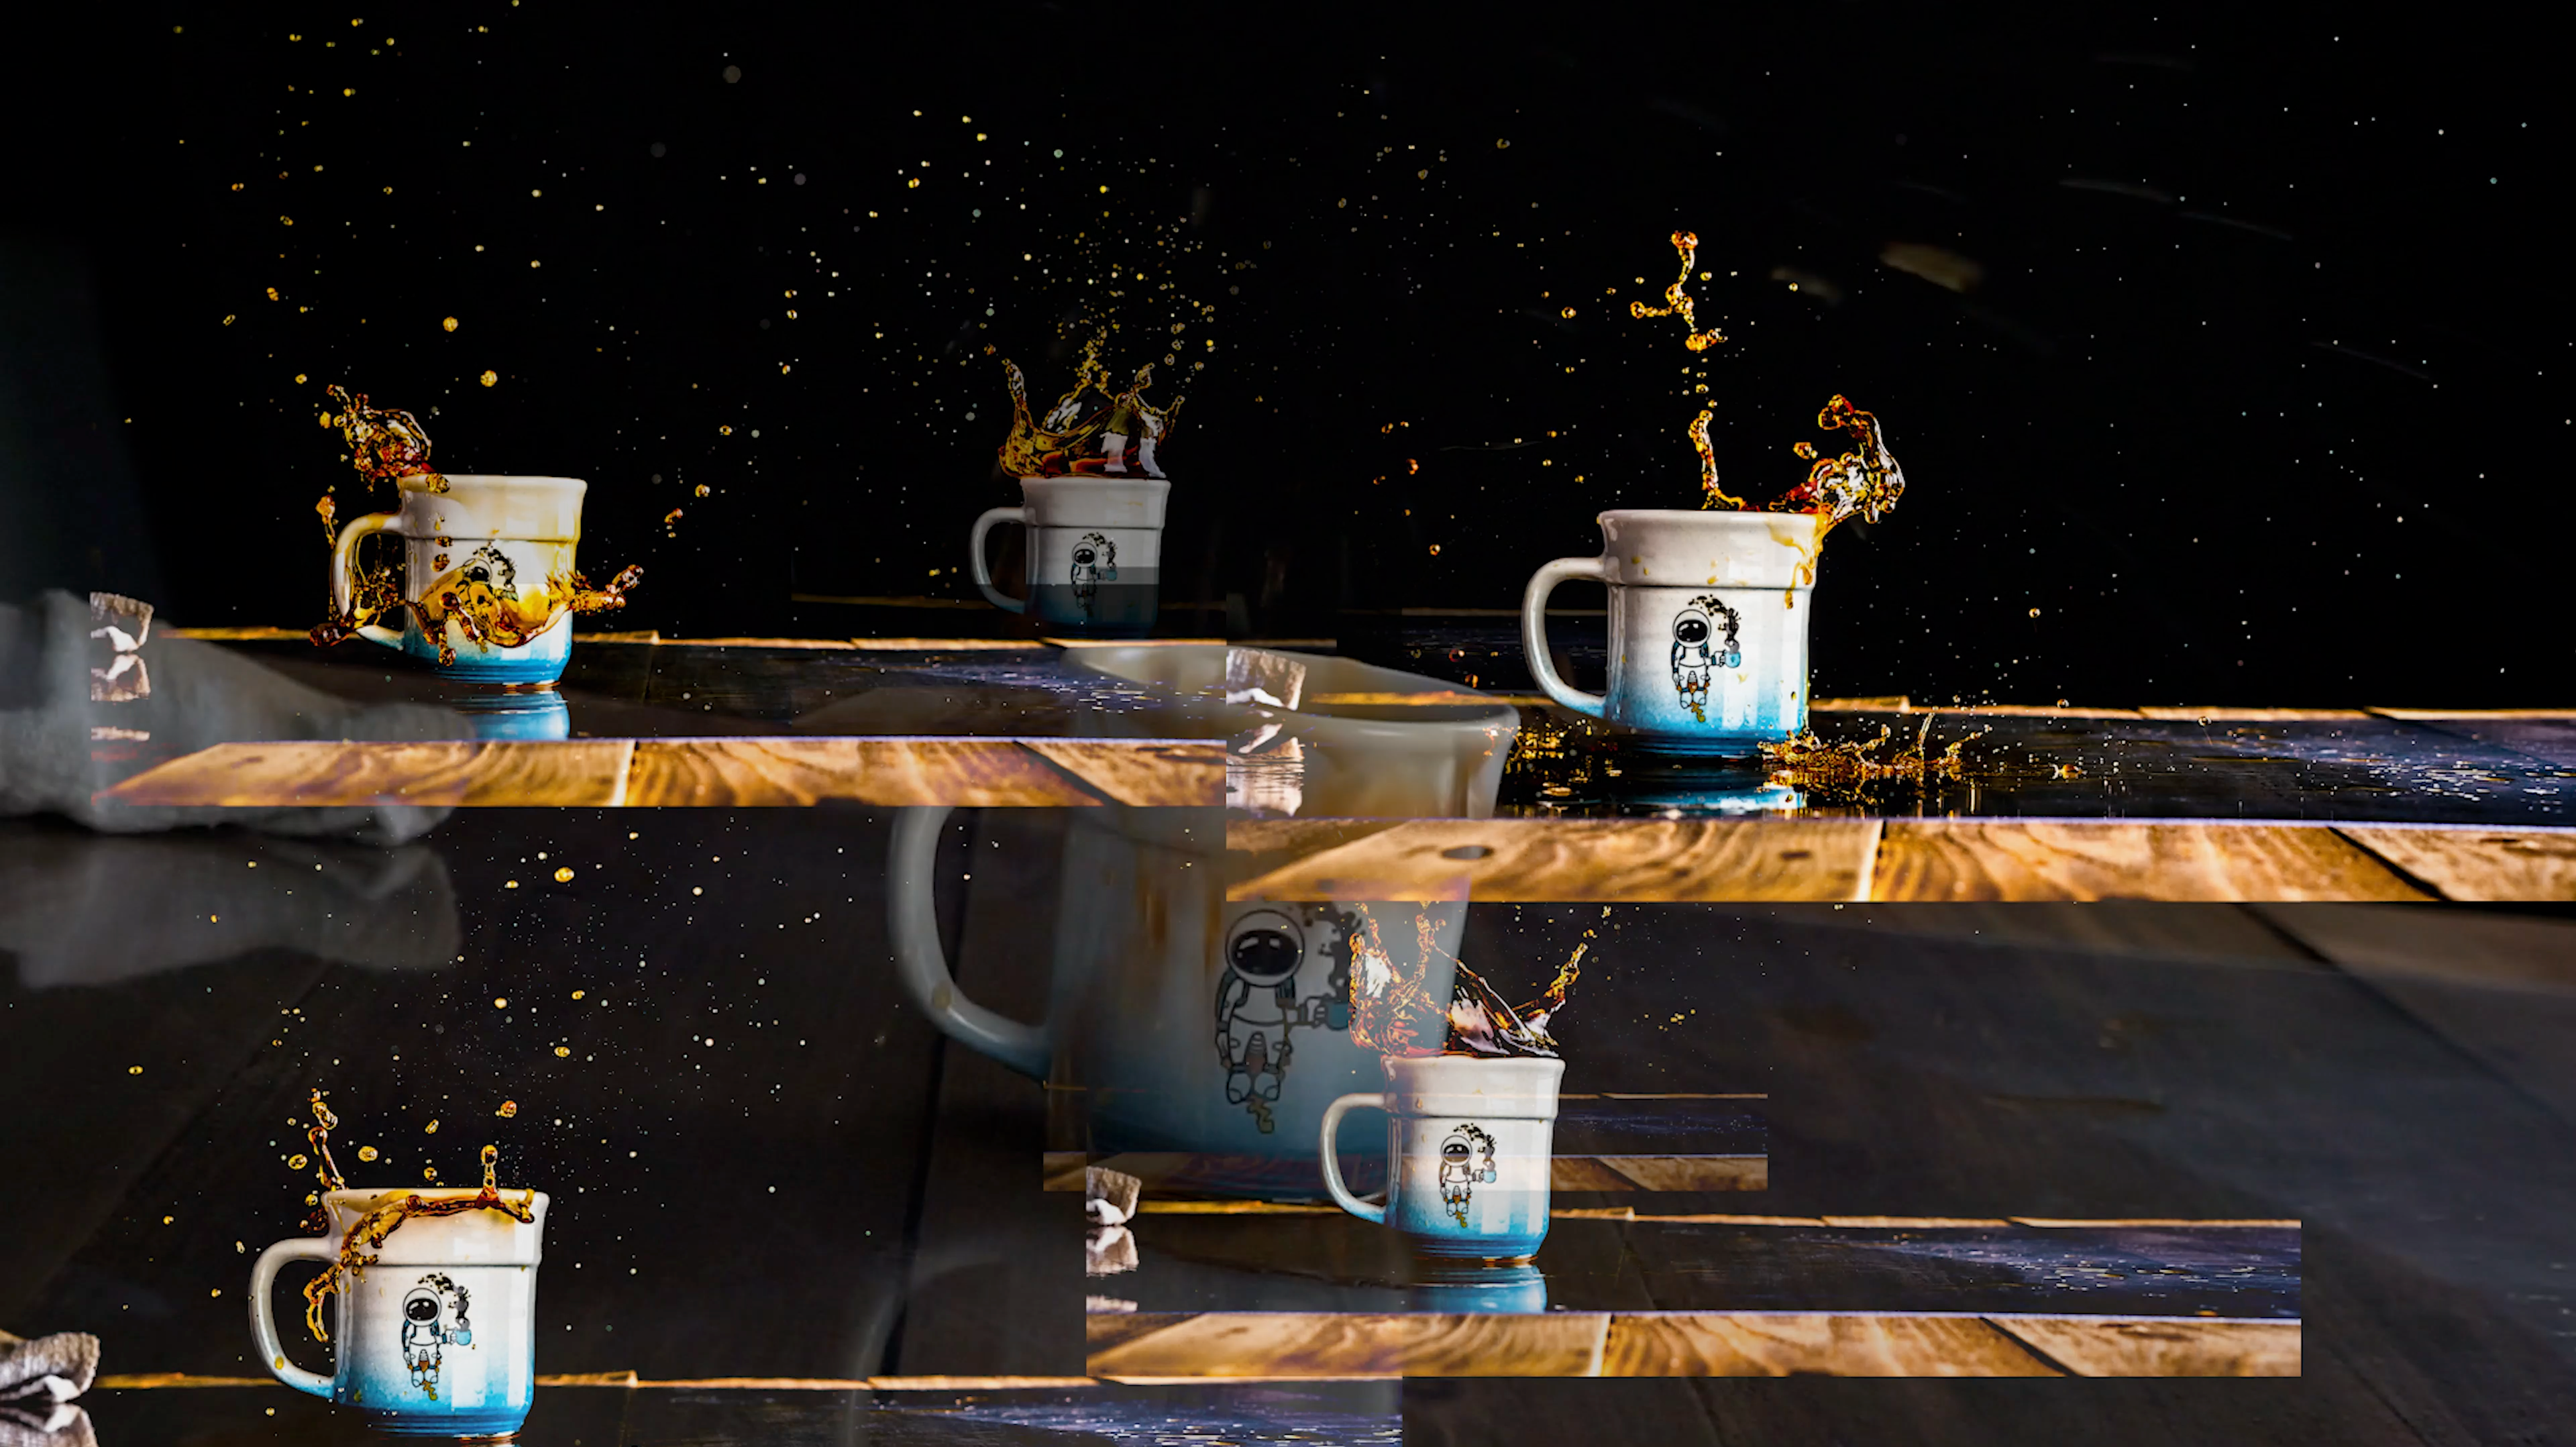
Then I took these guys into Lightroom and Photoshop real quickly to remove my hand out of the mug shot by using the pen tool putting it onto a black isolated background. Then went a head and took some of my favorite splashes to composite them into the mug.
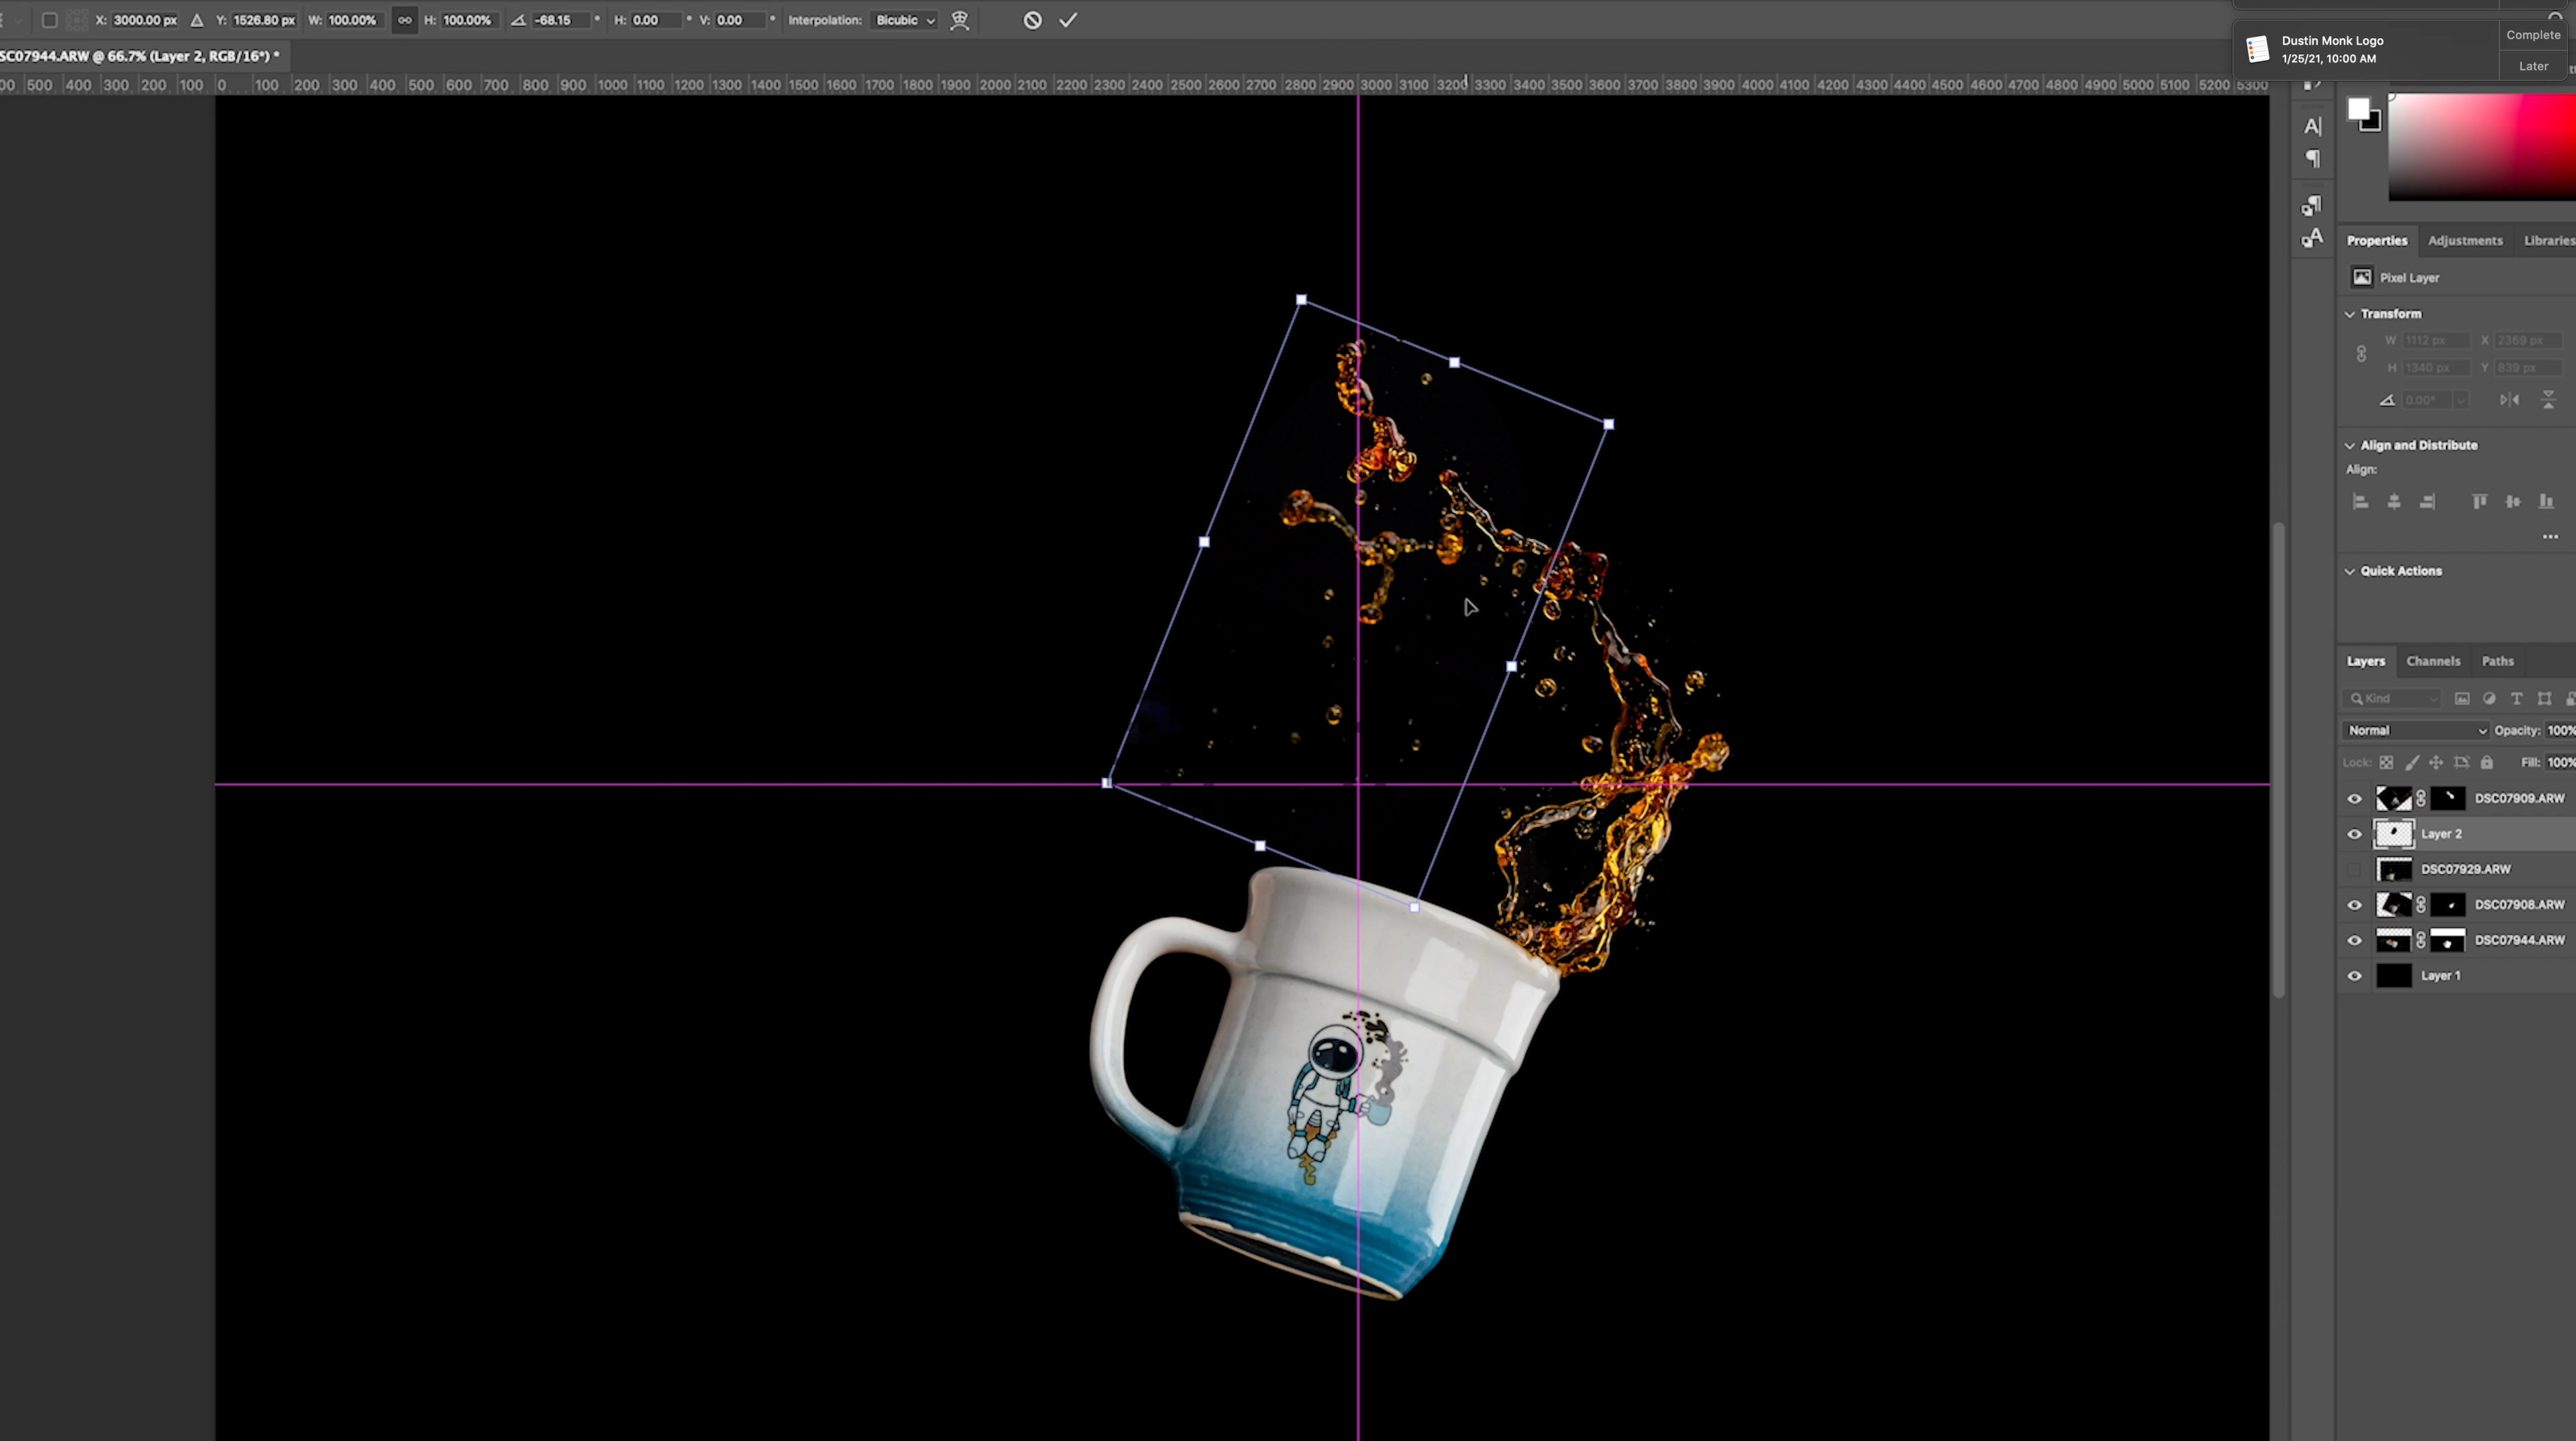
I actually ended up using about 3 different splashes for this one to to help make it feel like the coffee was floating up and out of the mug rather than just splashing out of it.
And if you actually look at the illustration of the astronaut his coffee is actually doing a similar motion so I’m feeling pretty satisfied with this one!
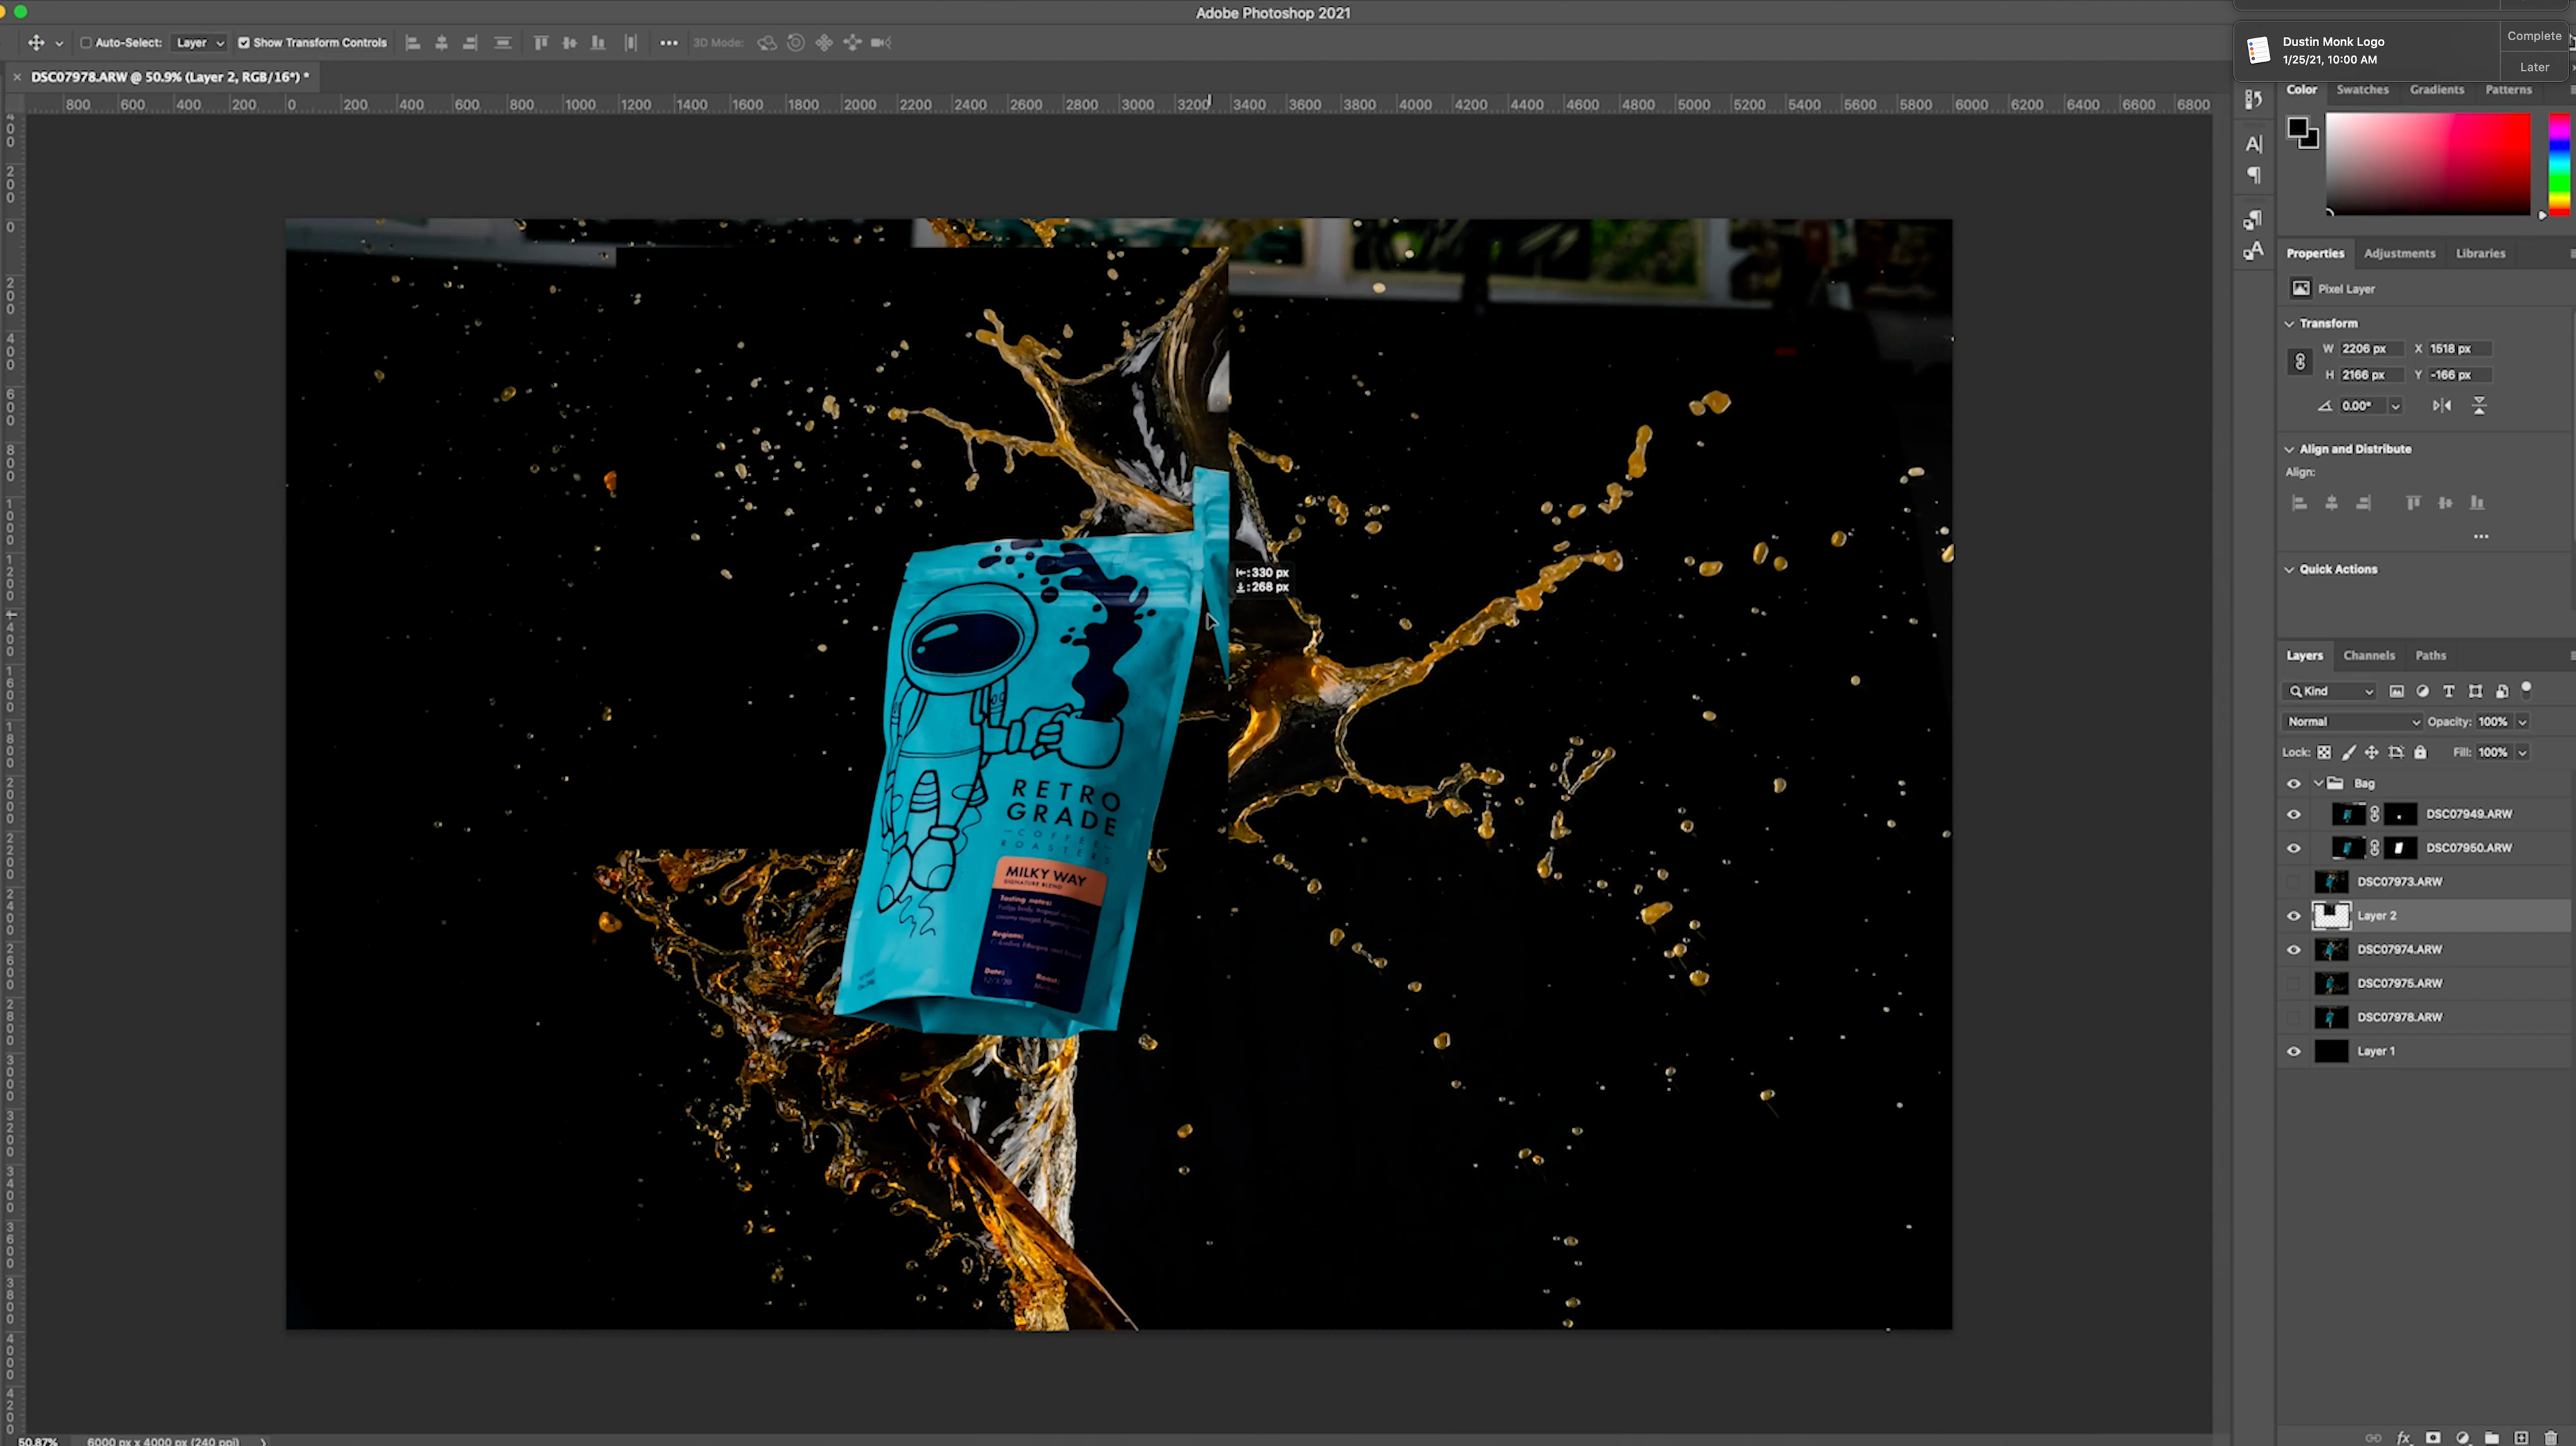
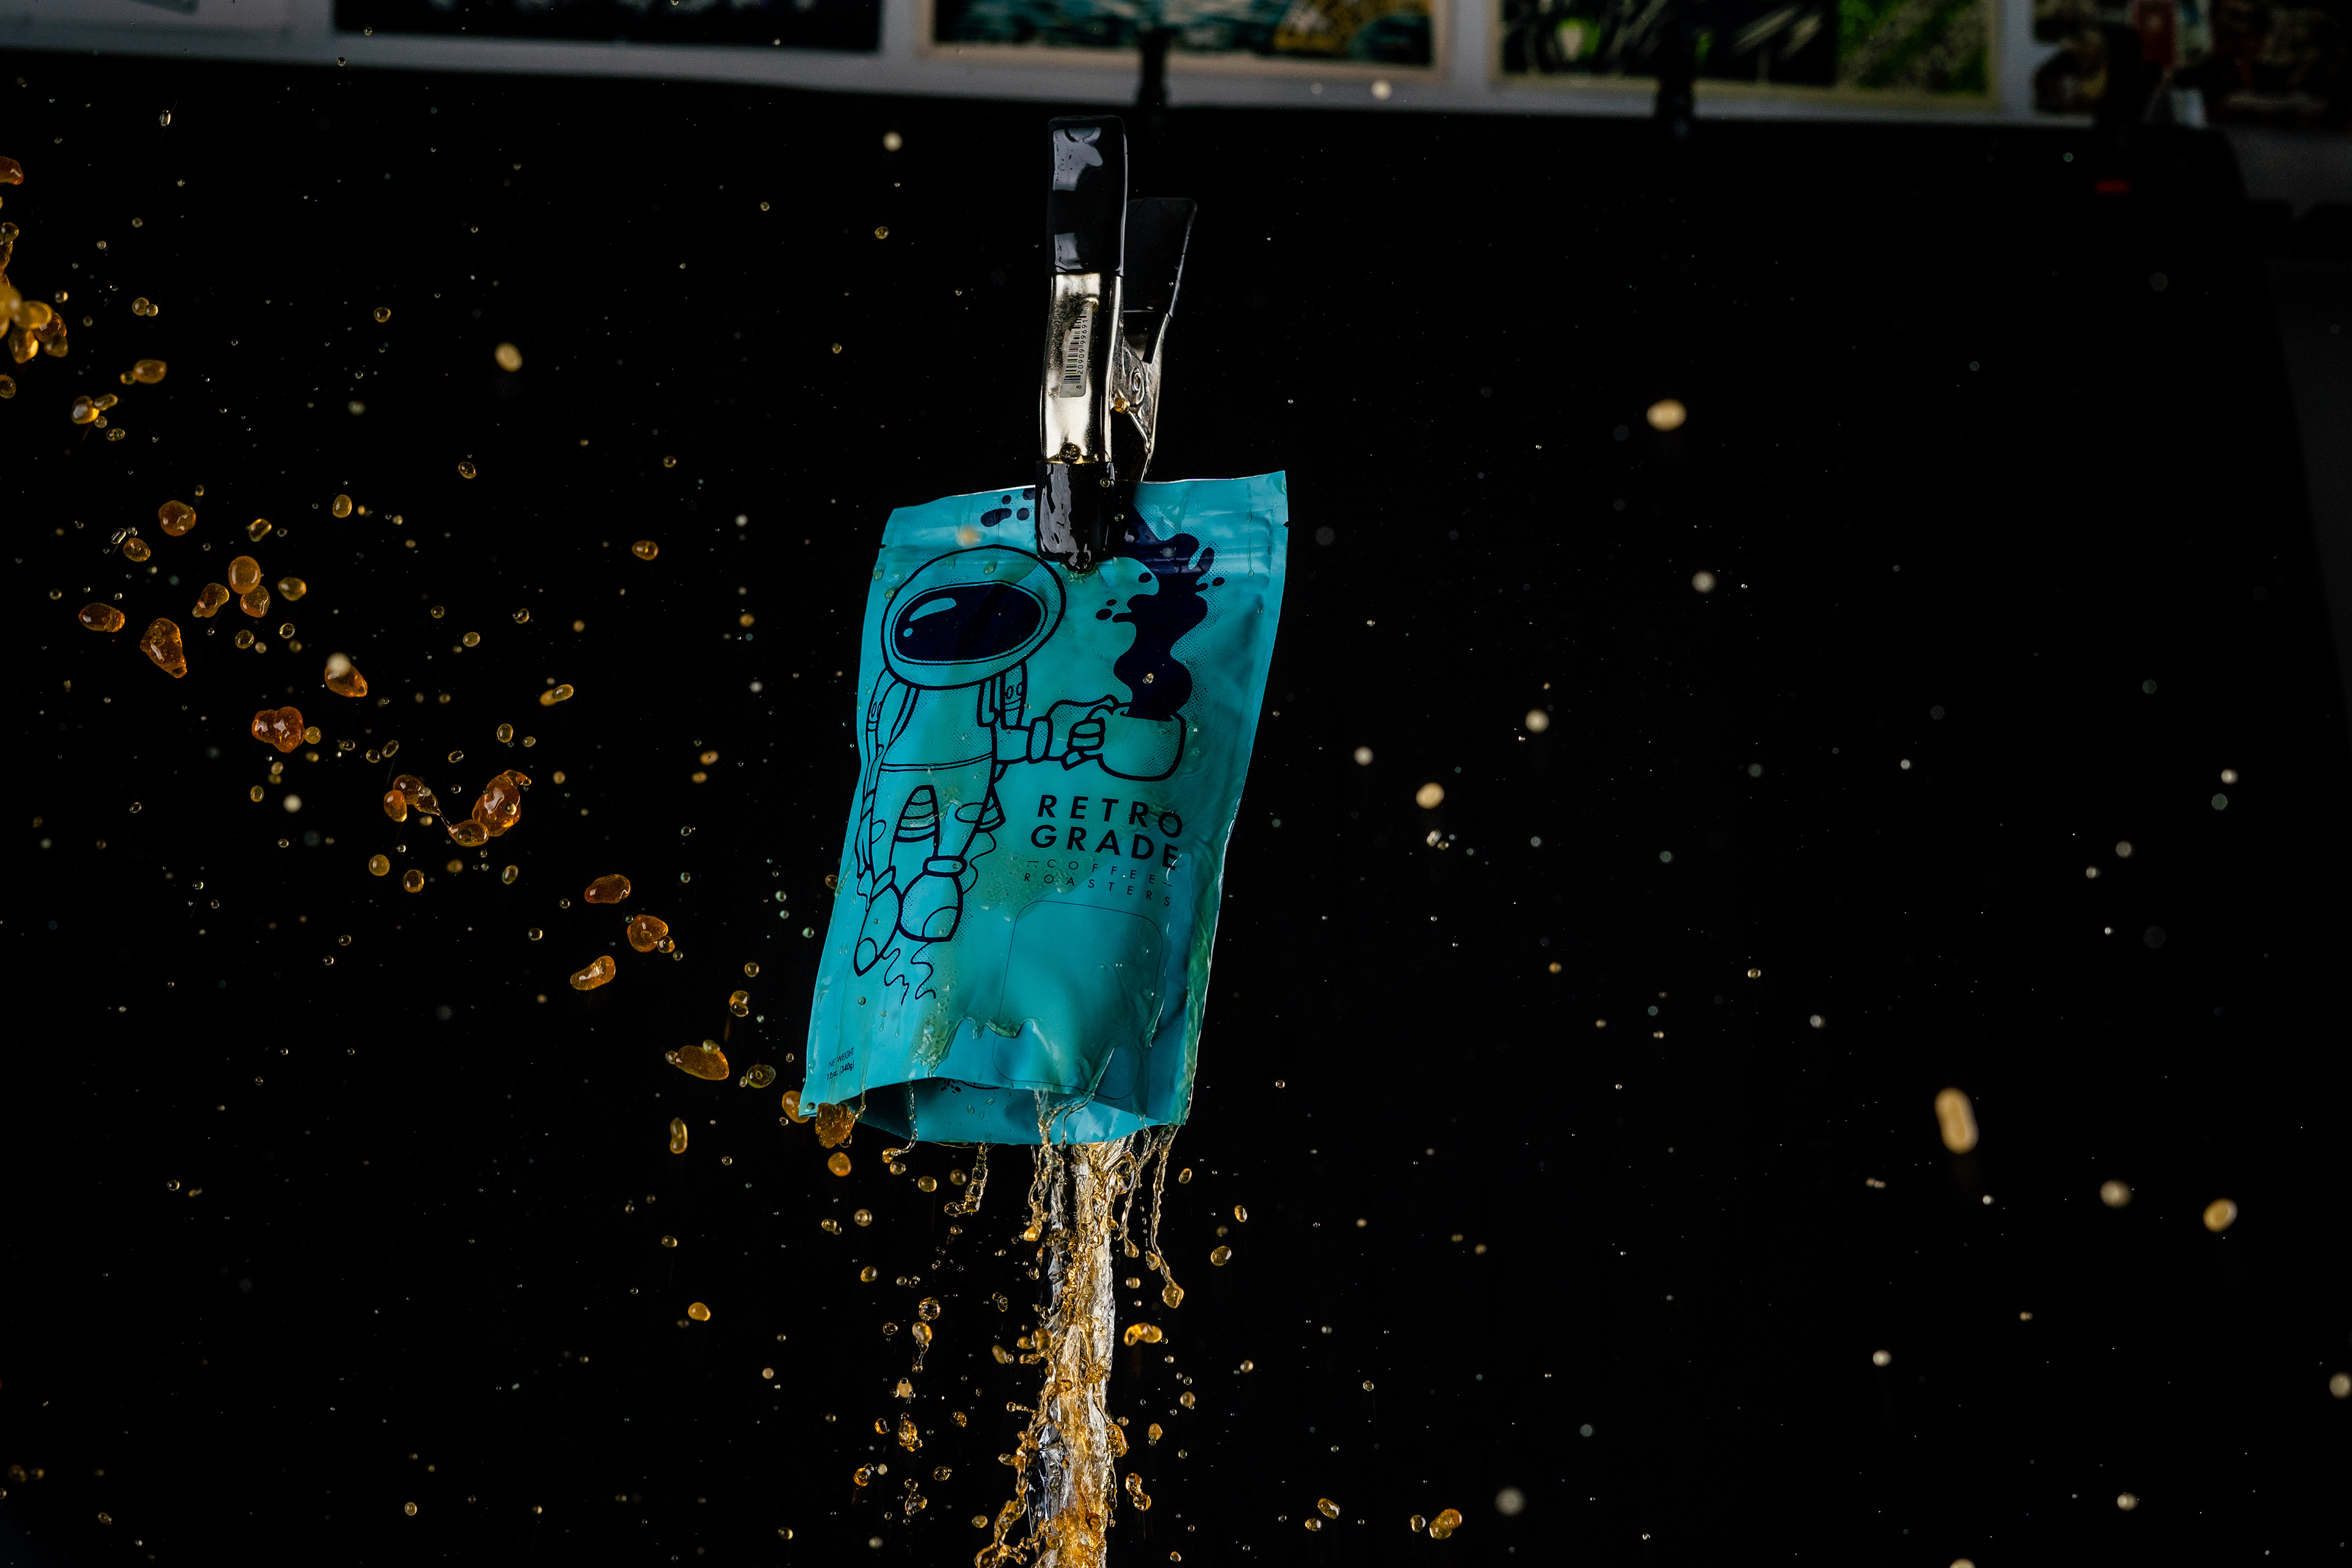
So we can move onto the next one which is a little more difficult. We're going to have to remove both the clamp and the light stand out of the image in order for it to feel like the bag is floating.
This one actually took me sometime to figure out. I started by cutting out my bag clean and laying it over my splash image that I liked then starting taking other sections of the splash to help hide the clamp. It took me a few tries, but after just pulling different sections and blending them then stamping out certain sections I was finally able to really blend together really nicely.
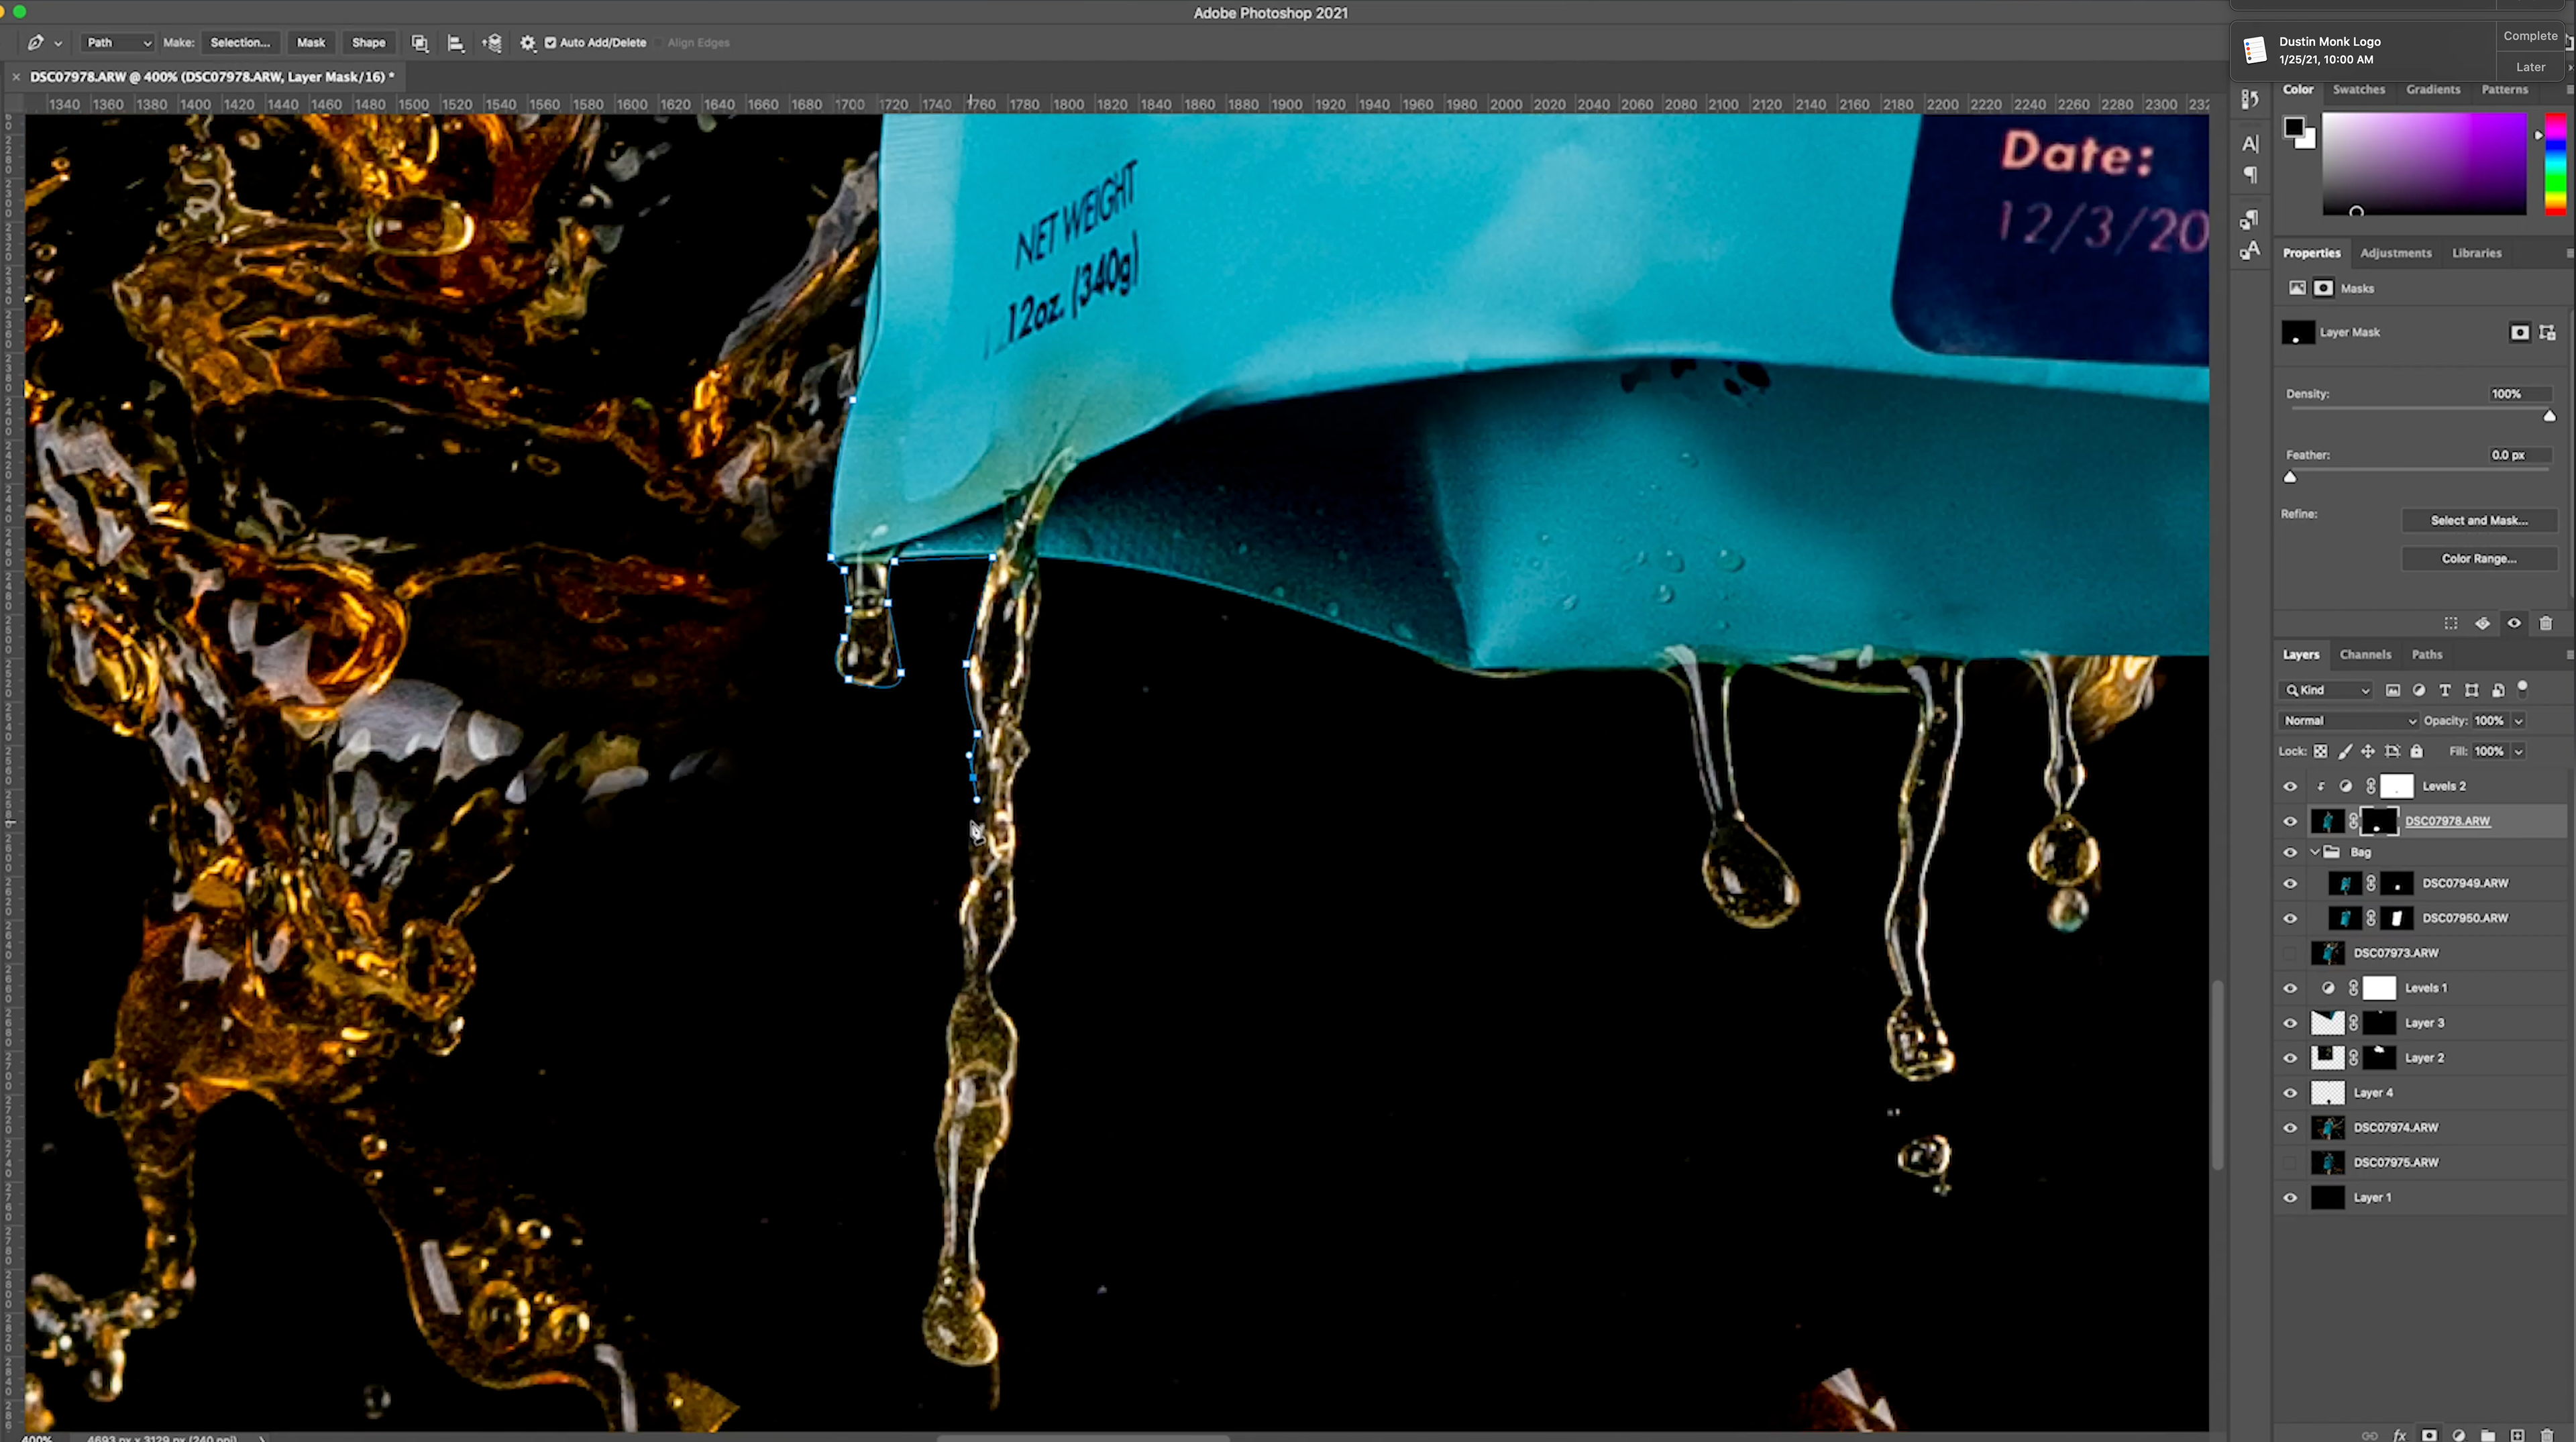
And then to remove the light stand out of the photo all I did was paint black over where the stand was then pulled drips from some of the other photos after the splash occurred. I felt like this helped add an extra element to make the bag feel like it was floating.
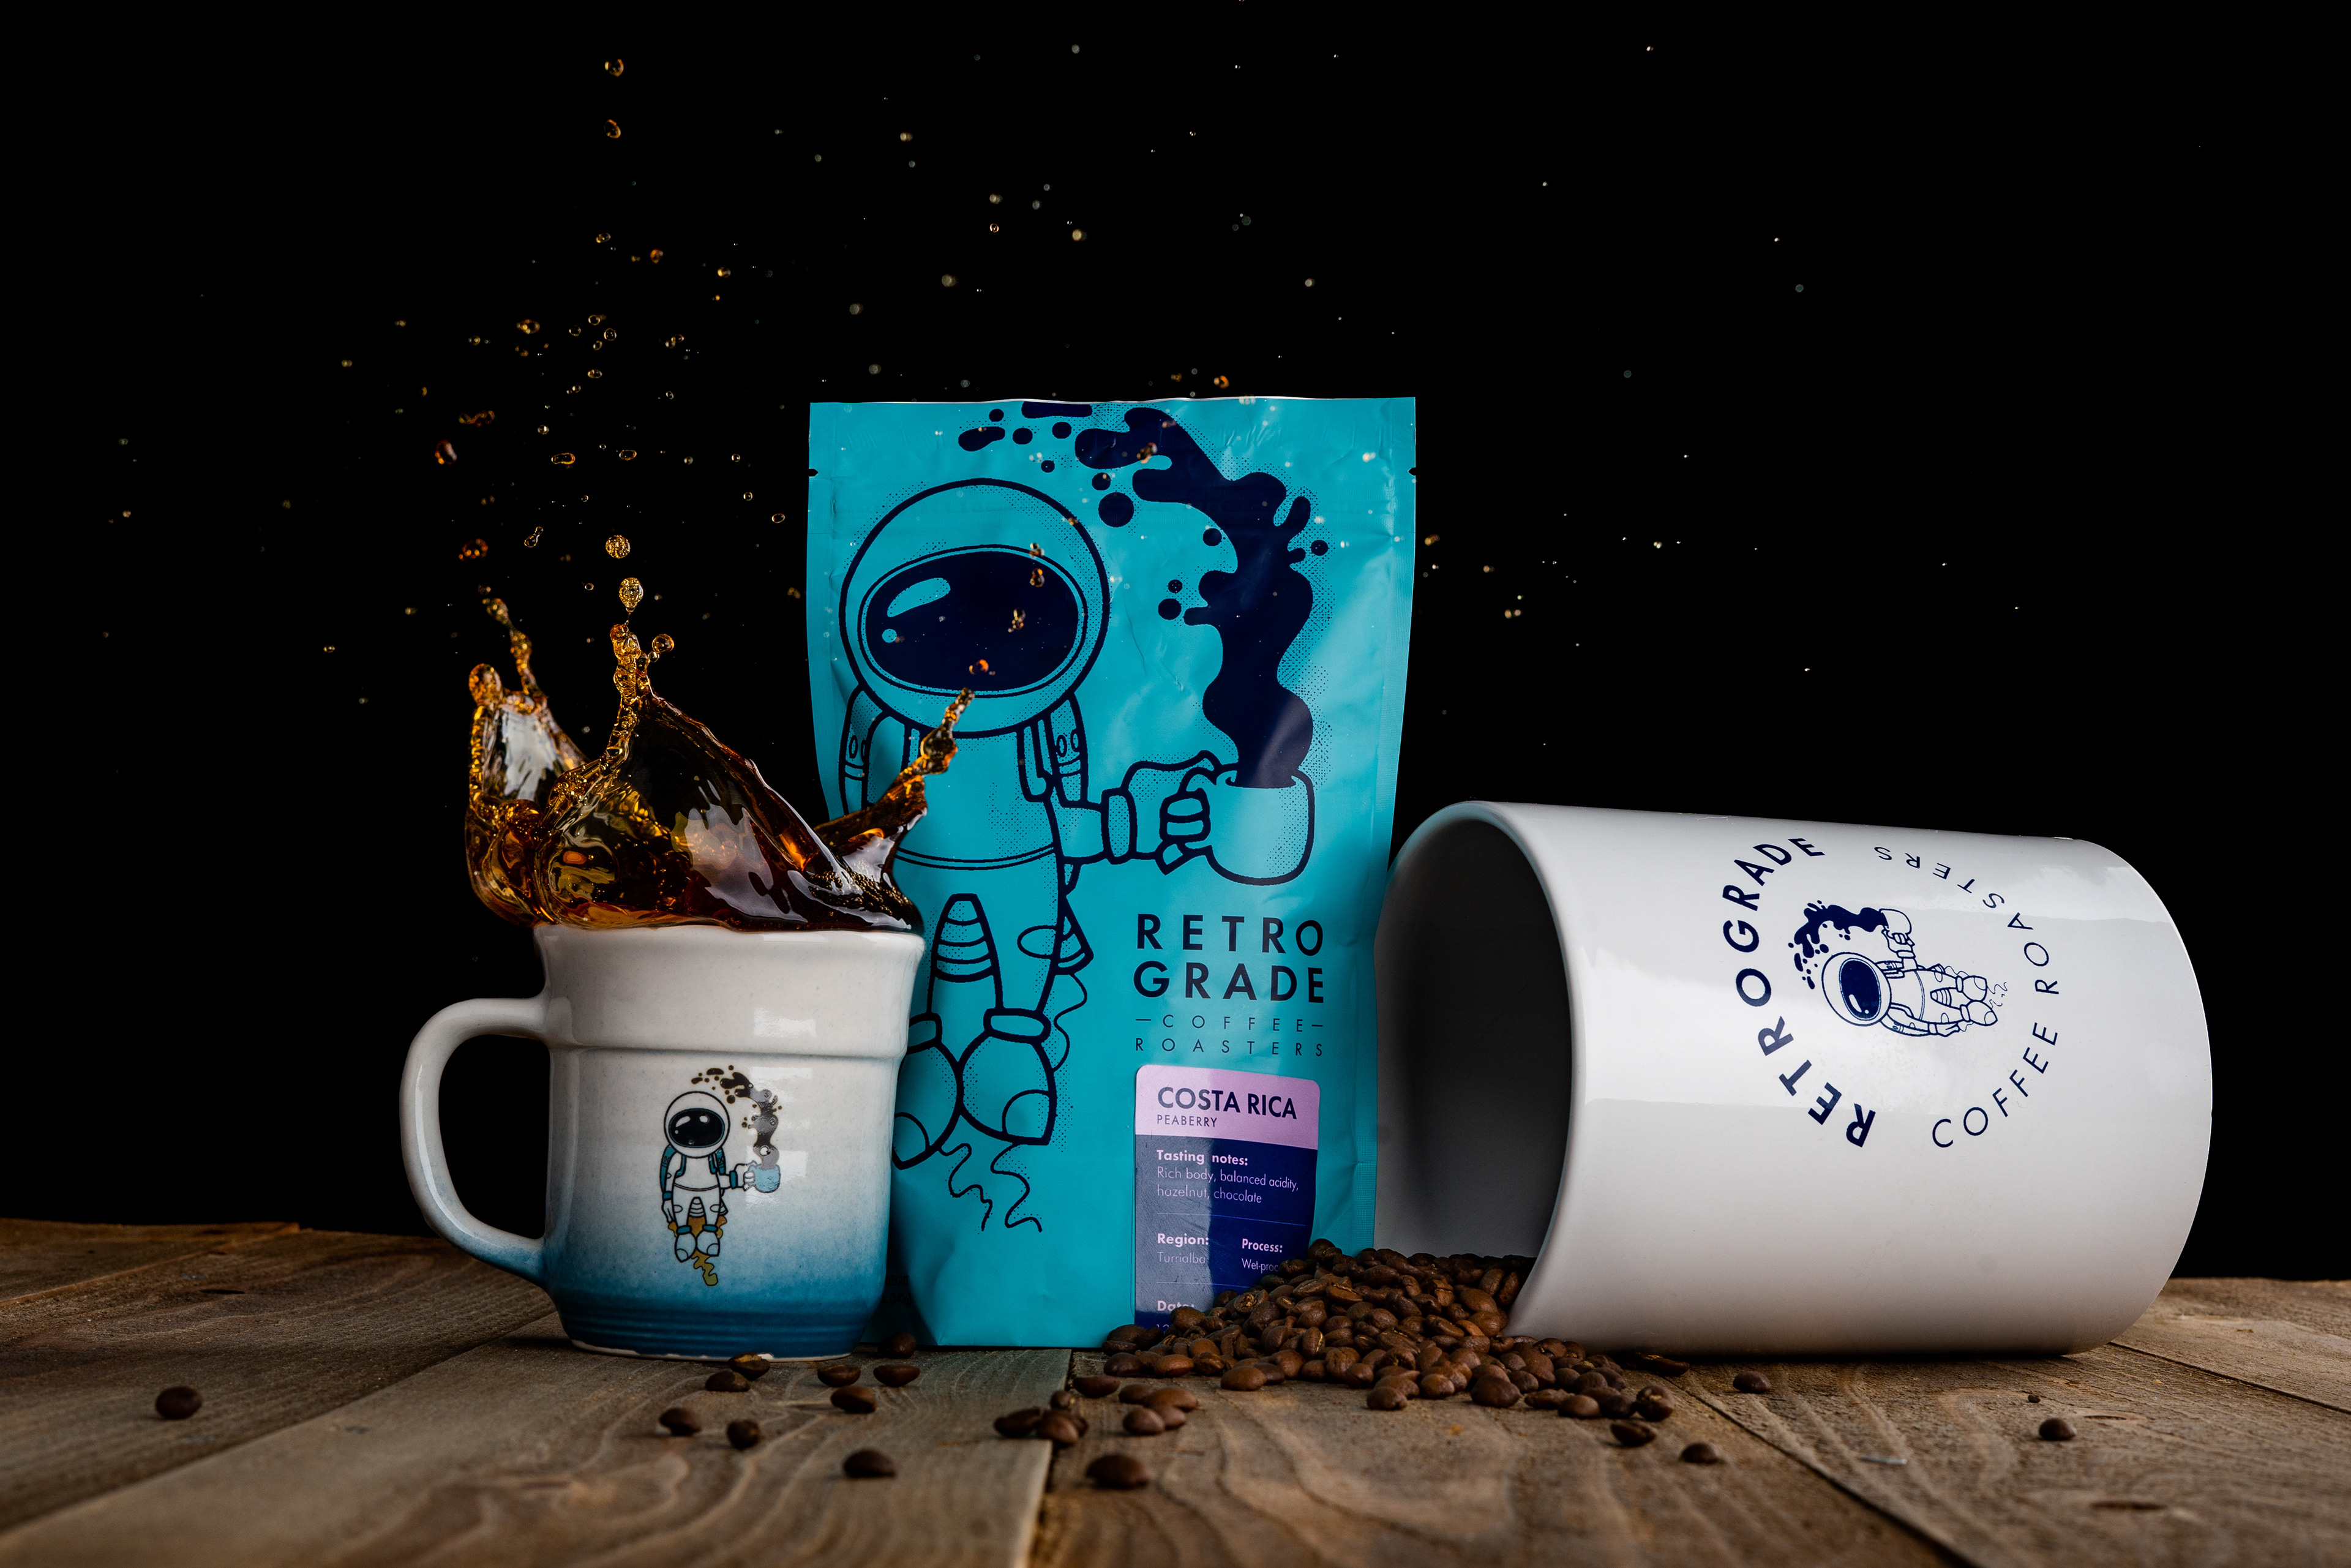
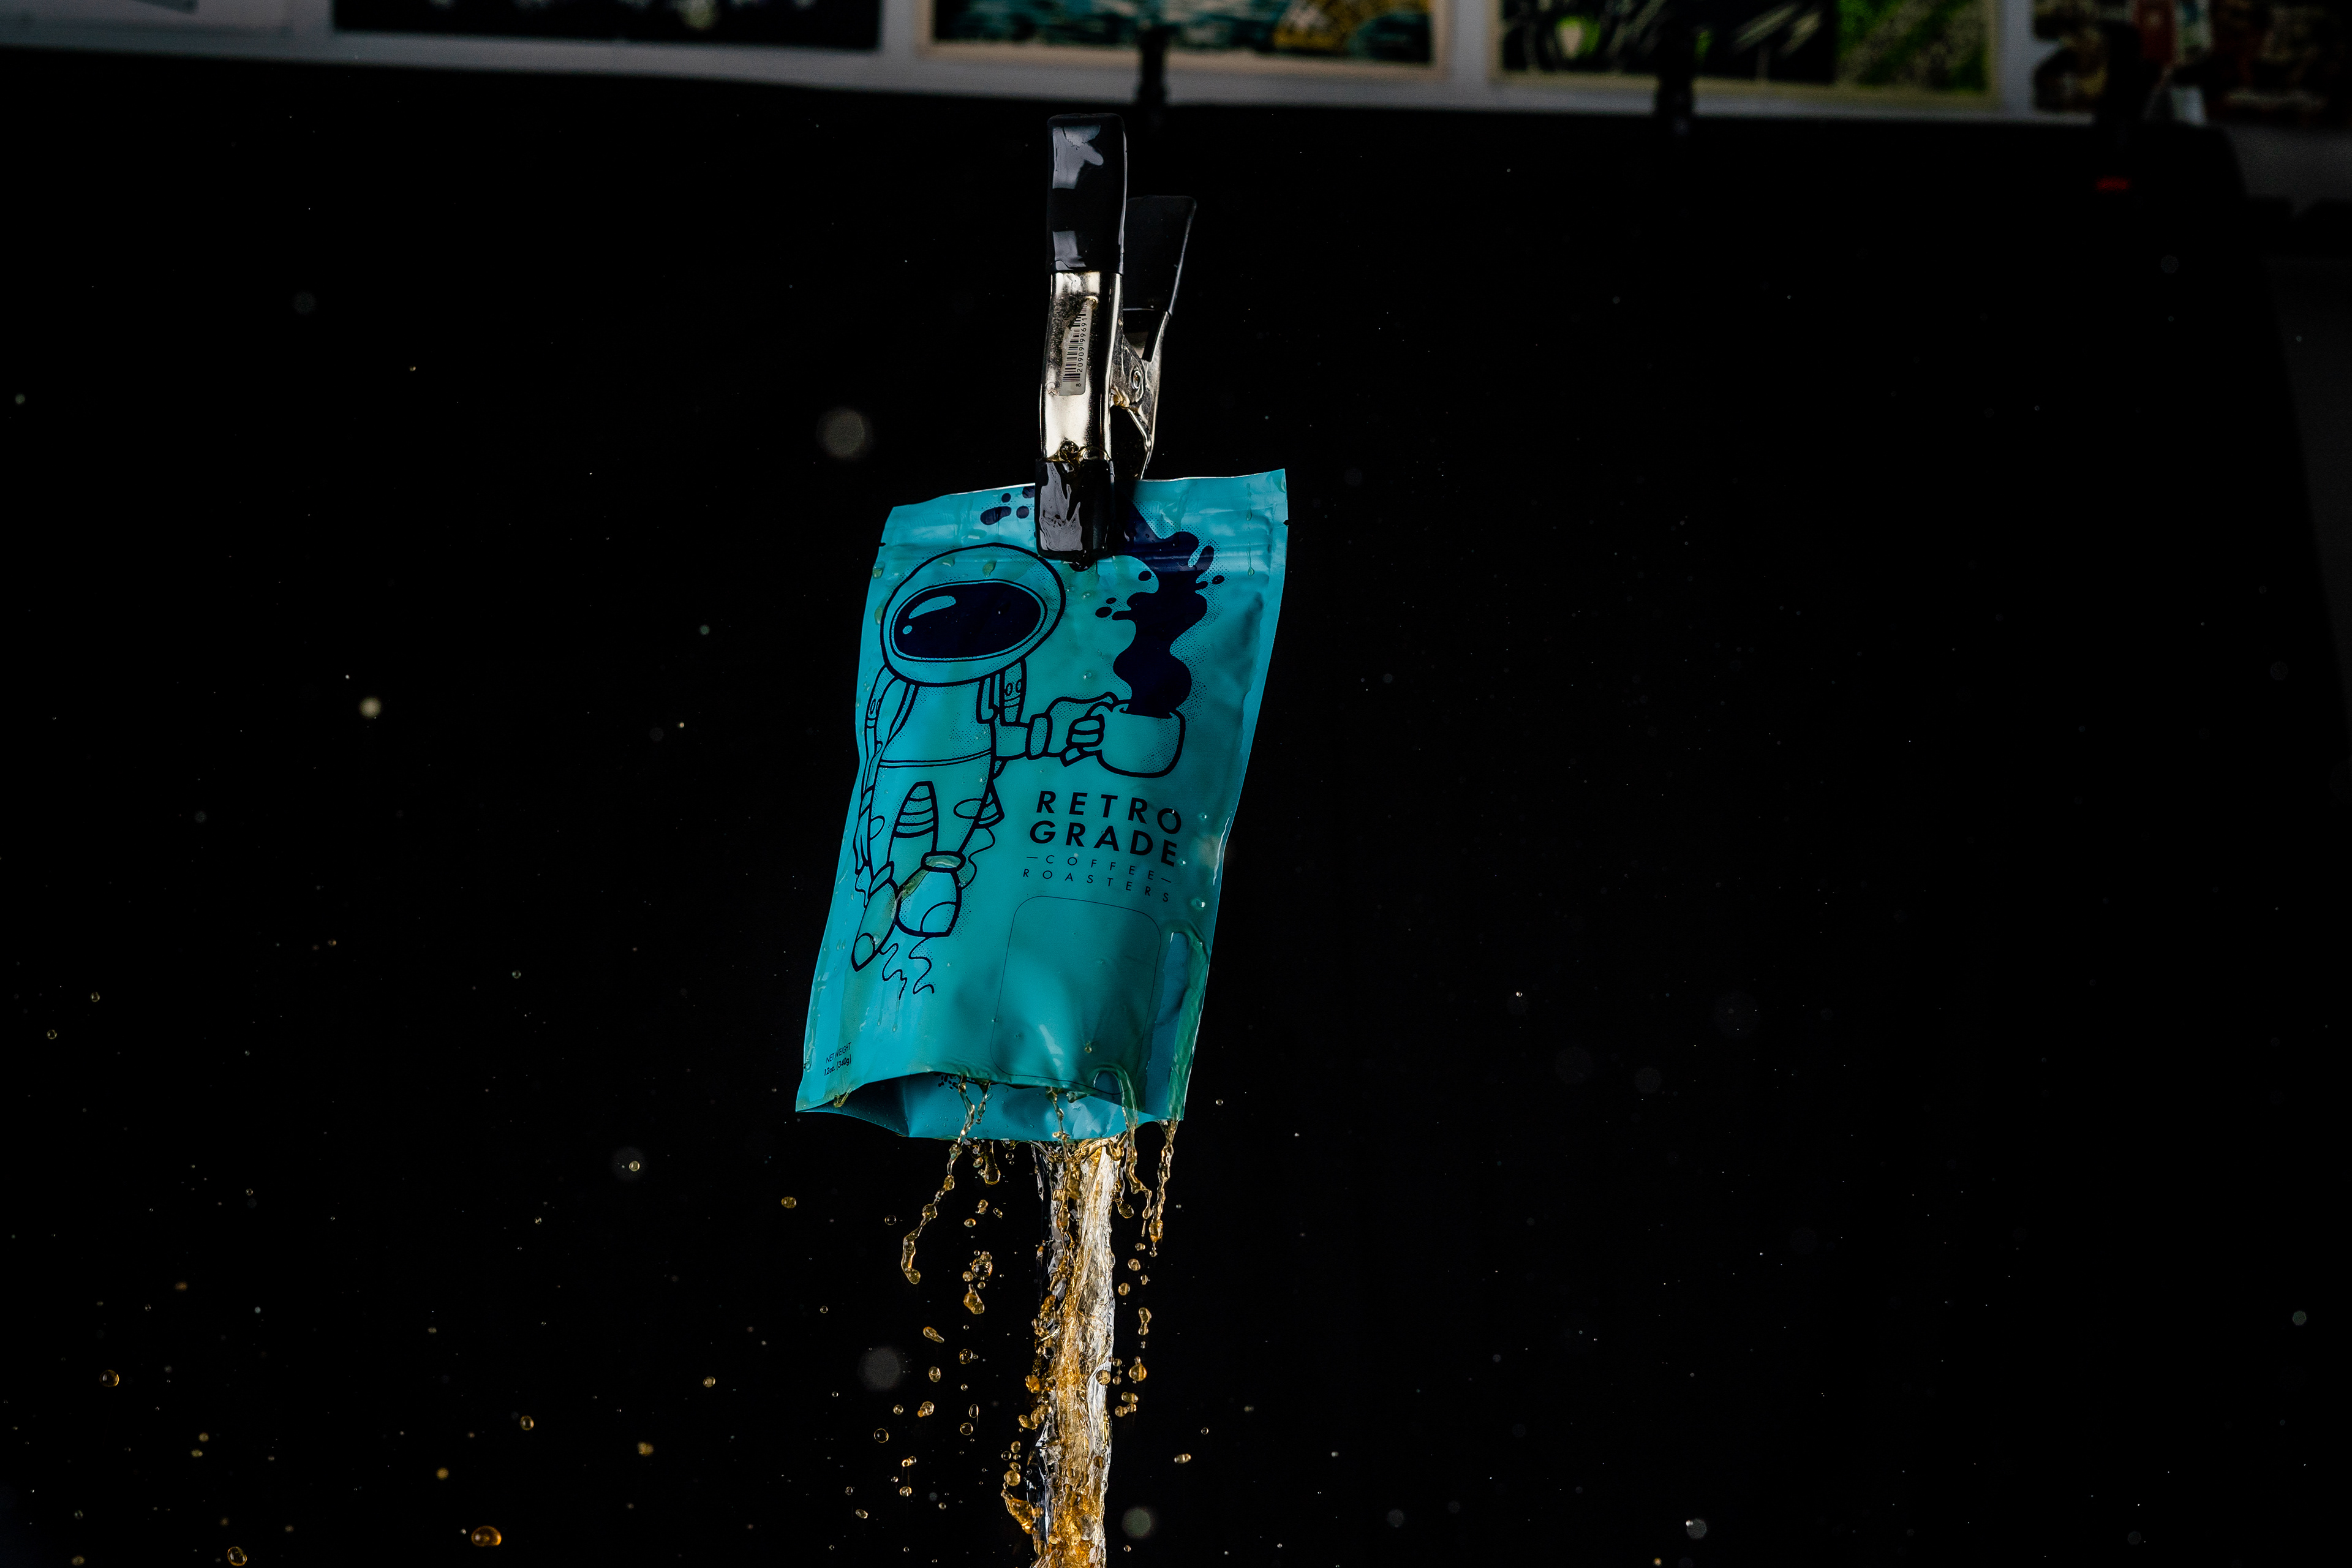
Then the last thing I did was drop in a bunch of the beans that I shot from another photo from this project. I actually took more than just these two photos I’m walking you guys through, but they were taken very similar to my first video.
So for the sake of time I thought i would walk you guys through the two floating shots instead since they were using some different techniques.
Overall I’m pretty stoked with the way these turned out, the mug shot was already super similar to something I’ve shot before previously. So I’m glad I was able to share that technique with you guys.
As for the bag shot it was something completely new for me to try and I’m pretty happy with the results even though I made a complete mess of my garage, but it was all worth it in the end to get the shot I envisioned.
I hope that this video inspired you to try some floating product photography yourself! Take my techniques that I use and apply them to your own. You don’t need to recreate what I just did exactly, but use it as inspiration to create something of your own! If you shoot any photos using any of these techniques I would love to see them! So please make sure you tag me on instagram I have that linked below if you want to give me a follow or just say hey!