
Thanks so much for stopping for stopping by to check out my editing breakdown of my Pie vs Pie photo in this tutorial we are going to focus on how I edit these photos using Adobe Photoshop & Lightroom. If you guys haven't seen the behind the scenes of me capturing these photos I would recommend checking out that one before you get started! You can find that video by clicking here.
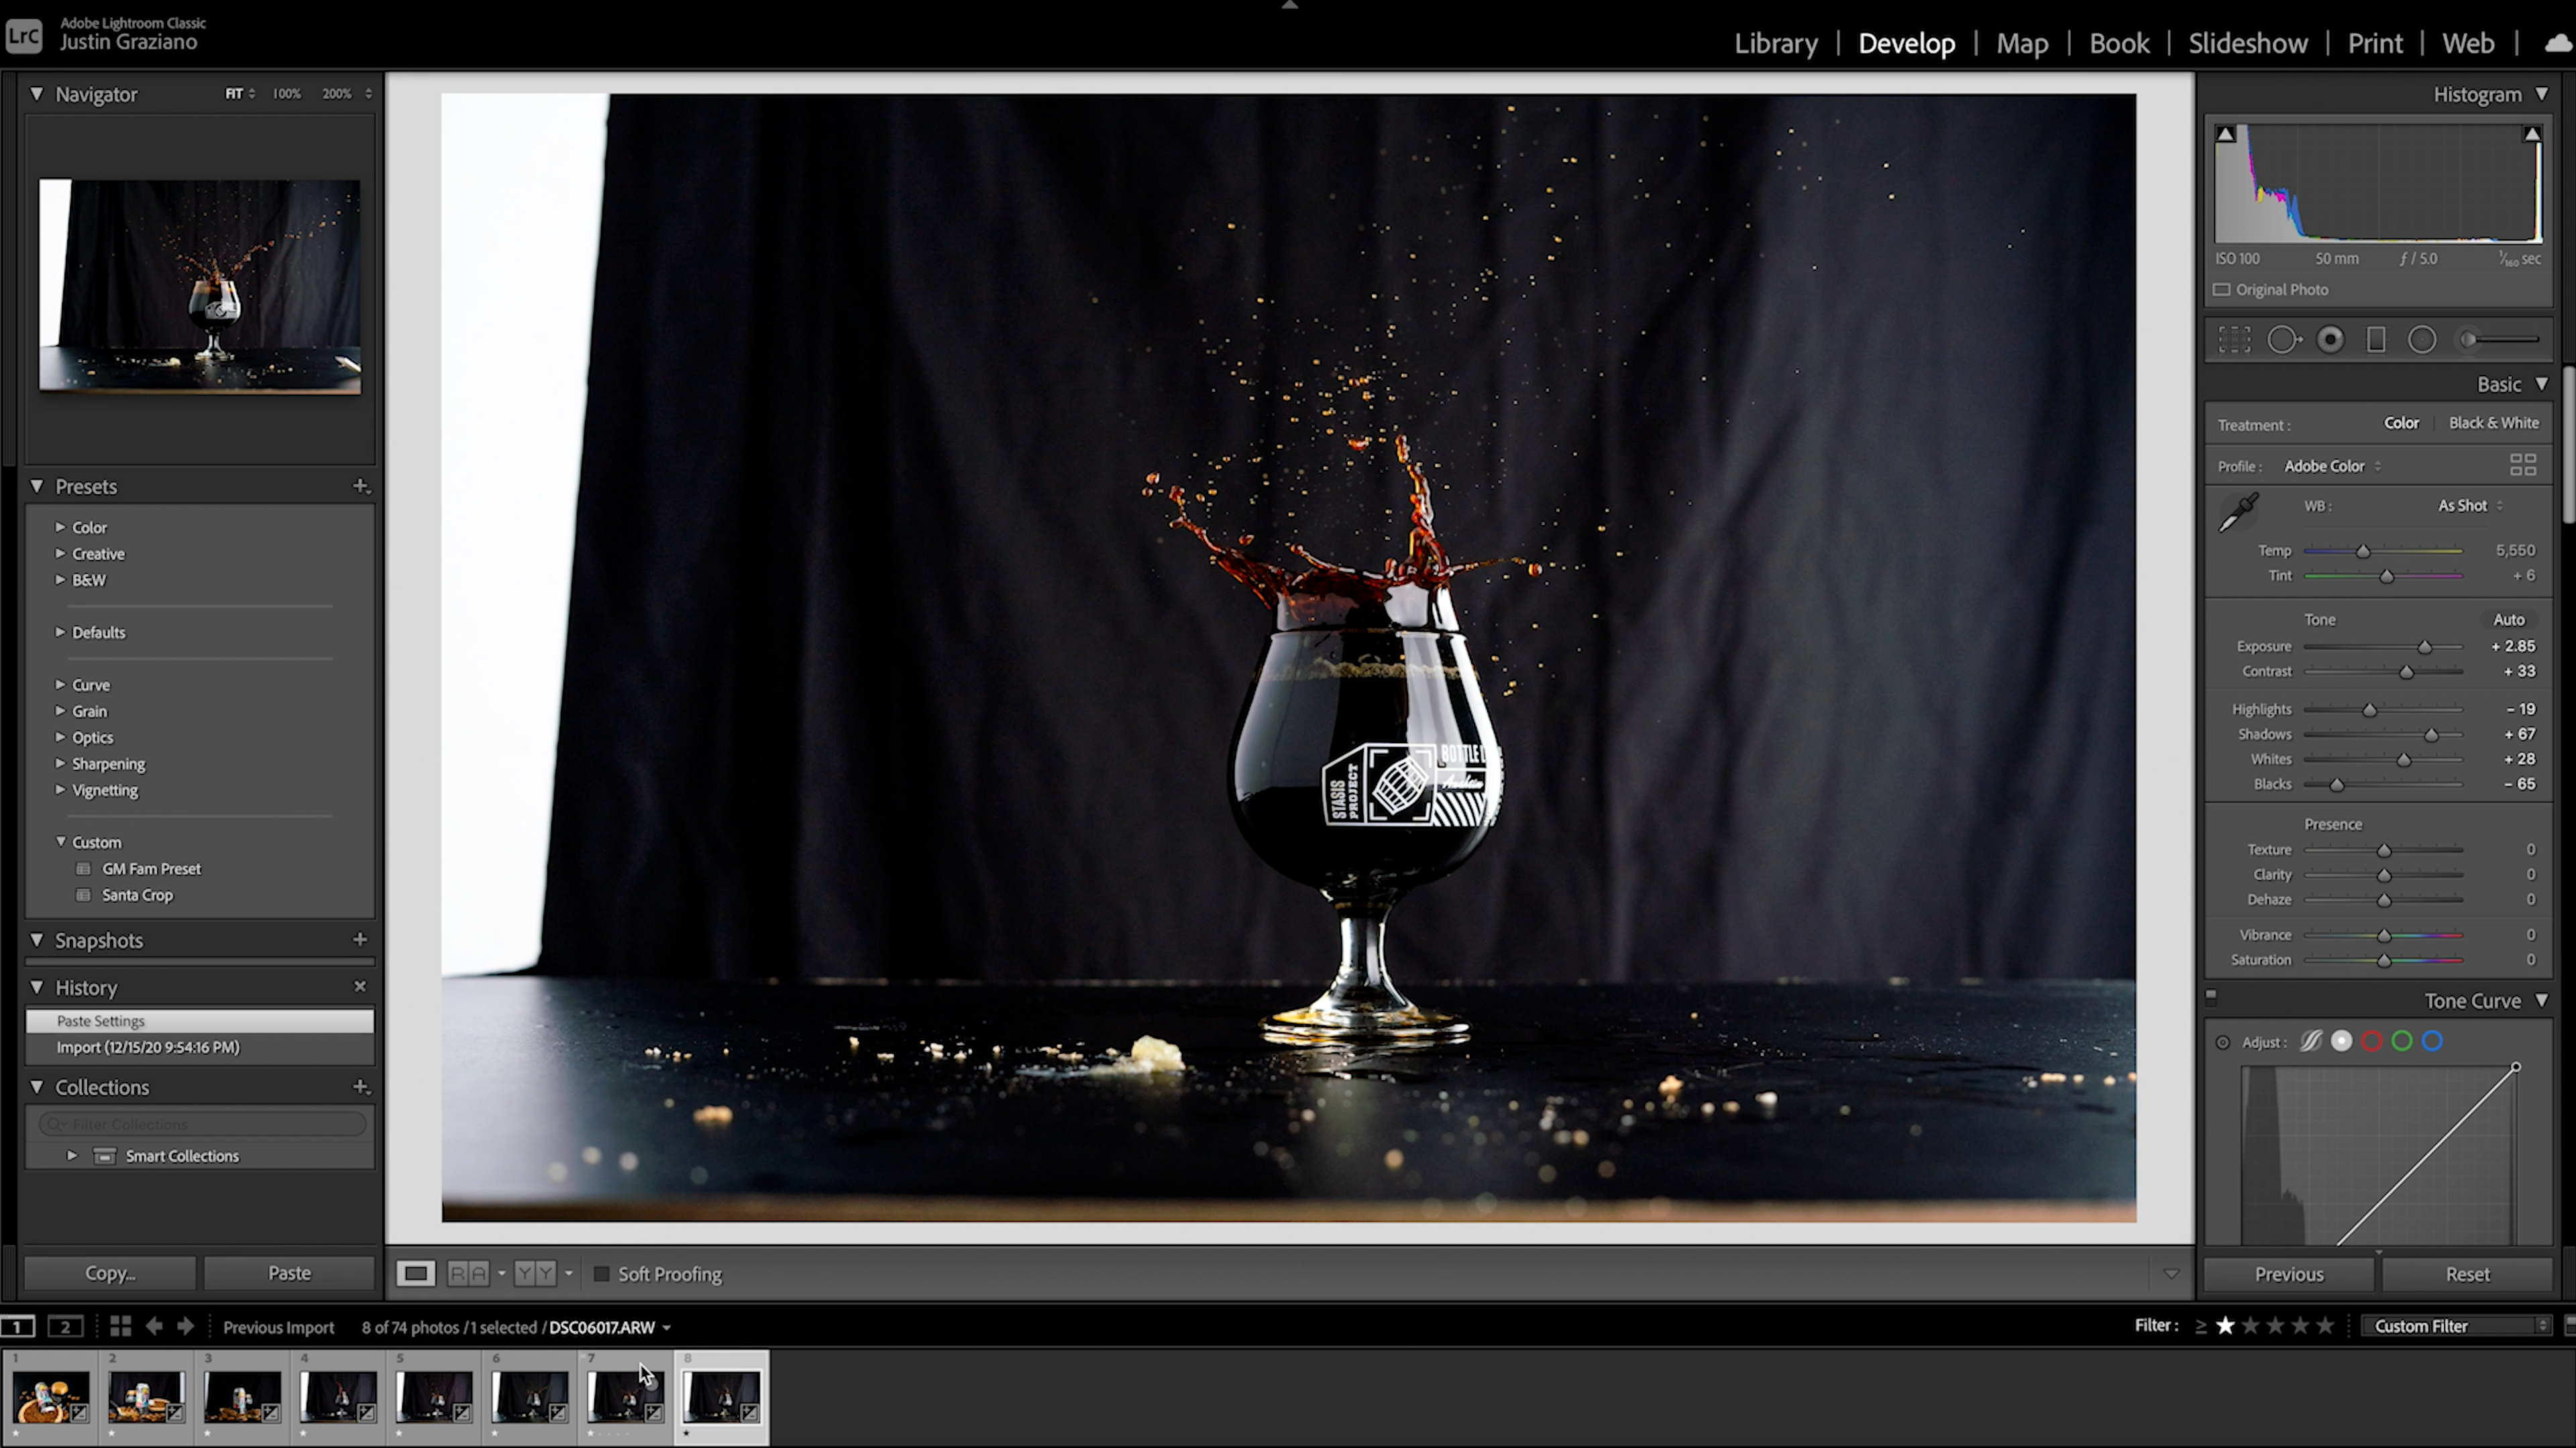
So Let's get into it! All my edits start in Lightroom, this is where I add in all my basic color corrections and select all my favorites! From there I select all the images I want to composite by holding down the "alt" or "opt" keys.
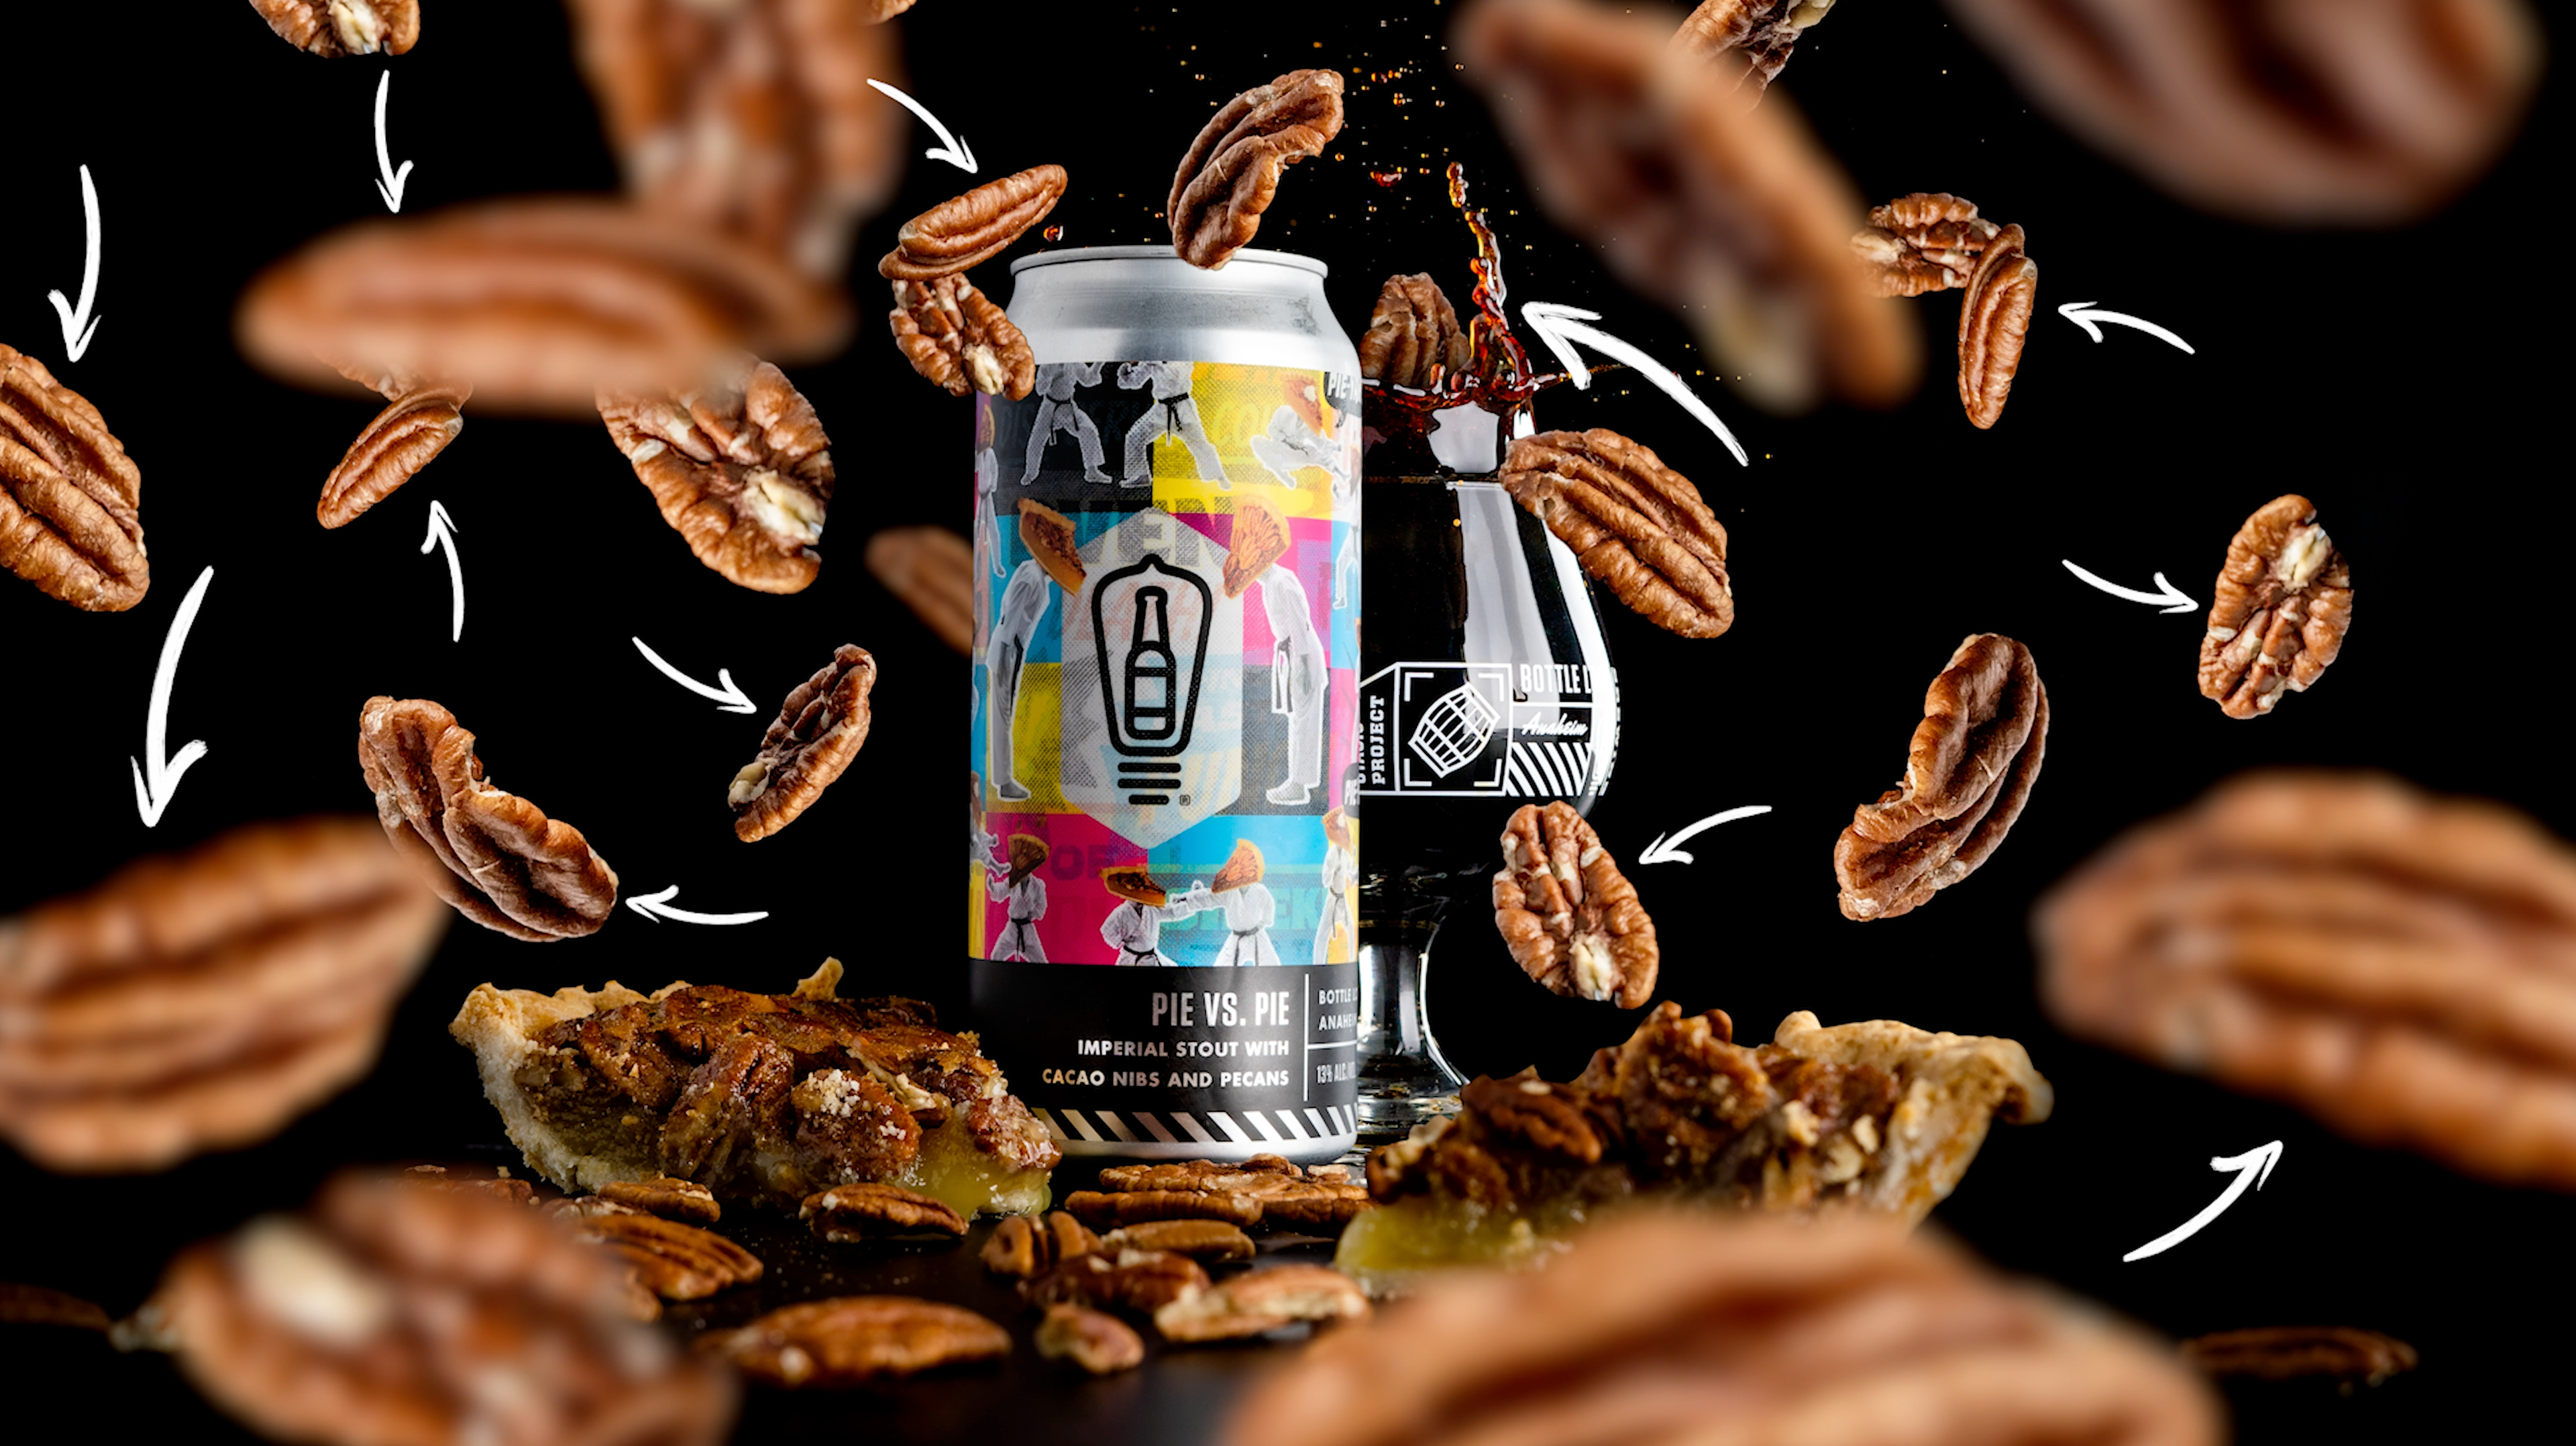
For this photo I am going to show you how to composite in the splash as well as all the falling pecans, but from here we are just going to start with the splash.
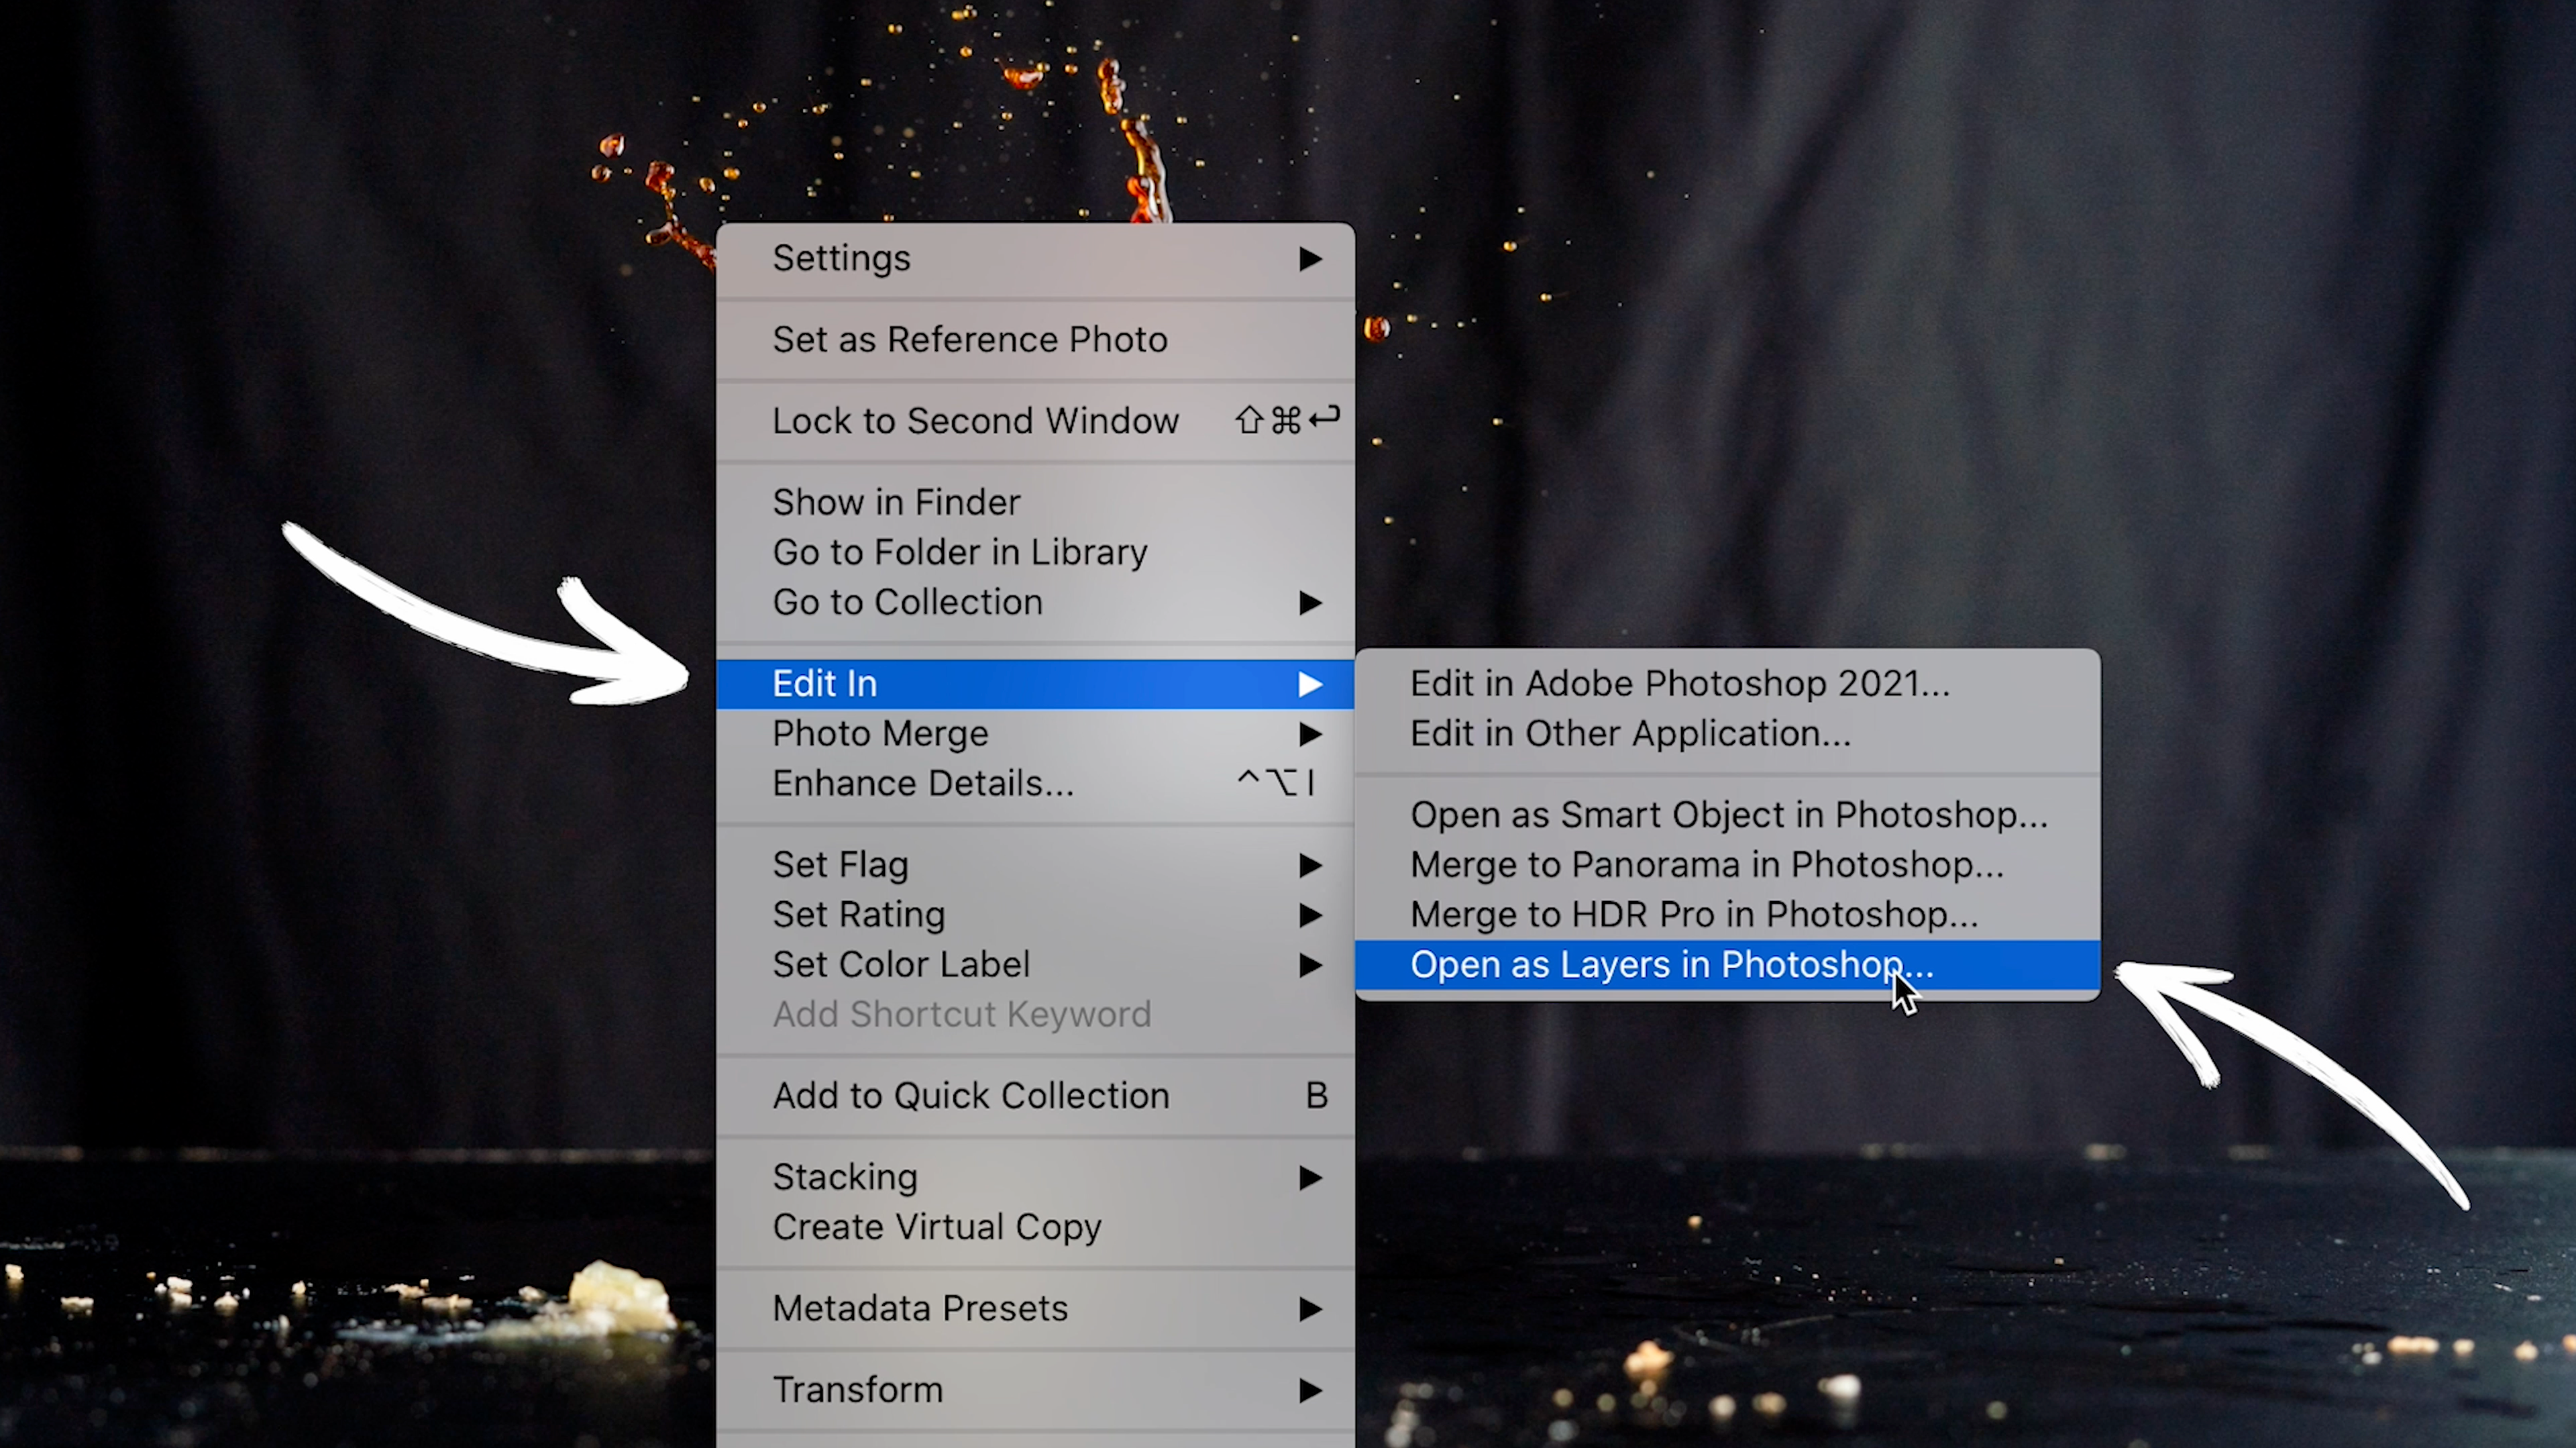
To open your selected photos into Photoshop you will need to "Right Click" scroll down to "Edit In" then "Open as Layers in Photoshop..." This will open all your photos into Photoshop basically eliminating the process of you having to export all your photos from Lightroom and having to reopen them into Photoshop.
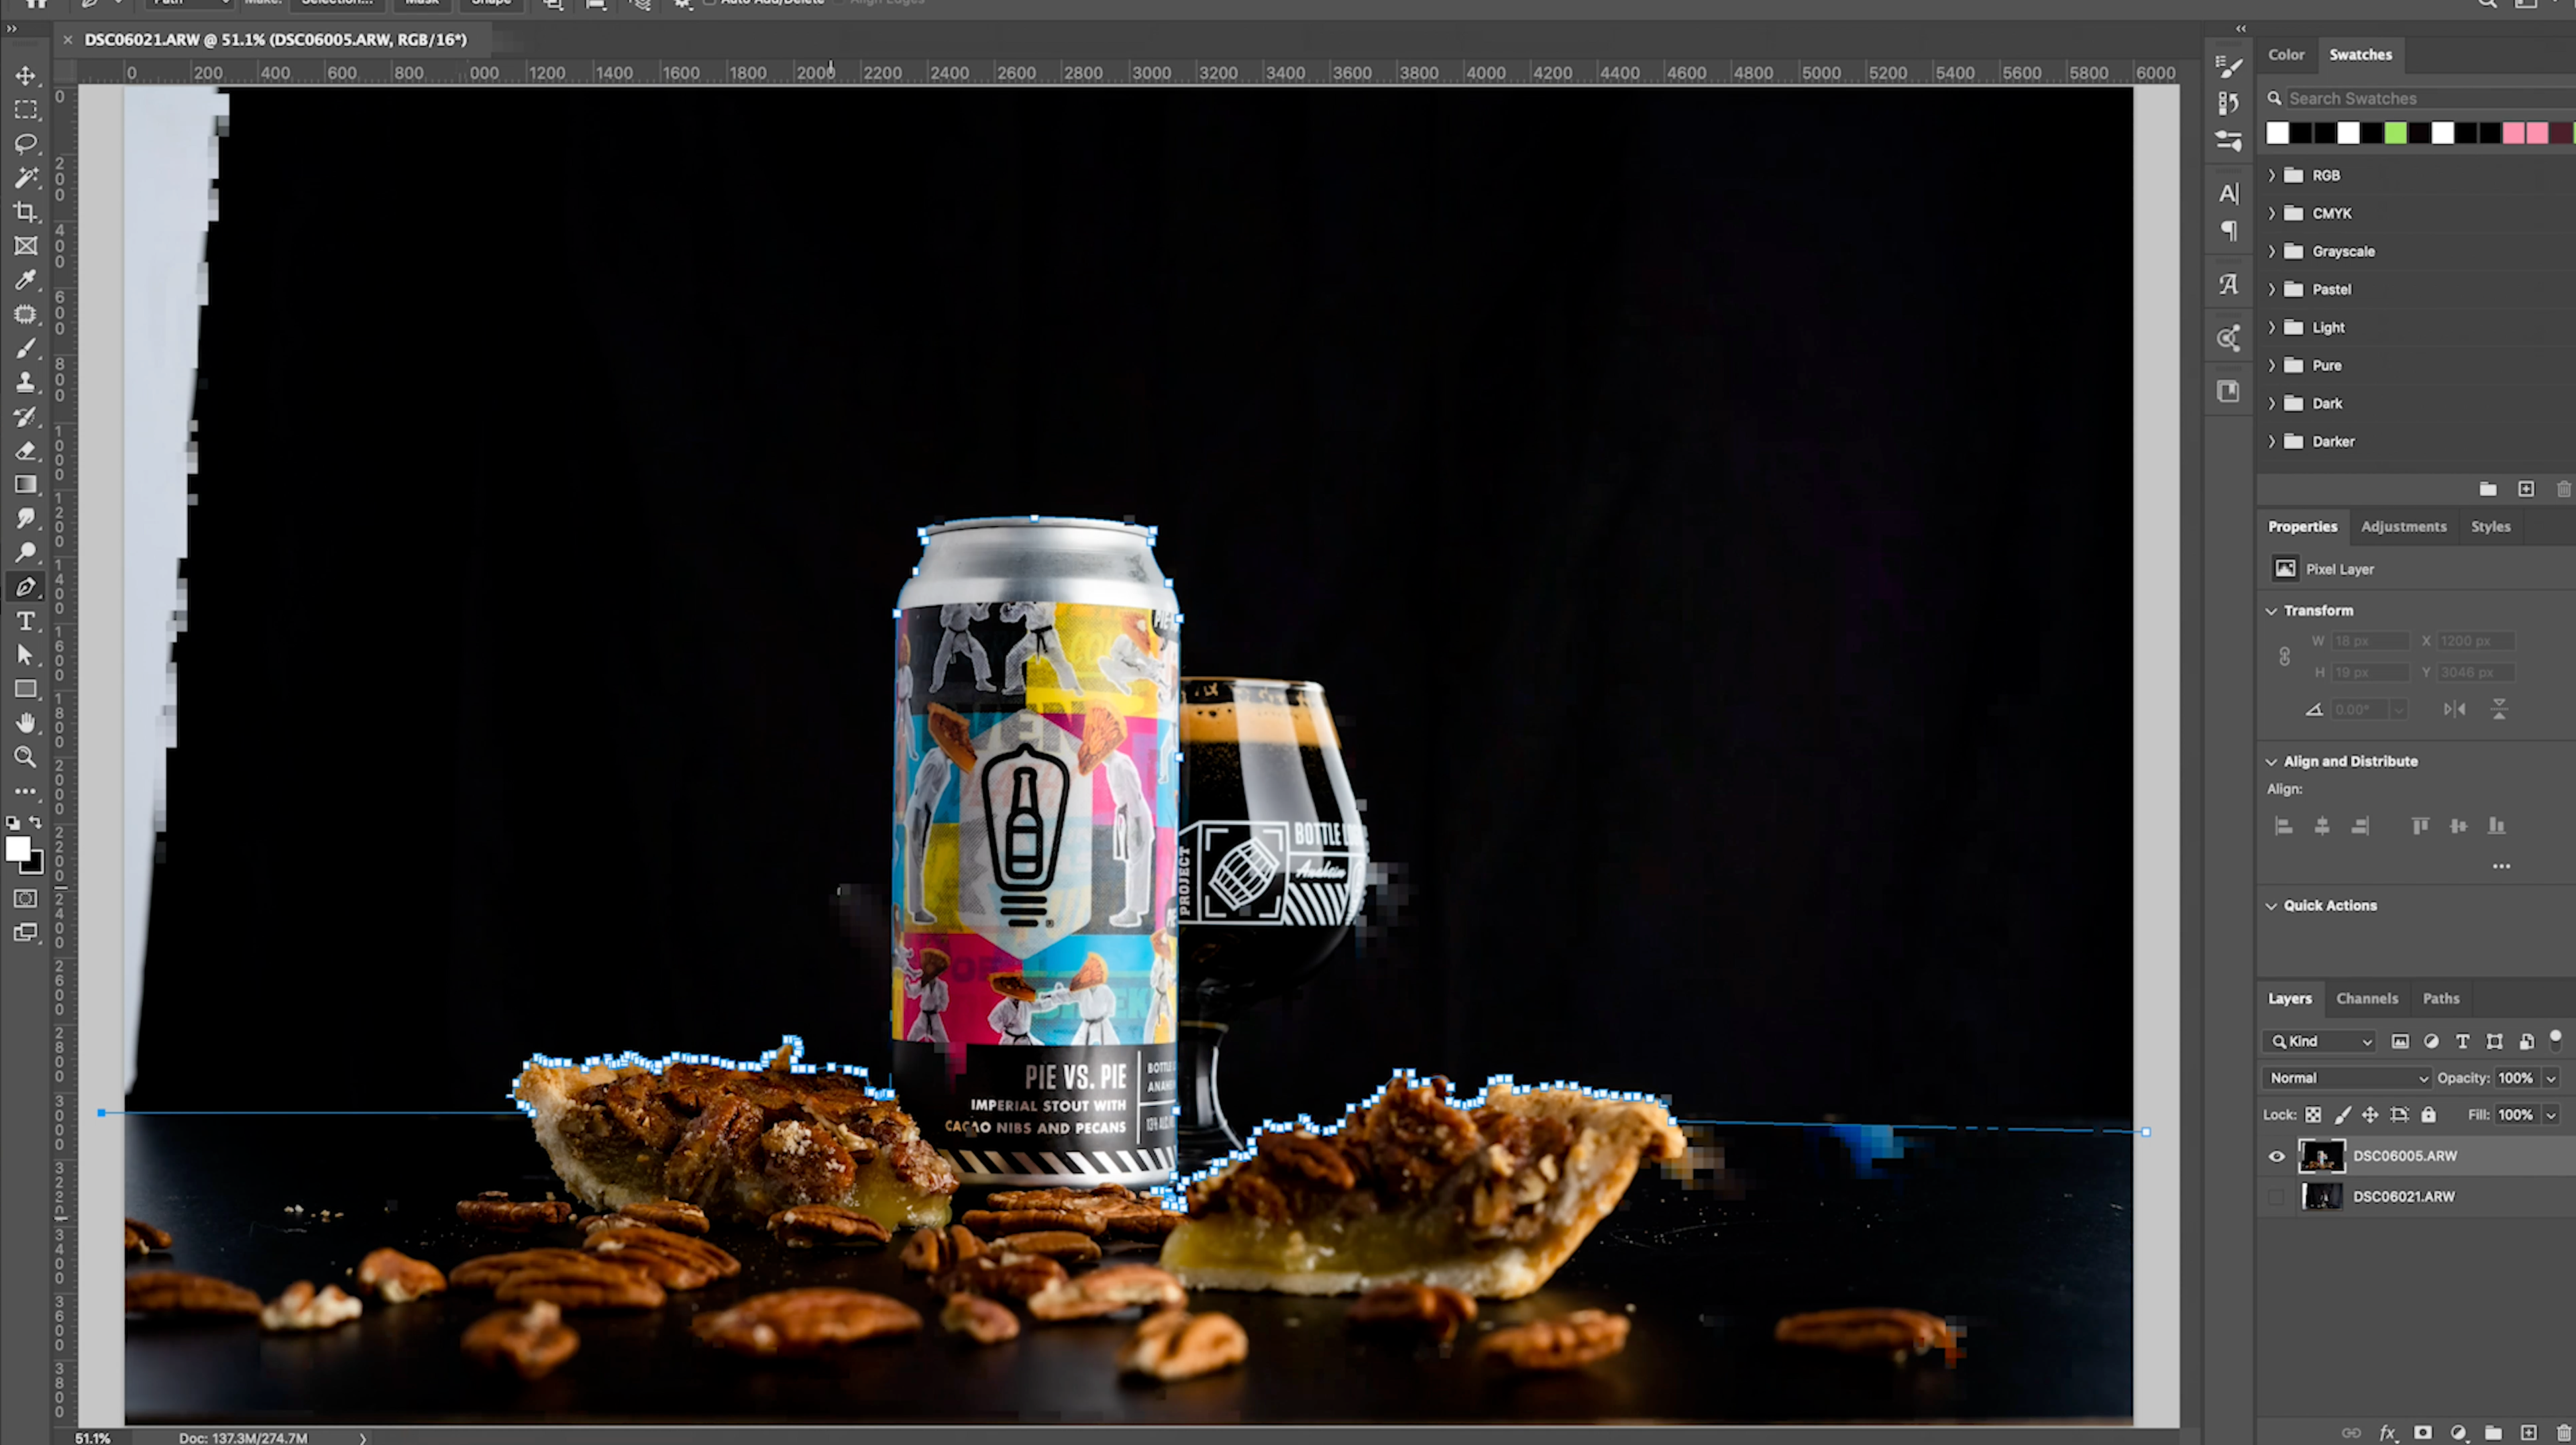
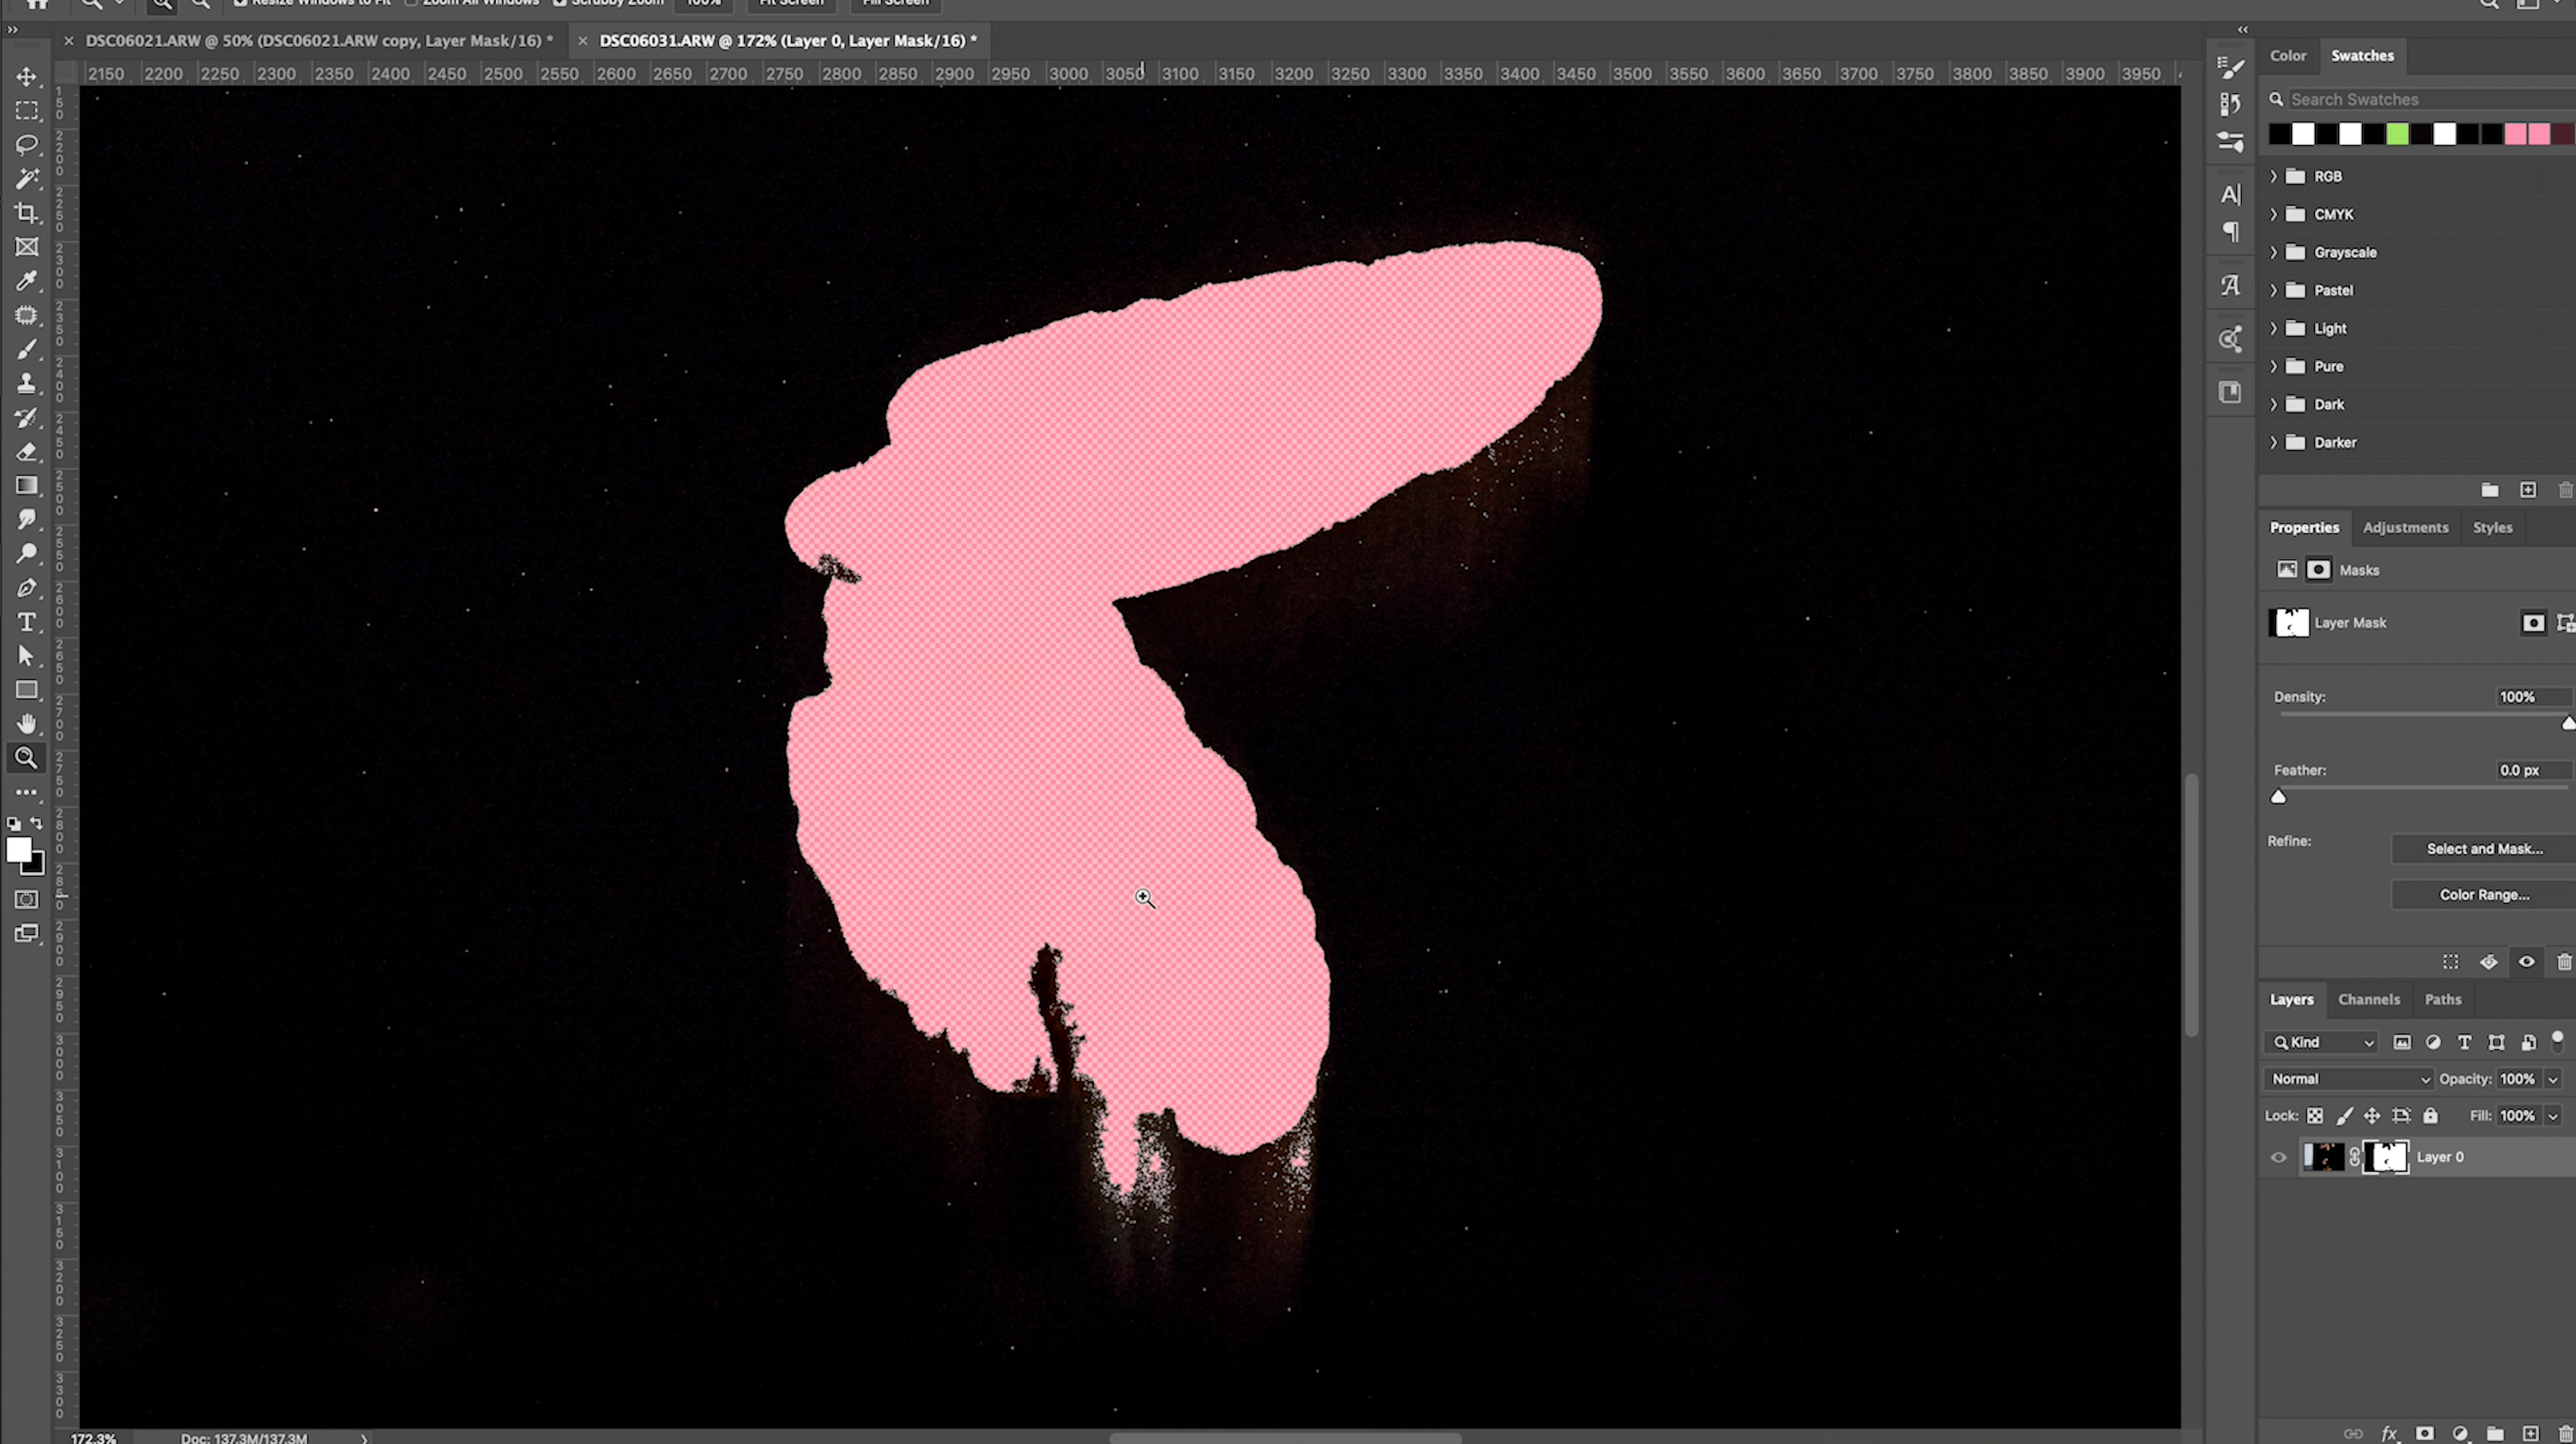
Once all your images have opened up into Photoshop we can get to editing. The first thing we are going to want to do is cut out the background, as well as the glass to allow us to add in glass with the splash. You can do this a number of ways, but the way I like to do it is by using the pen tool! All you have to do is to click to drop and anchor point that will create a path that you can turn into a layer mask.
Creating a Layer Mask
Once you have your image fully traced, you are going to "Right Click" scroll down to "Make Selection..." then apply a layer mask by clicking on the "Mask Icon" located at the bottom of your layers panel. This will automatically apply a layer mask according the the path that you just traced.
Once you have your image fully traced, you are going to "Right Click" scroll down to "Make Selection..." then apply a layer mask by clicking on the "Mask Icon" located at the bottom of your layers panel. This will automatically apply a layer mask according the the path that you just traced.
Next we are going to replace the background we just removed by adding in a new layer and filling it in with "Black" to create a nice smooth background.
Add in the Splash
Now here comes the fun part! We are going to add in the glass with the splash. You're going to start by "Disabling" the mask you just created and then dragging the splash layer on top of that layer then changing the "Blend Mode" to "Difference" This will help you align the splash layer with your original glass.
Now here comes the fun part! We are going to add in the glass with the splash. You're going to start by "Disabling" the mask you just created and then dragging the splash layer on top of that layer then changing the "Blend Mode" to "Difference" This will help you align the splash layer with your original glass.
Then once everything is aligned make sure you go a head and flip that "Blend Mode" back to "Normal" and then "Re-Enable" your layer mask on your can layer.
Then you're going to go back in with the pen tool tracing your glass and any splash coming directly out of it. Don't worry about any of the spray as we will be adding that back in, in a different way. Once you've finished tracing your splash, go ahead and apply a "layer mask" just like you did before. Then if you want to go in and fine tune things you can add a slight feather to your layer mask. We can go ahead and add a "1 pixel" feather. This will help soften our edges and help blend our splash in with the background.
Adding in the Spray back from our Splash
From there you're going to want to add in the spray back from your splash. You can do this by duplicating your splash layer underneath your original splash layer. You can do this by hold down the "alt" or "opt" key and clicking on the layer you want to duplicate then drag down inside your layers panel to duplicate.
From there you're going to want to add in the spray back from your splash. You can do this by duplicating your splash layer underneath your original splash layer. You can do this by hold down the "alt" or "opt" key and clicking on the layer you want to duplicate then drag down inside your layers panel to duplicate.
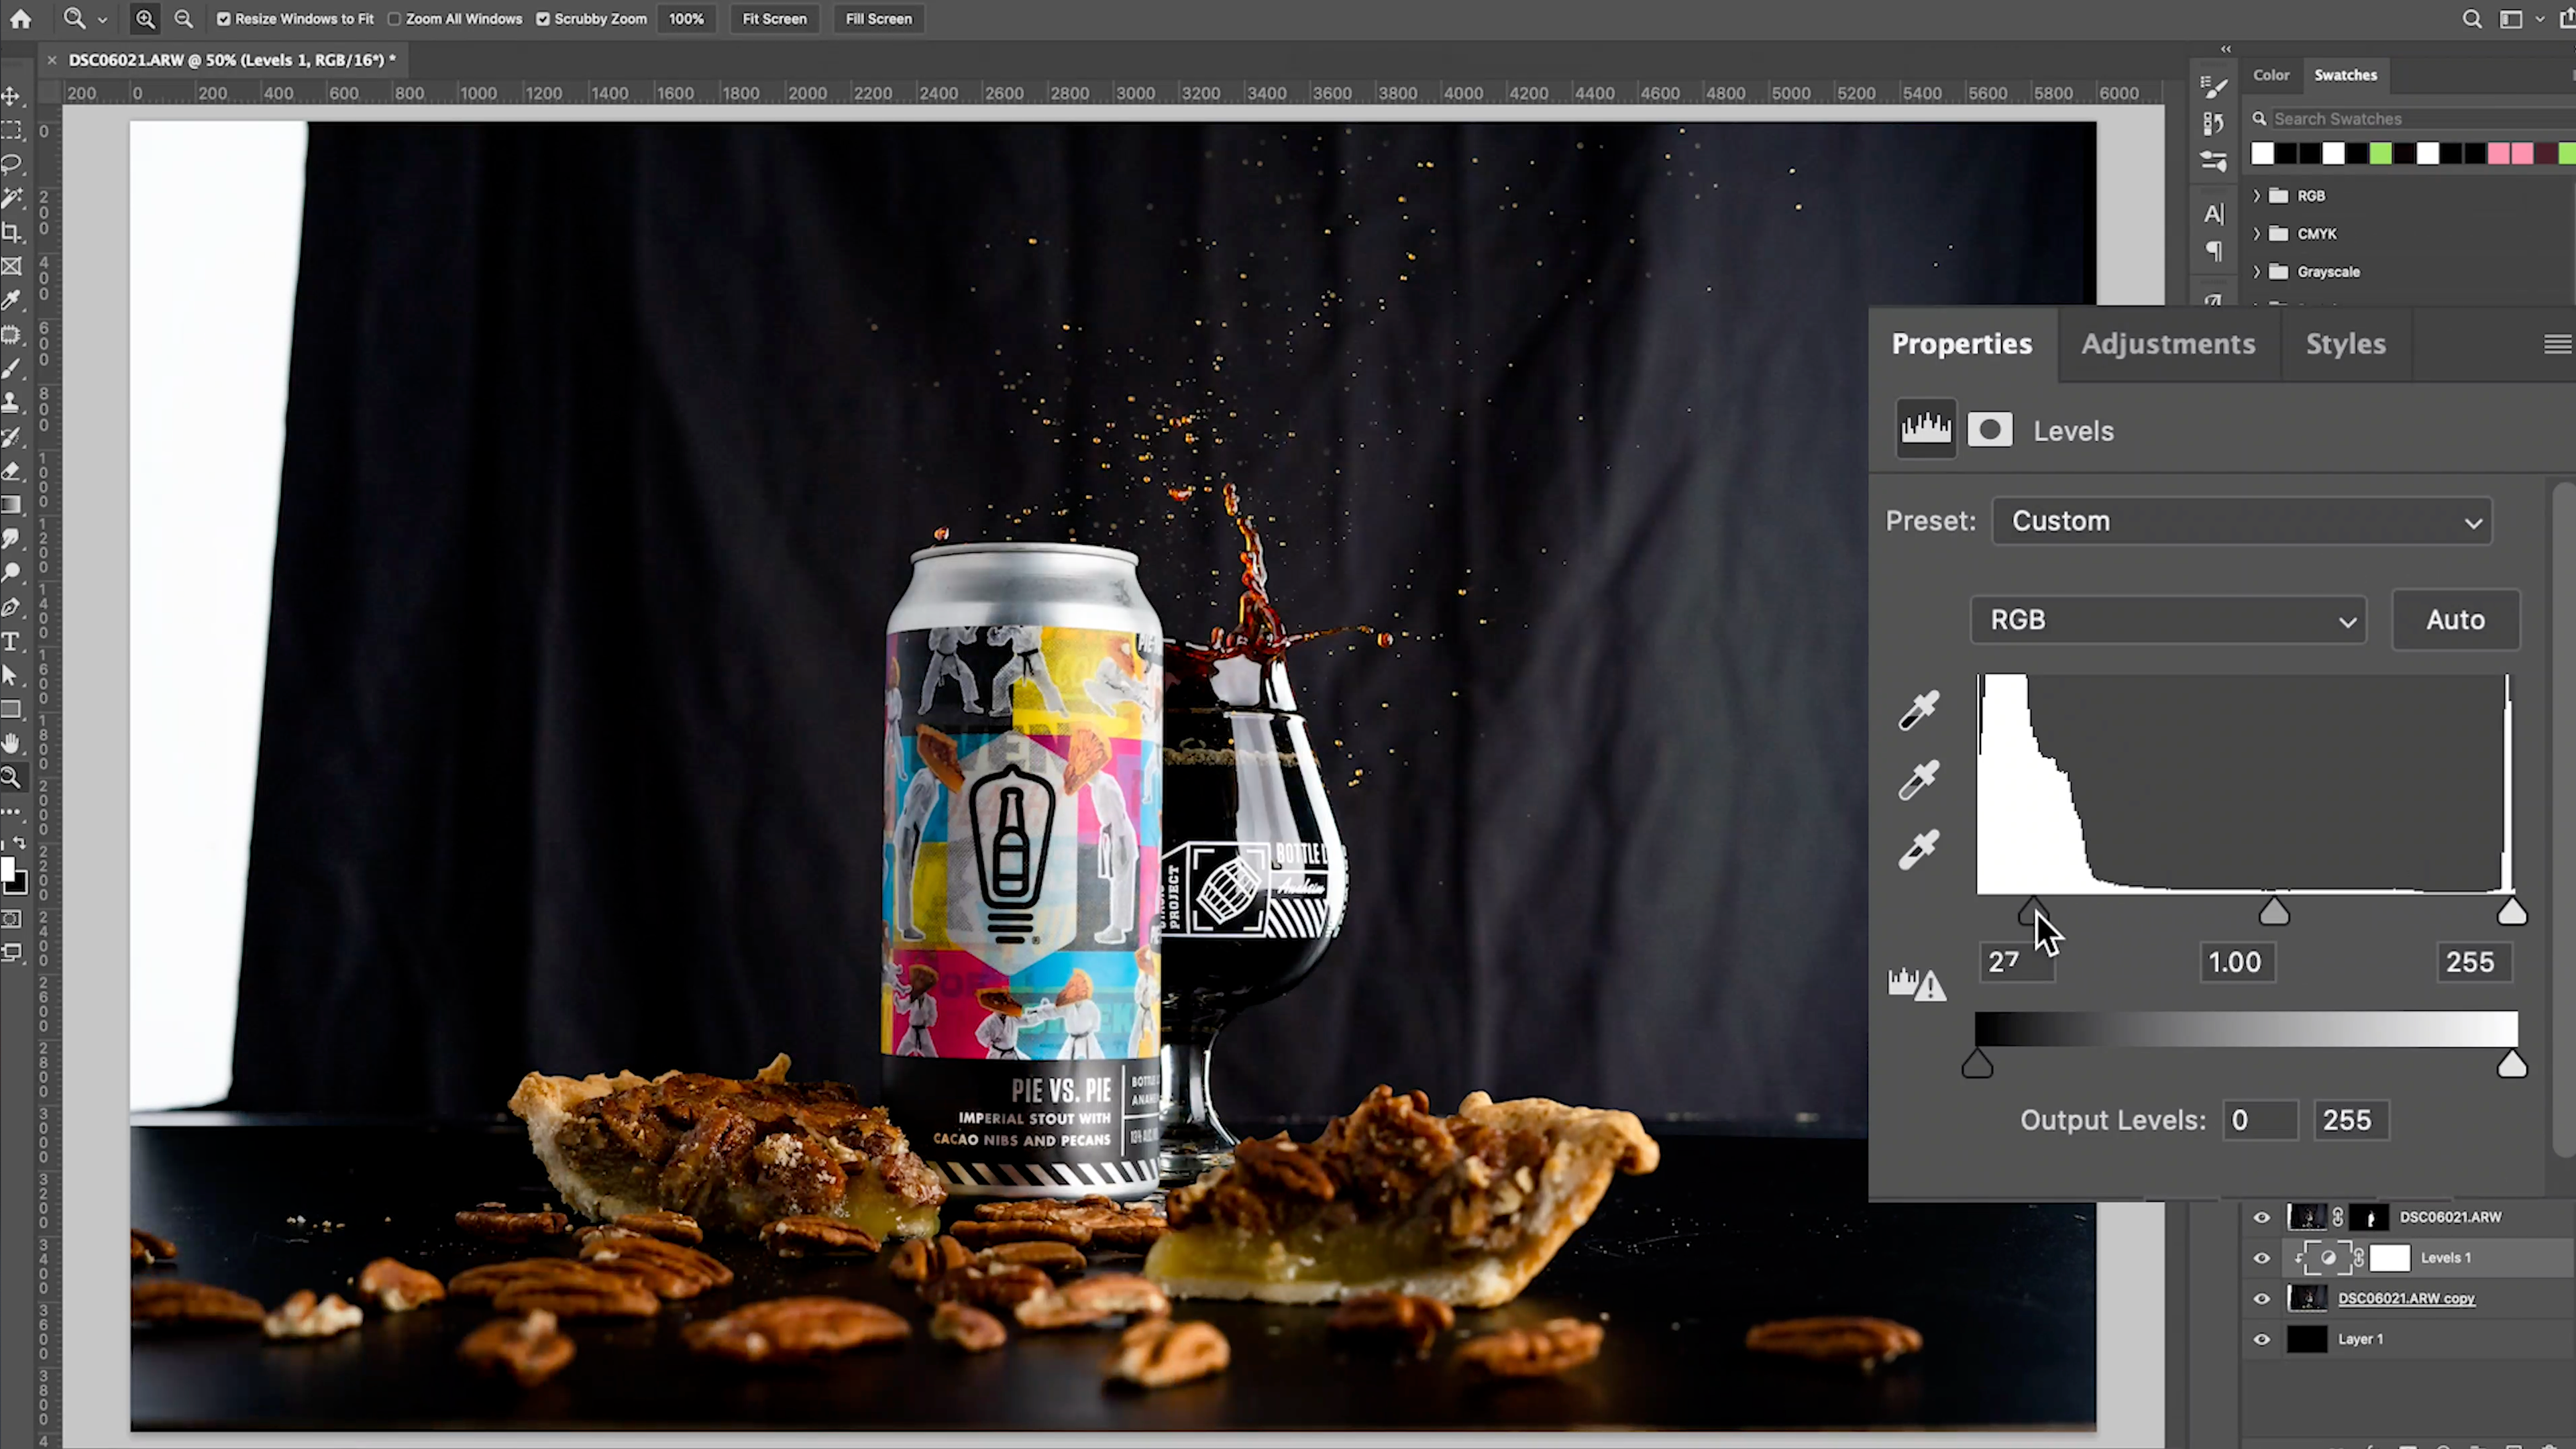
Next you're going to add in a "Levels Adjustment Layer" and then clip it to your spray layer by holding down the "alt" or "opt" key. This "Levels Adjustment Layer" is going to help clean things up in our background. Start by dragging your blacks and mids until you have a nice clean spray image.
And to clean things up even more you can "Add a Layer Mask" then use the "Brush" (B) tool to paint out any unwanted wrinkles or anything like my softbox on the left side.
Composite All the Falling Elements
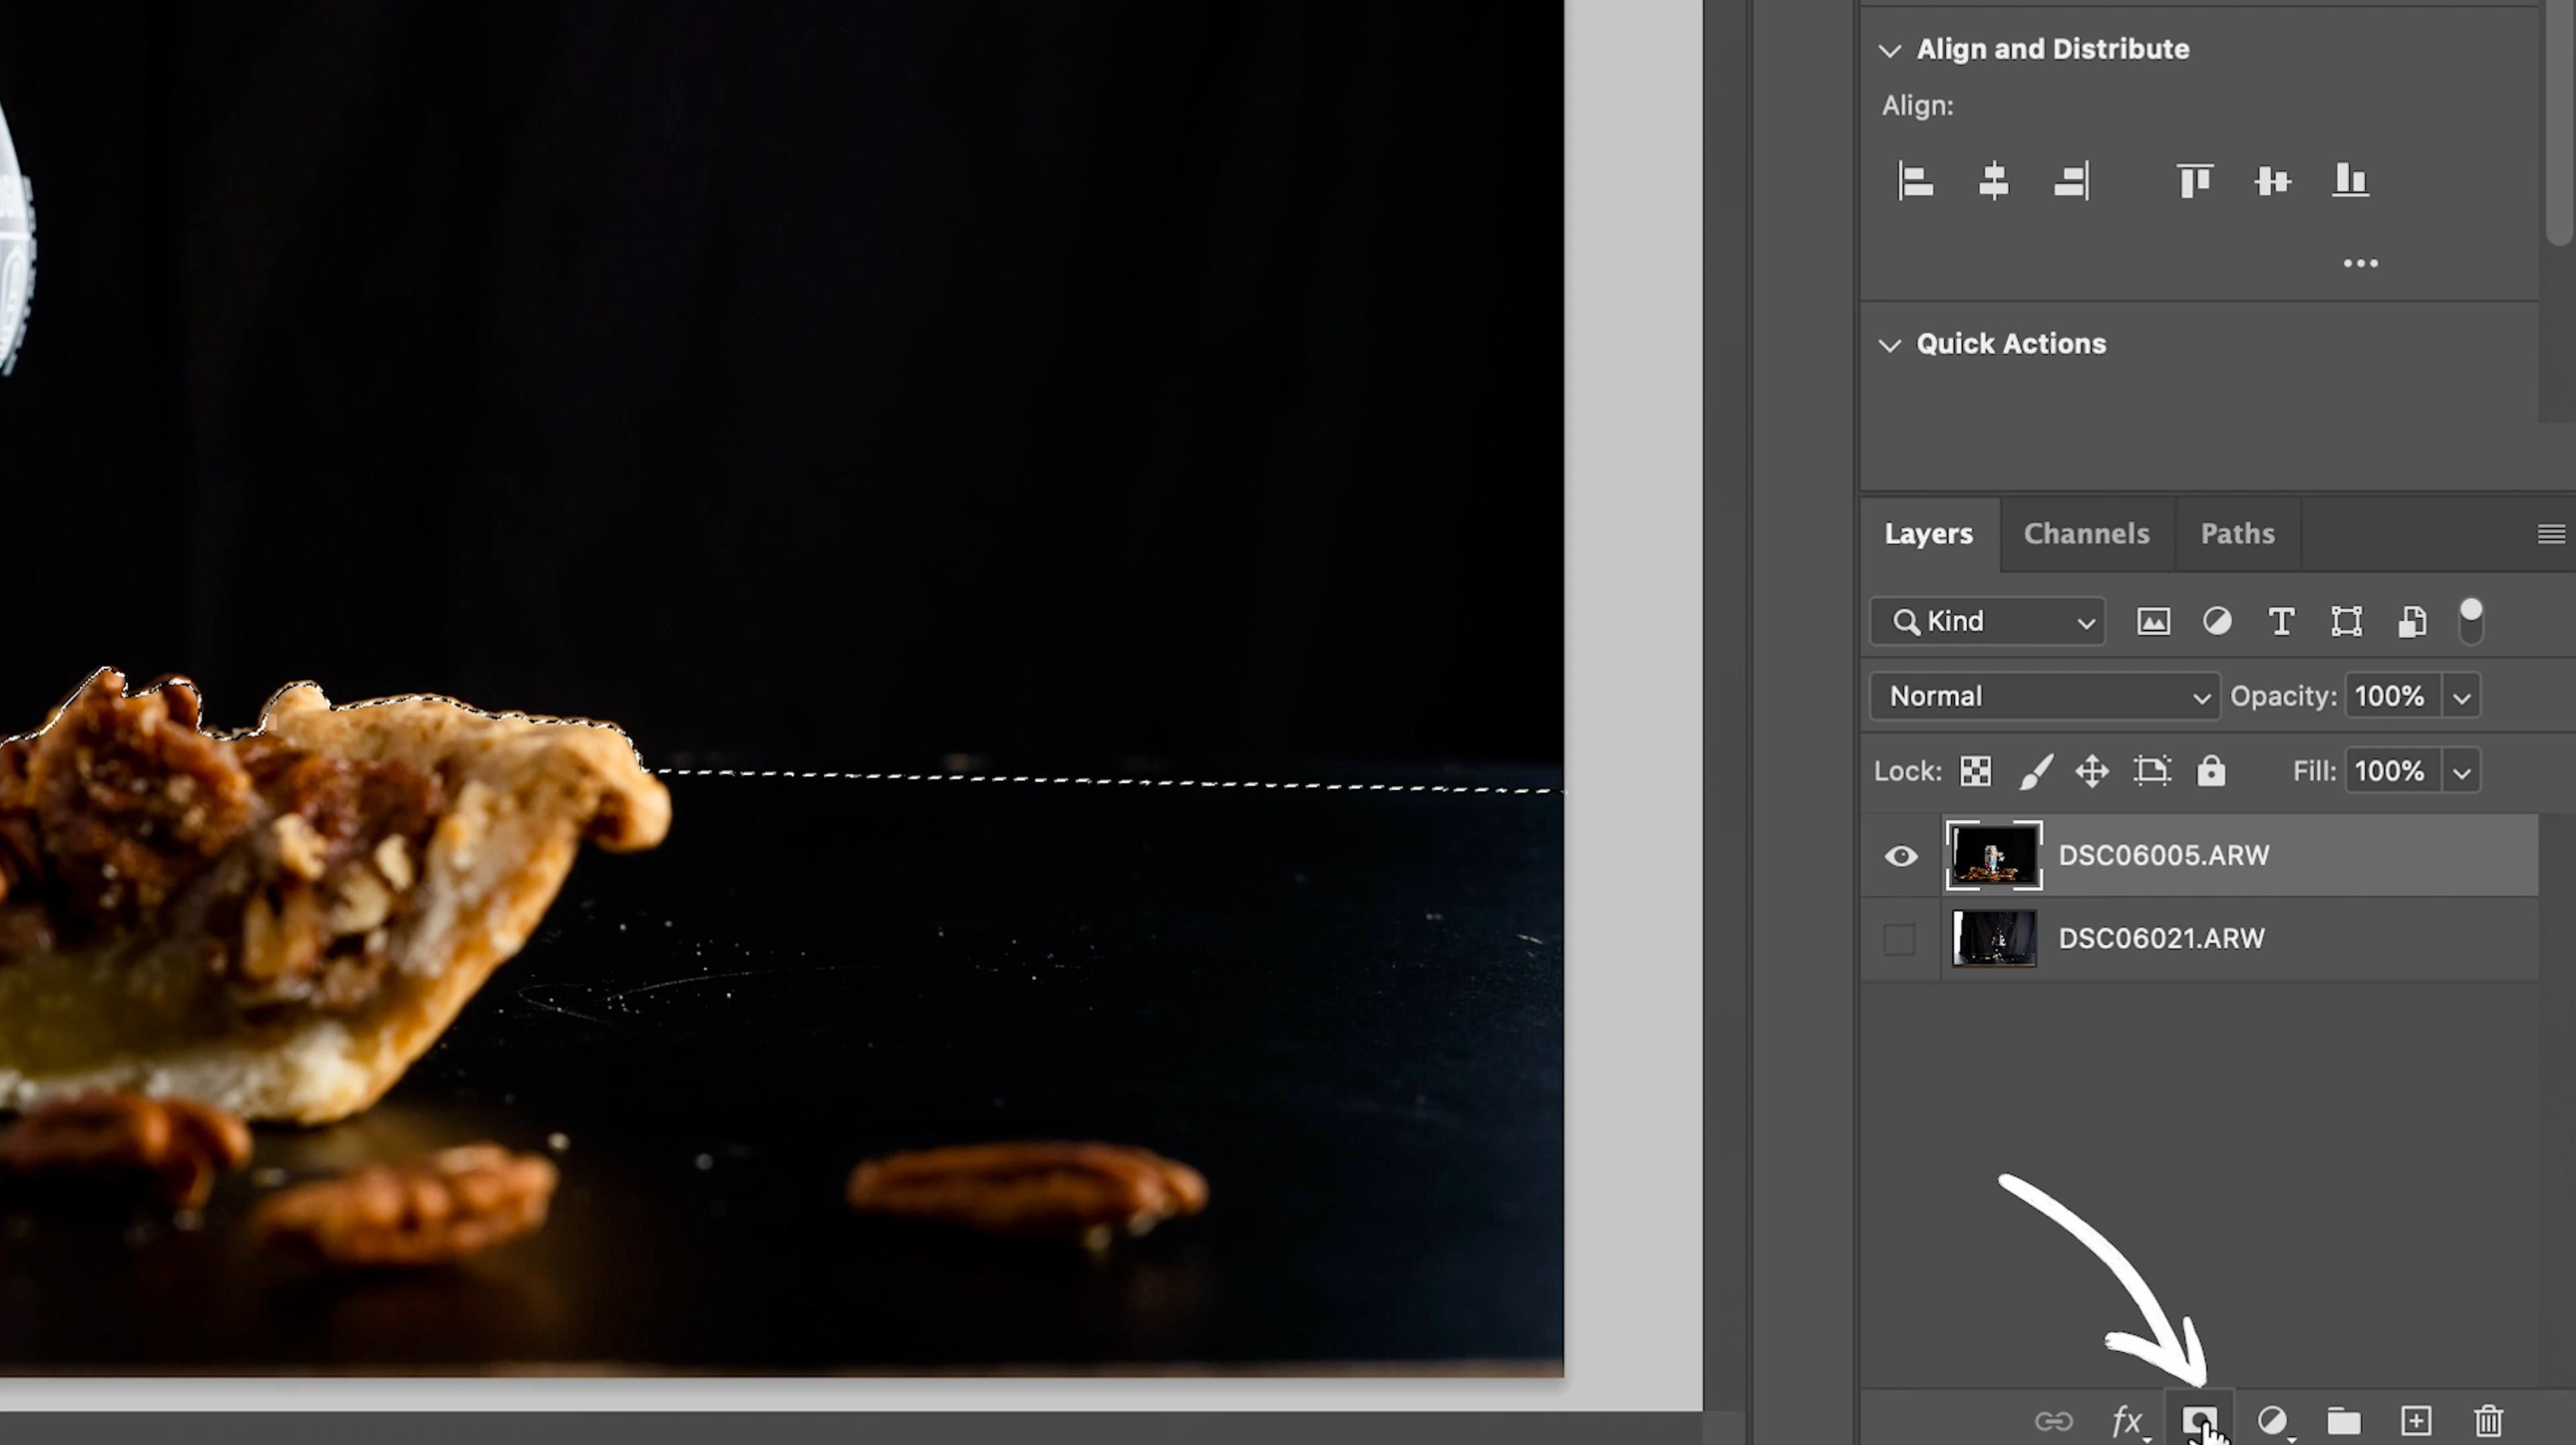
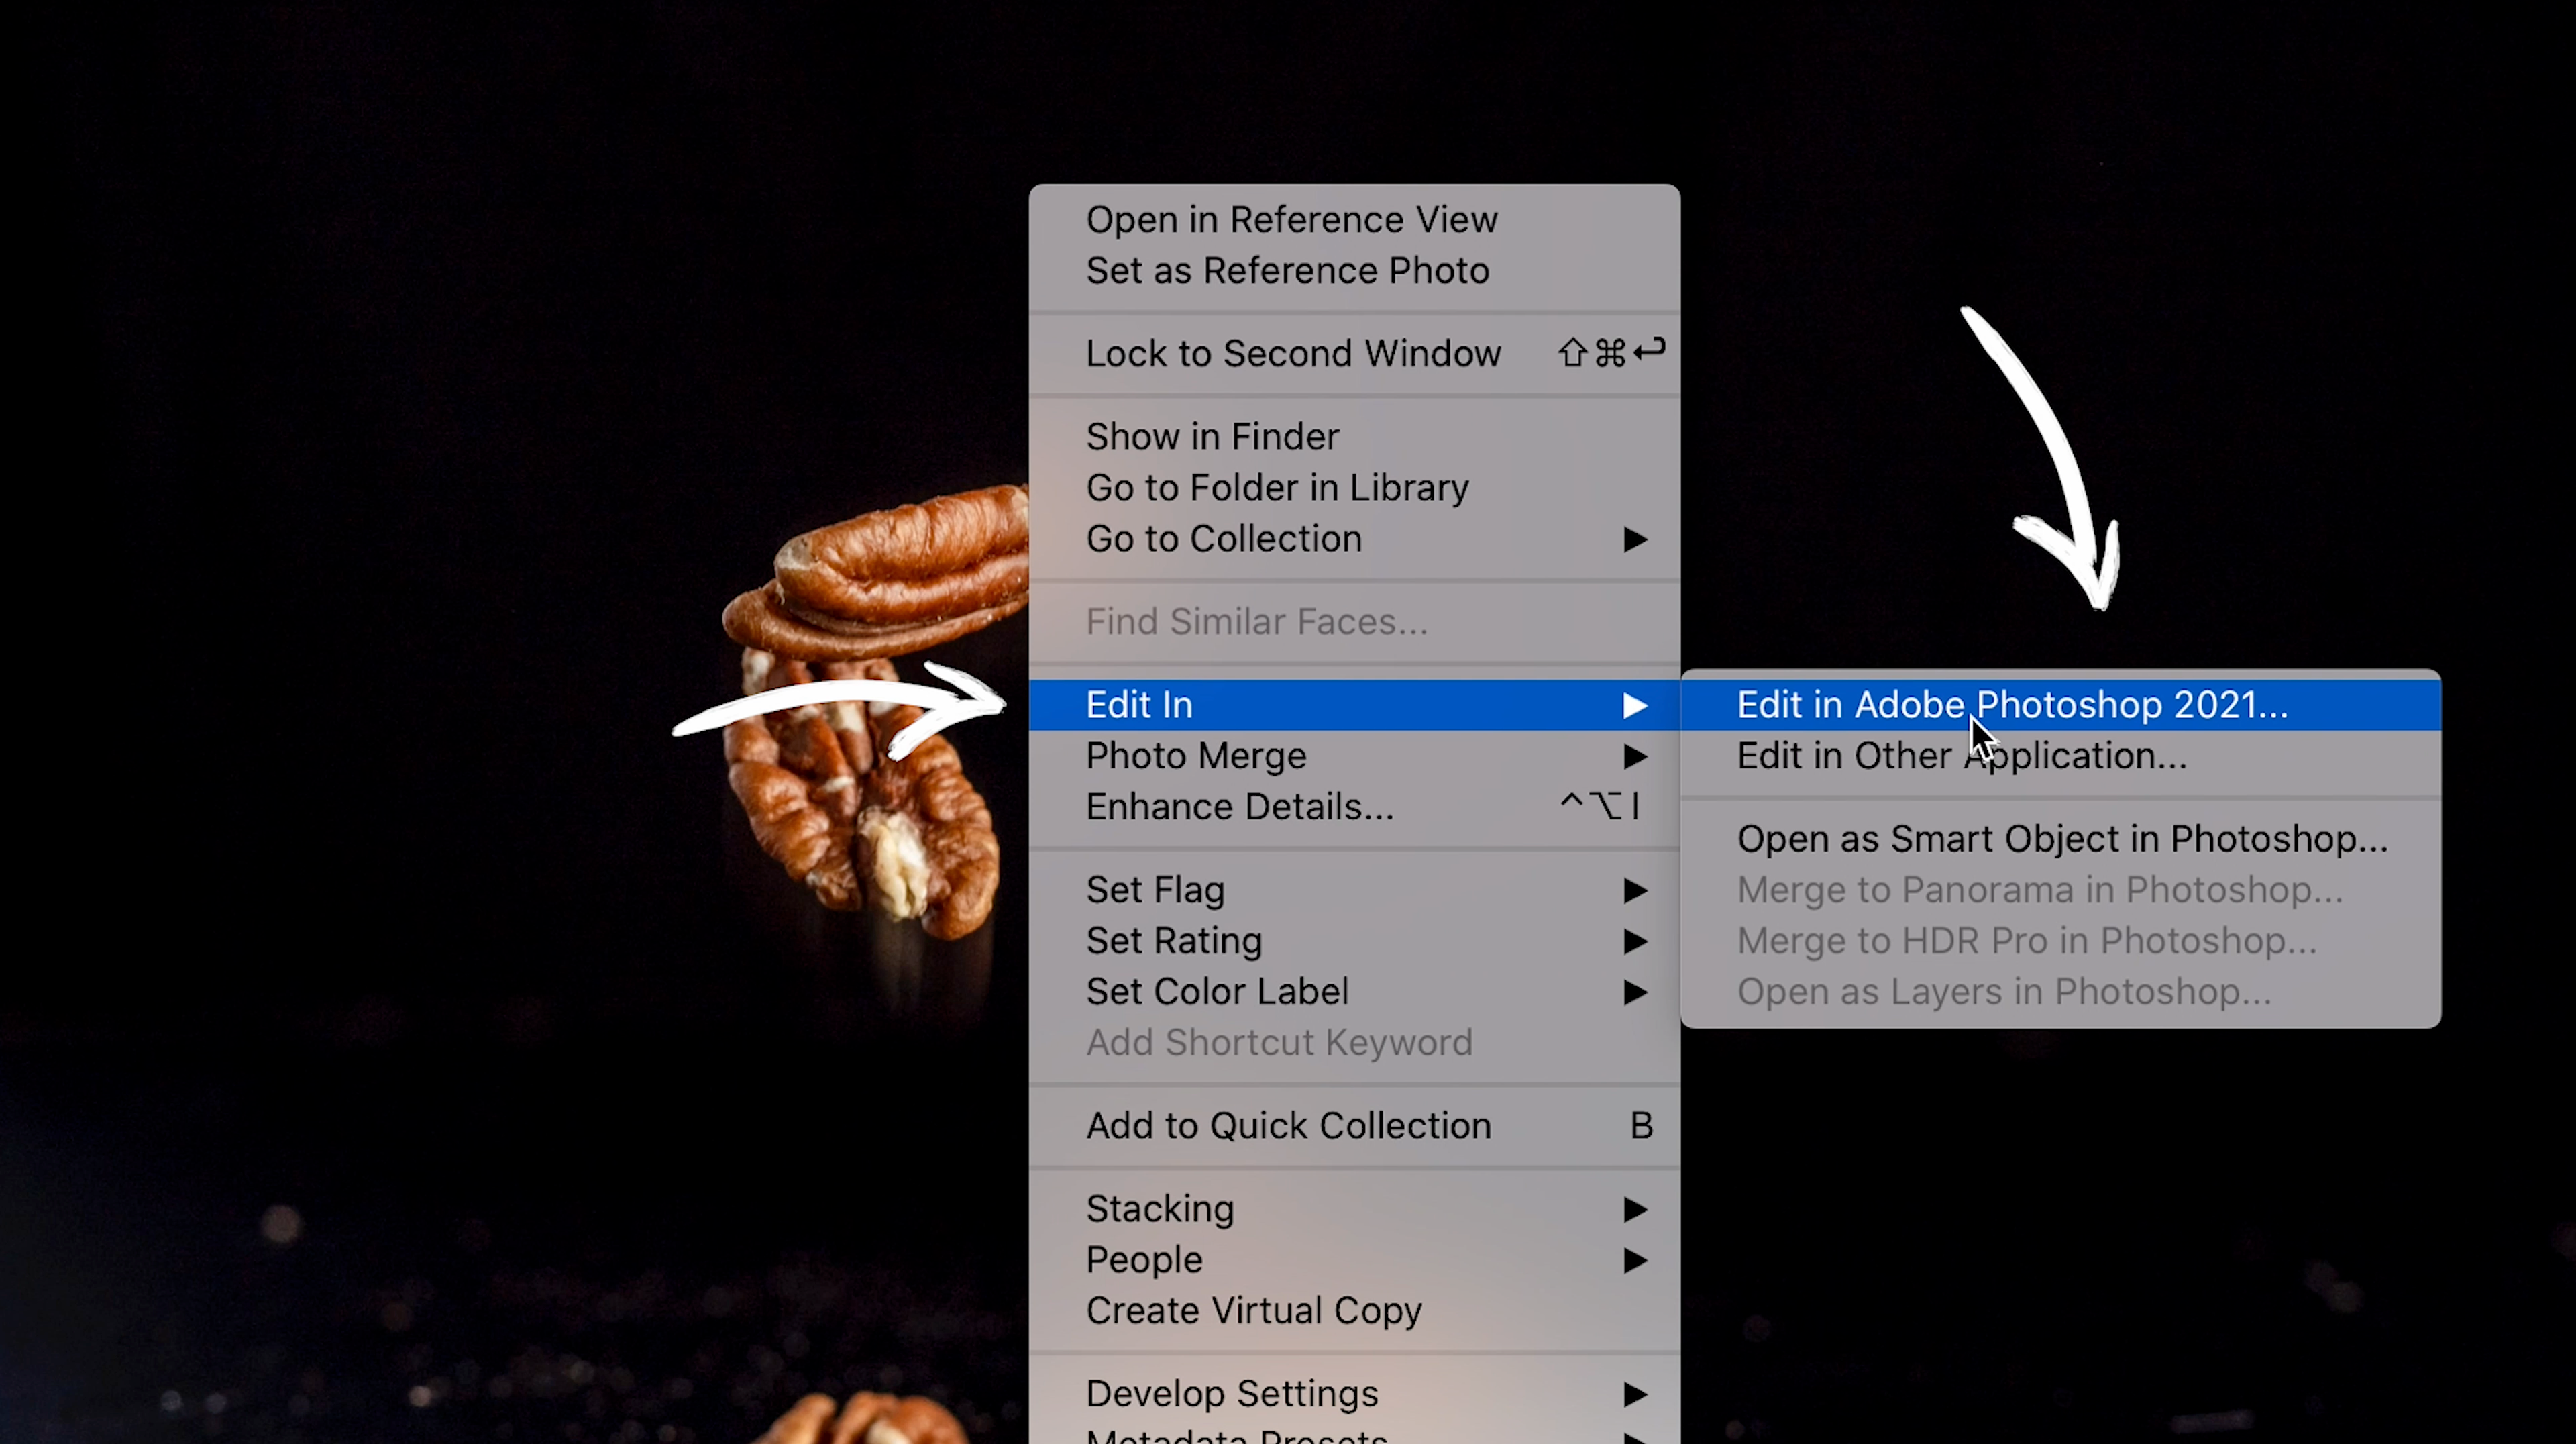
Now that we've added in our splash we can go ahead and add in all our falling elements, which in this case will be the pecans. We're going to jump back into Lightroom to check out what images we captured. Let's go ahead and pick a few for this photo, then open them up into Photoshop. You can do this by "Right Clicking" scrolling down to "Edit In" then selecting "Edit in Adobe Photoshop 2021..."
Now that we've added in our splash we can go ahead and add in all our falling elements, which in this case will be the pecans. We're going to jump back into Lightroom to check out what images we captured. Let's go ahead and pick a few for this photo, then open them up into Photoshop. You can do this by "Right Clicking" scrolling down to "Edit In" then selecting "Edit in Adobe Photoshop 2021..."
Once your new files have opened up into Photoshop you can either cut them out using the Pen Tool or the quick and dirty way, which is the "Magic Wand Tool" (W). Which in this case we have a solid background, so using the Magic Wand Tool we will only have to do a few minor adjustments.
You can start by "Selecting" the background using your "Magic Wand Tool" then applying a "Layer Mask", once your mask as been applied go ahead and hit the "Back Slash Key" this will help you see where your mask as already been applied. Then using the "Brush Tool" (B) you can go in and clean up a few things. From here we're just going to "Invert" (CMD/CTRL + I) our mask to see how things are looking. And then go ahead and tweak things as needed.
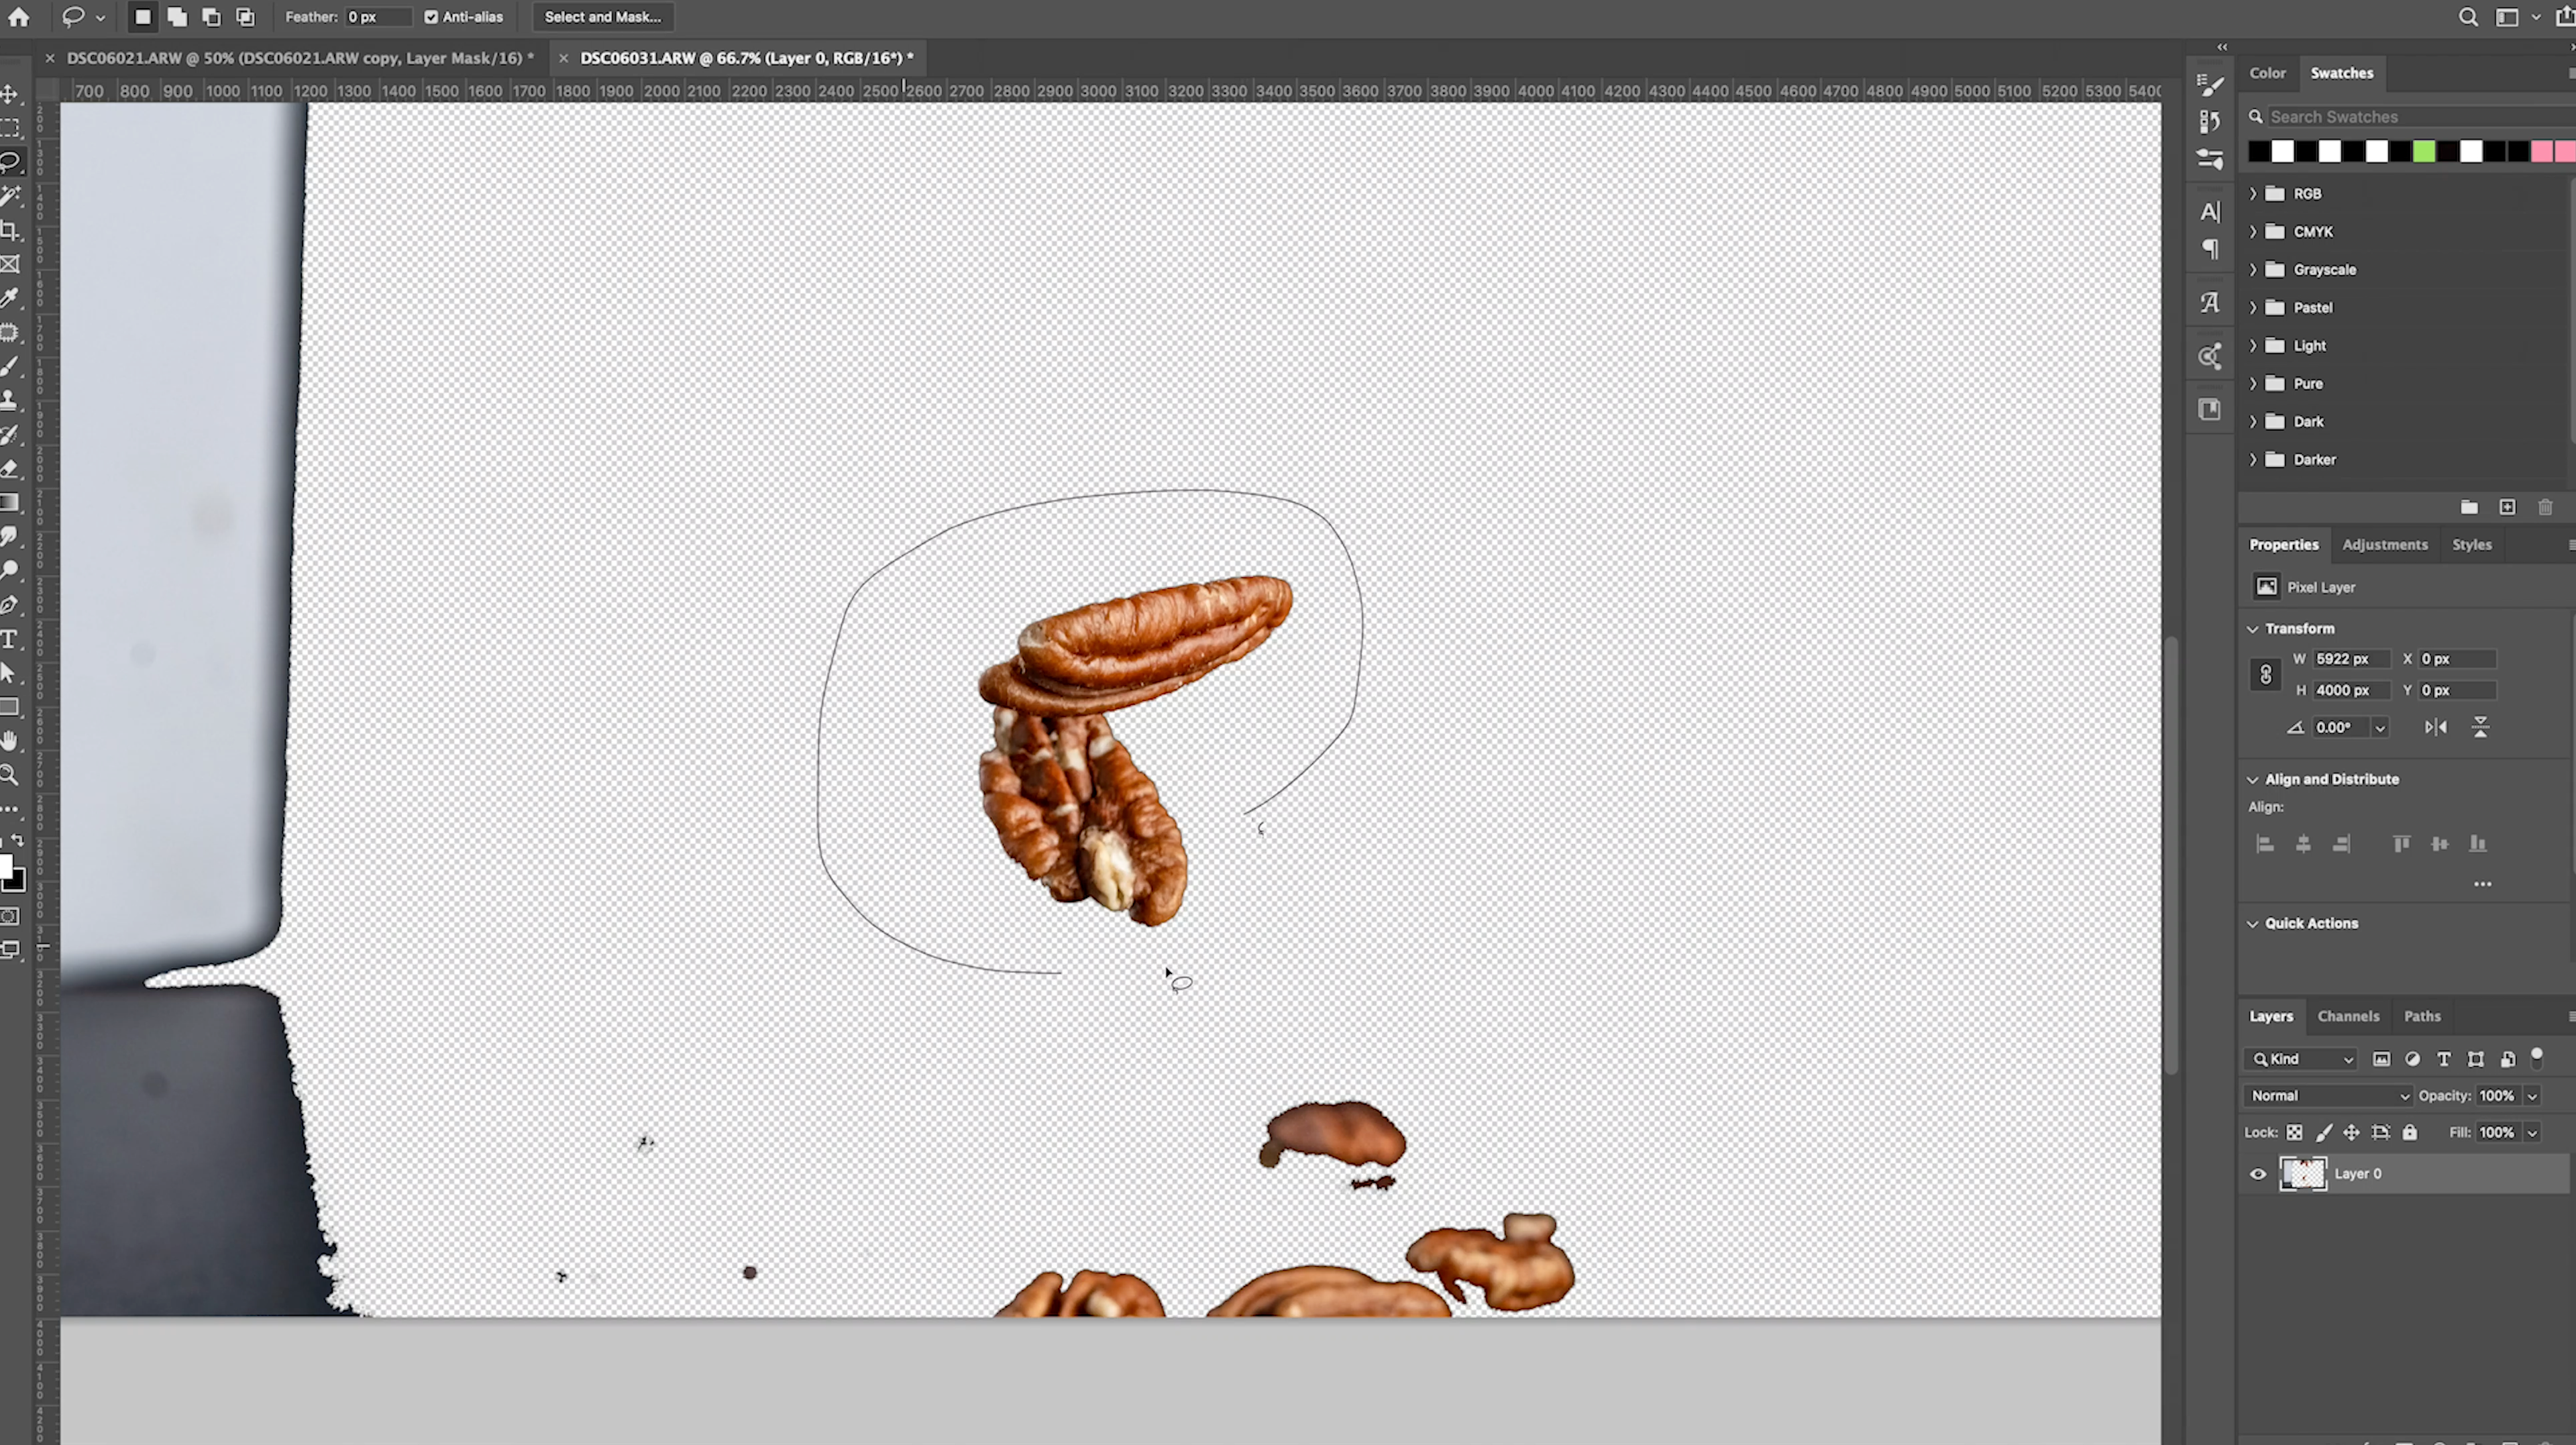
Once you have your mask where you want it, go a head and add a subtle feather to help clean things up a bit, I like to add a "1 pixel" feather to my masks. Once. you've done that go a head and apply your layer mask and use the "Lasso Tool" (L) to select your object, then "Copy" (CMD/CTRL + C) your object over to your original document.
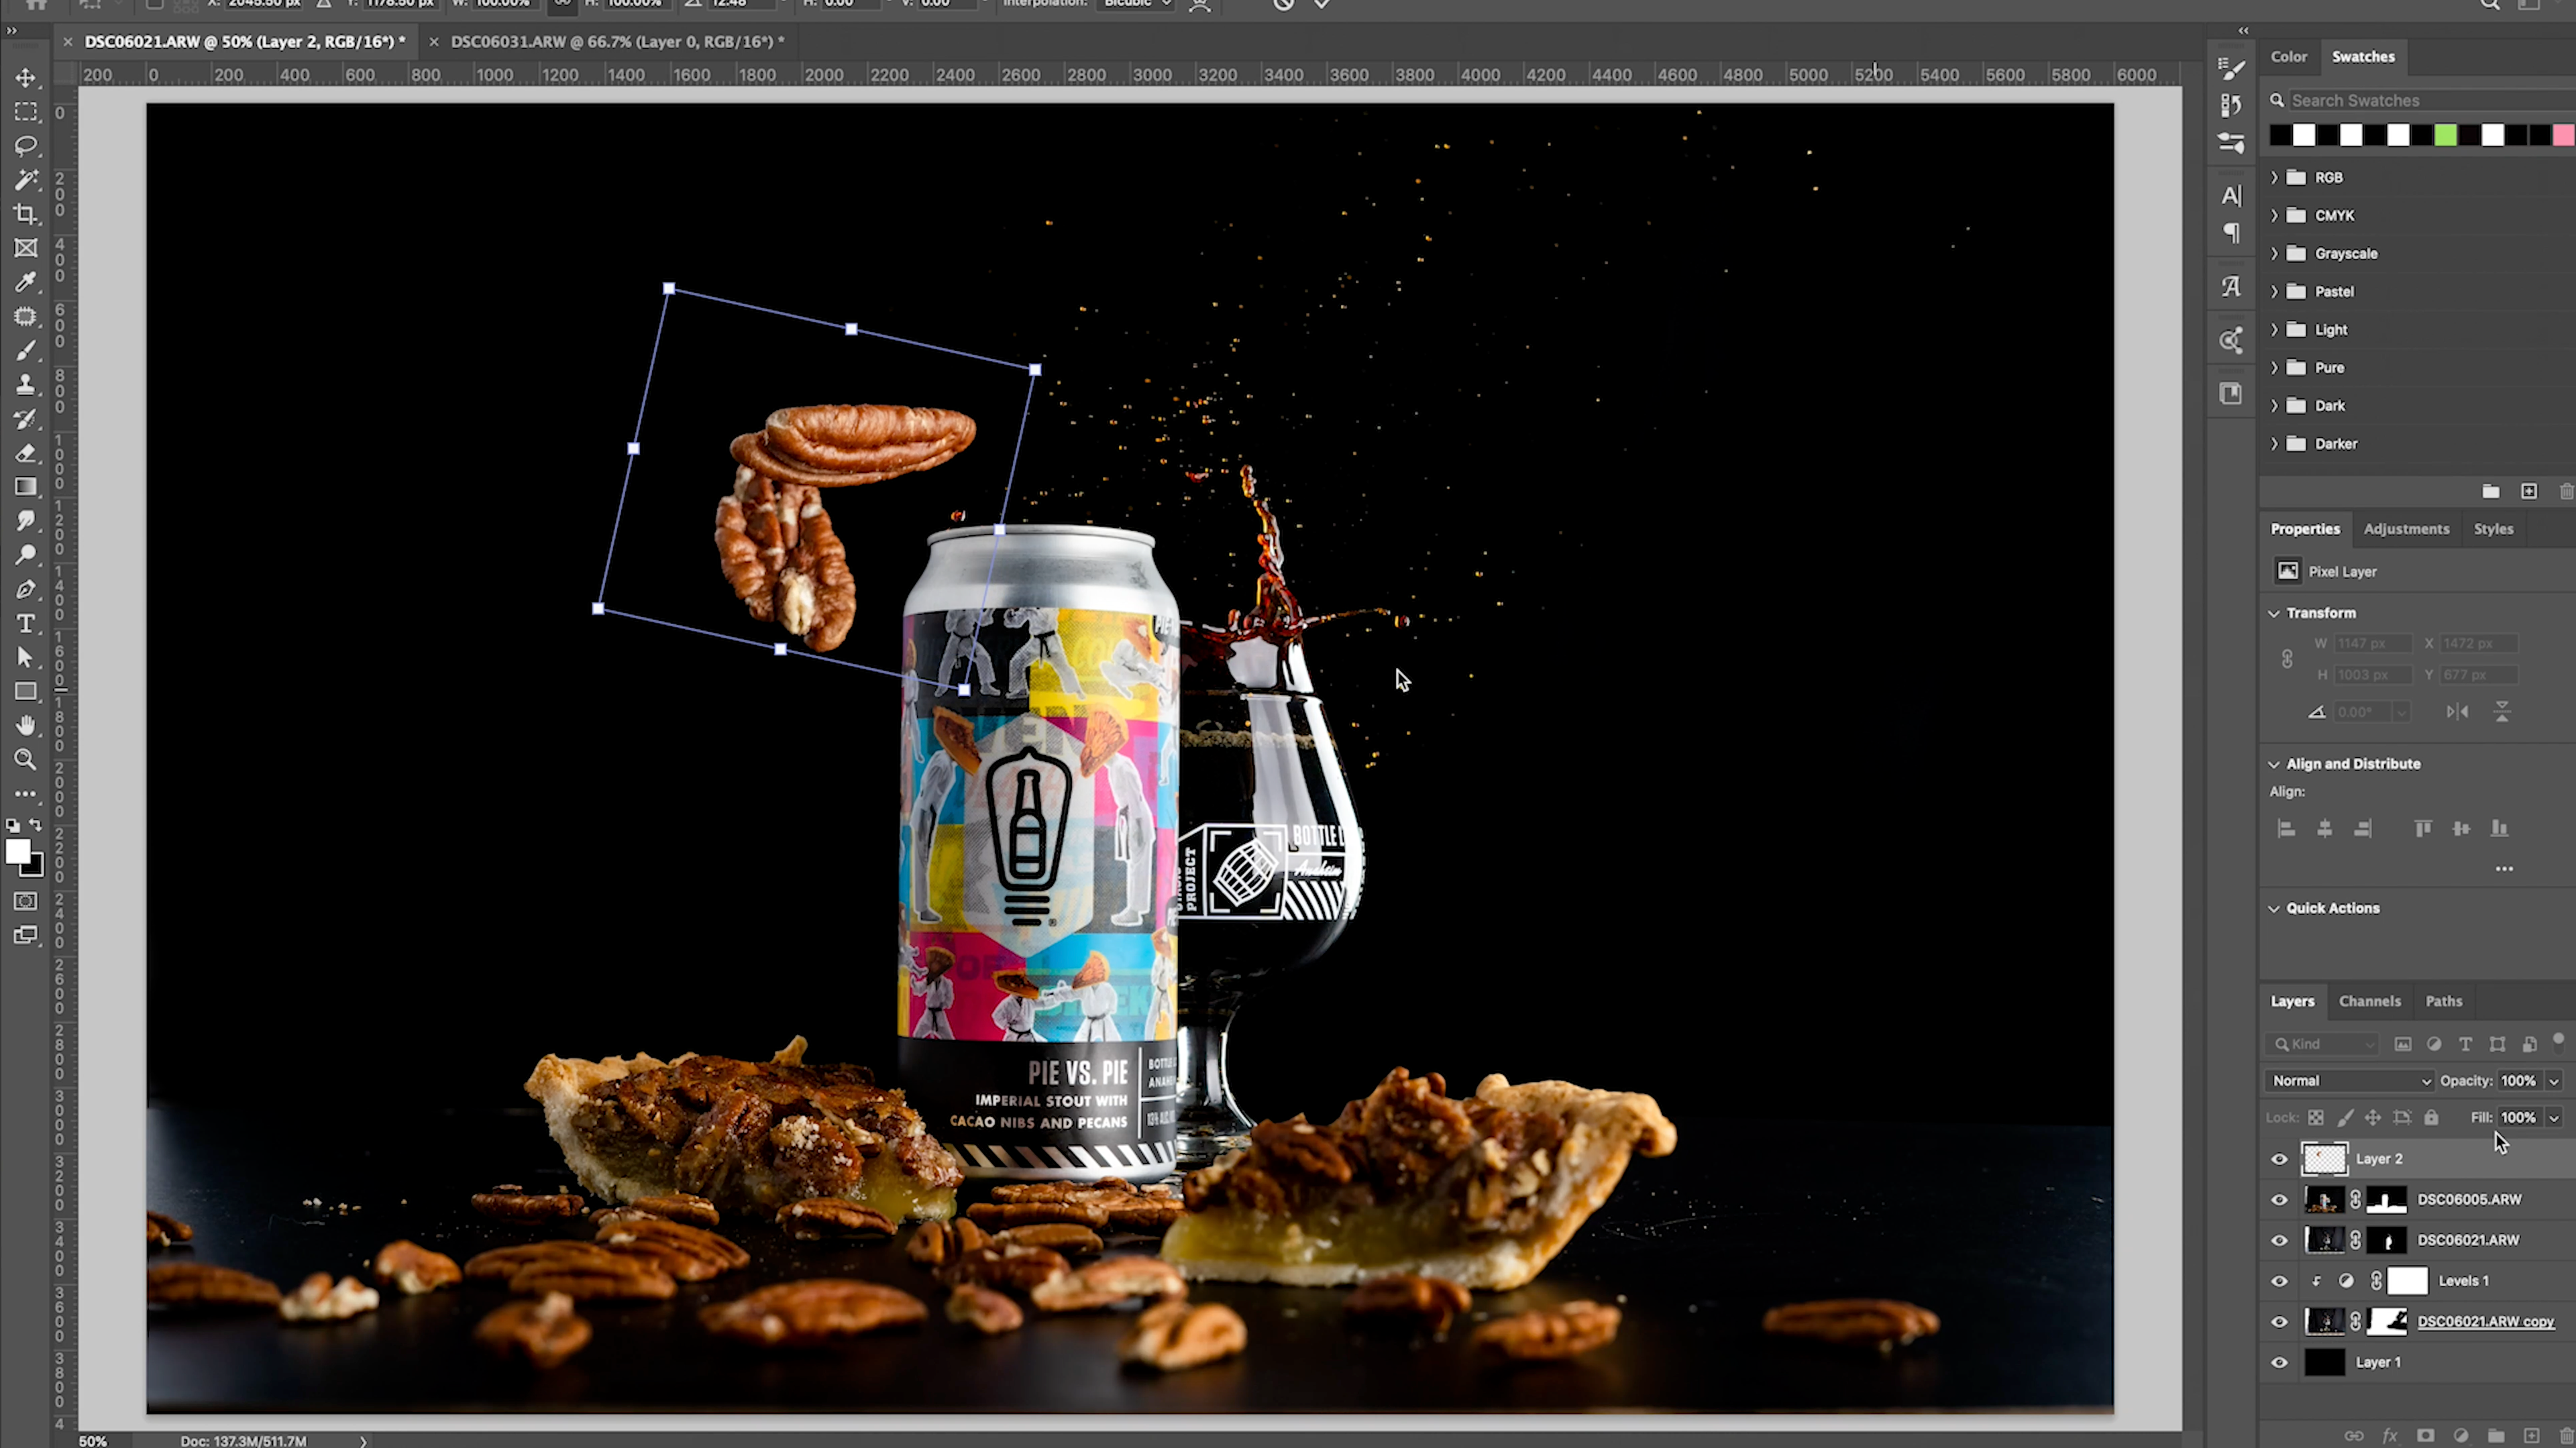
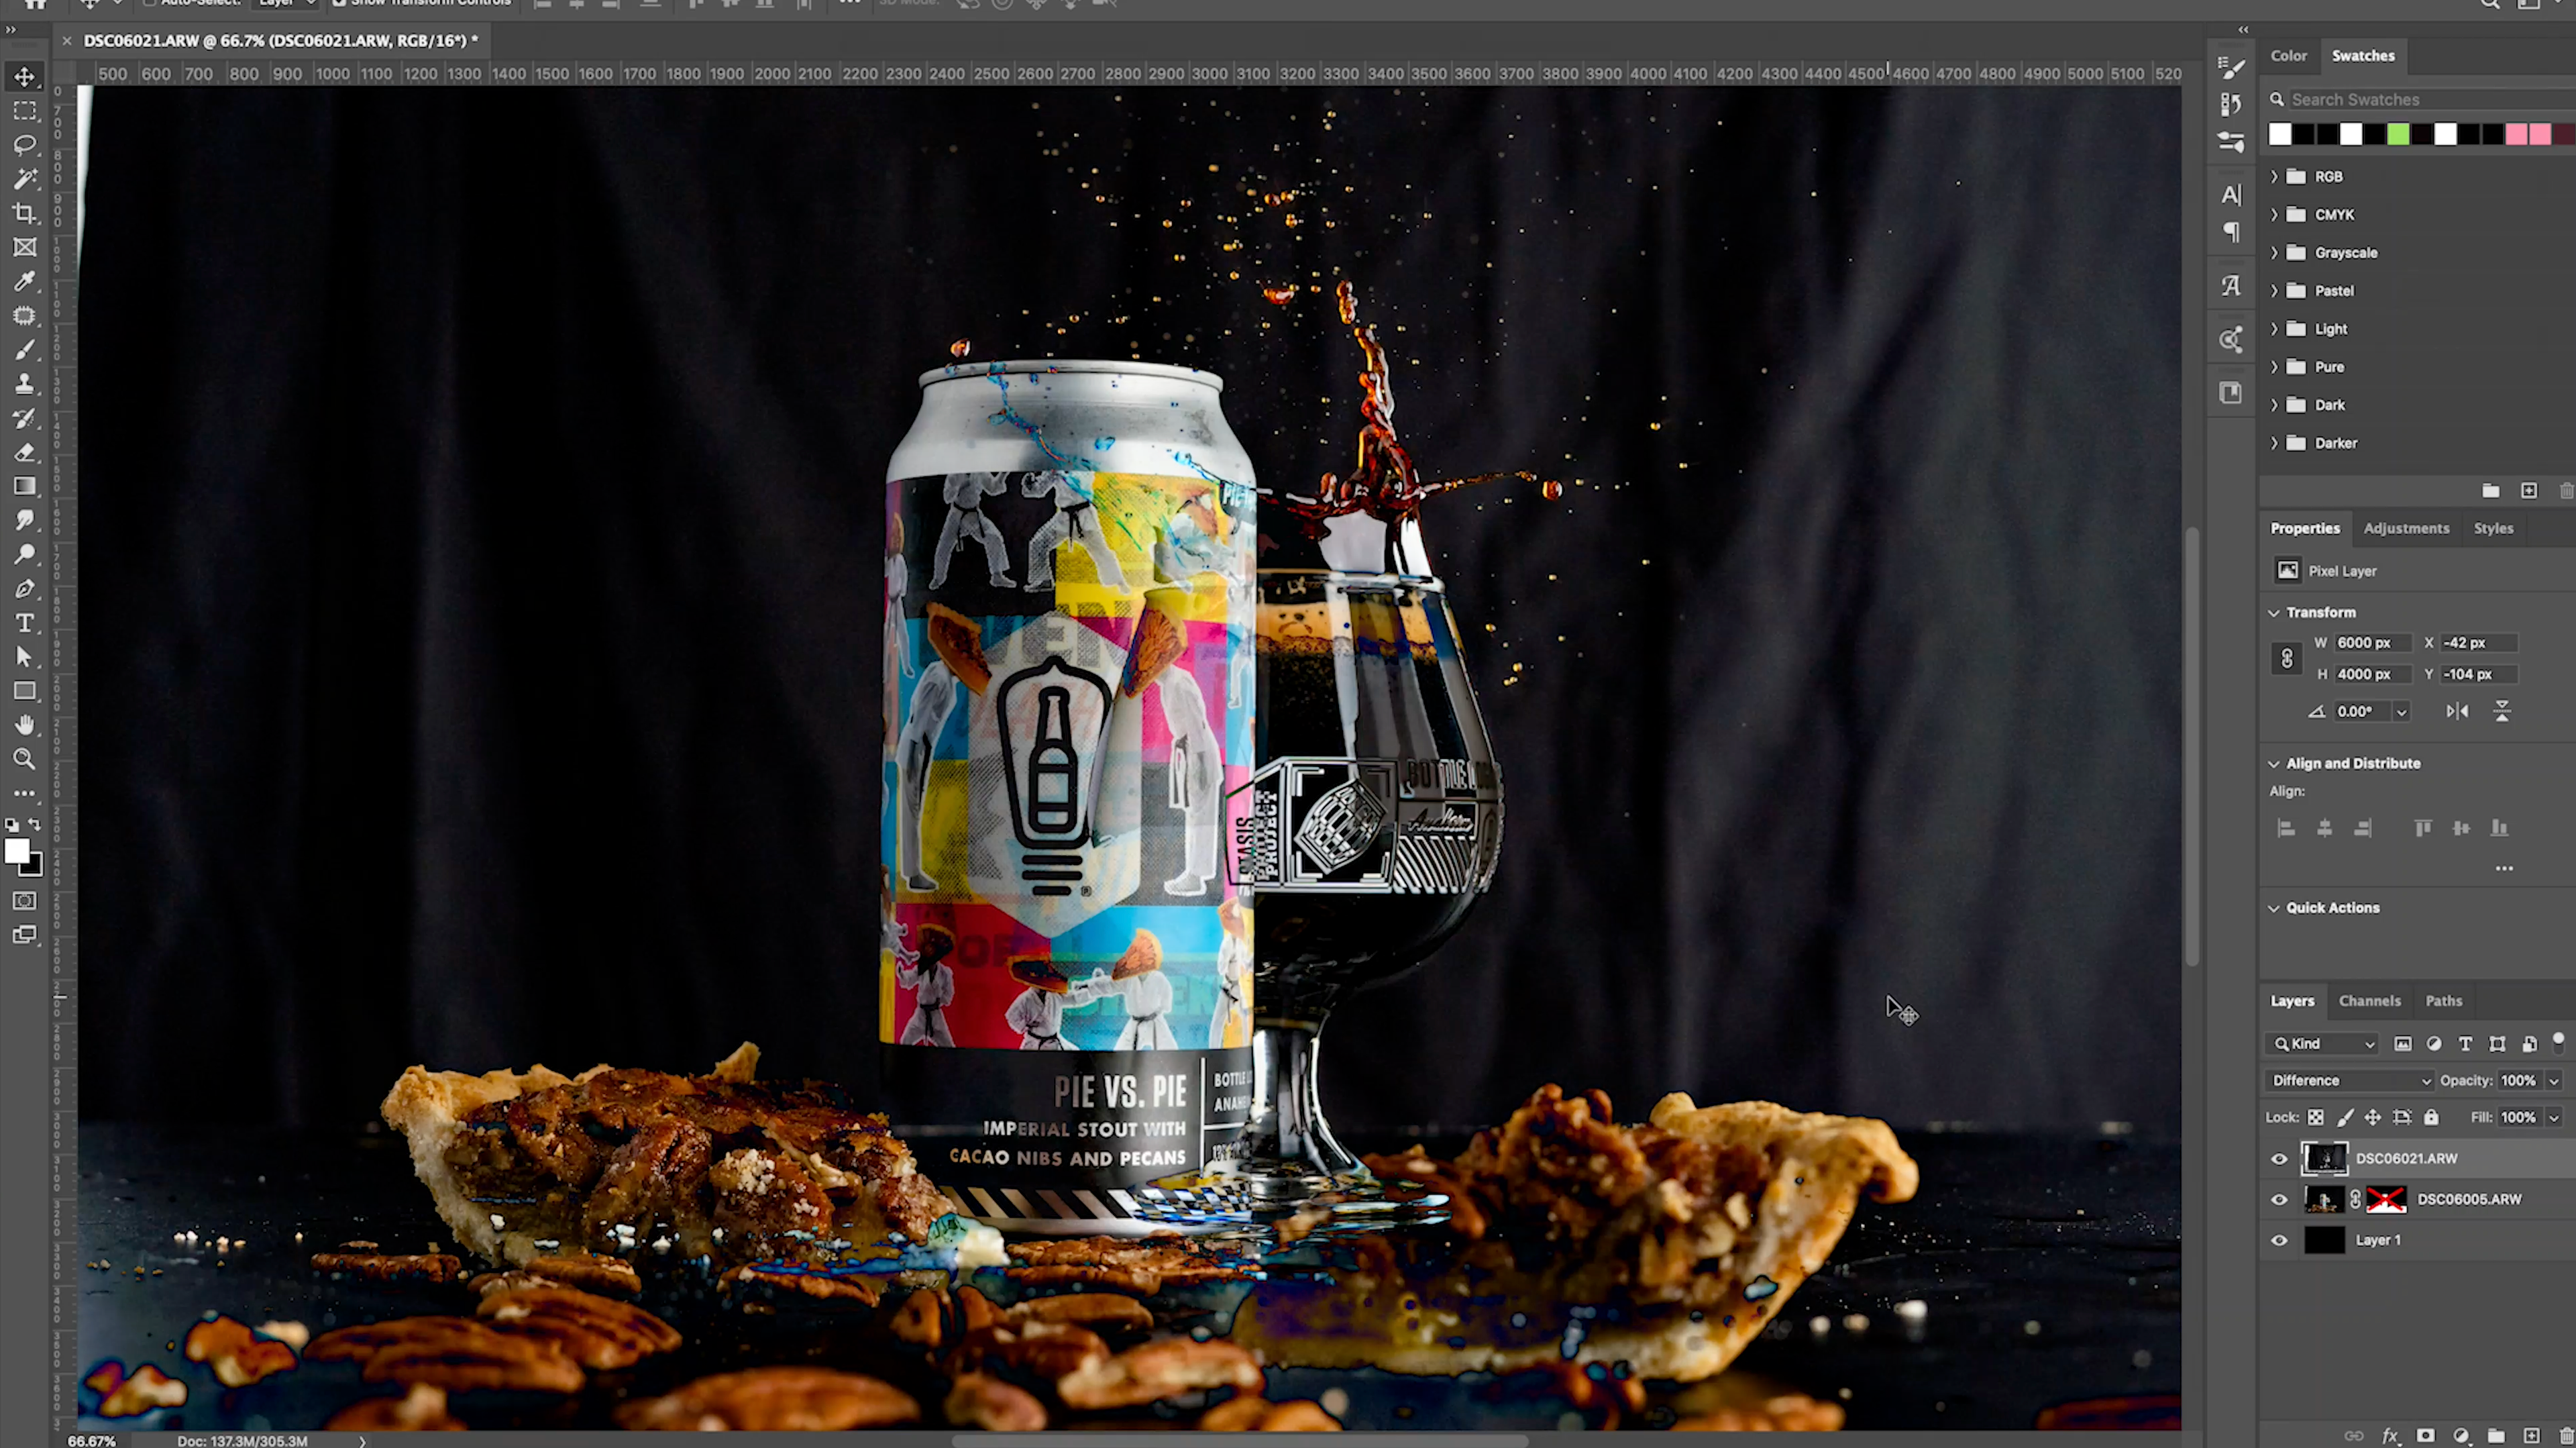
Here you can adjust the size and placement of your falling objects, I like to use the pecans in the foreground of the base image as reference to how large/small to make them.
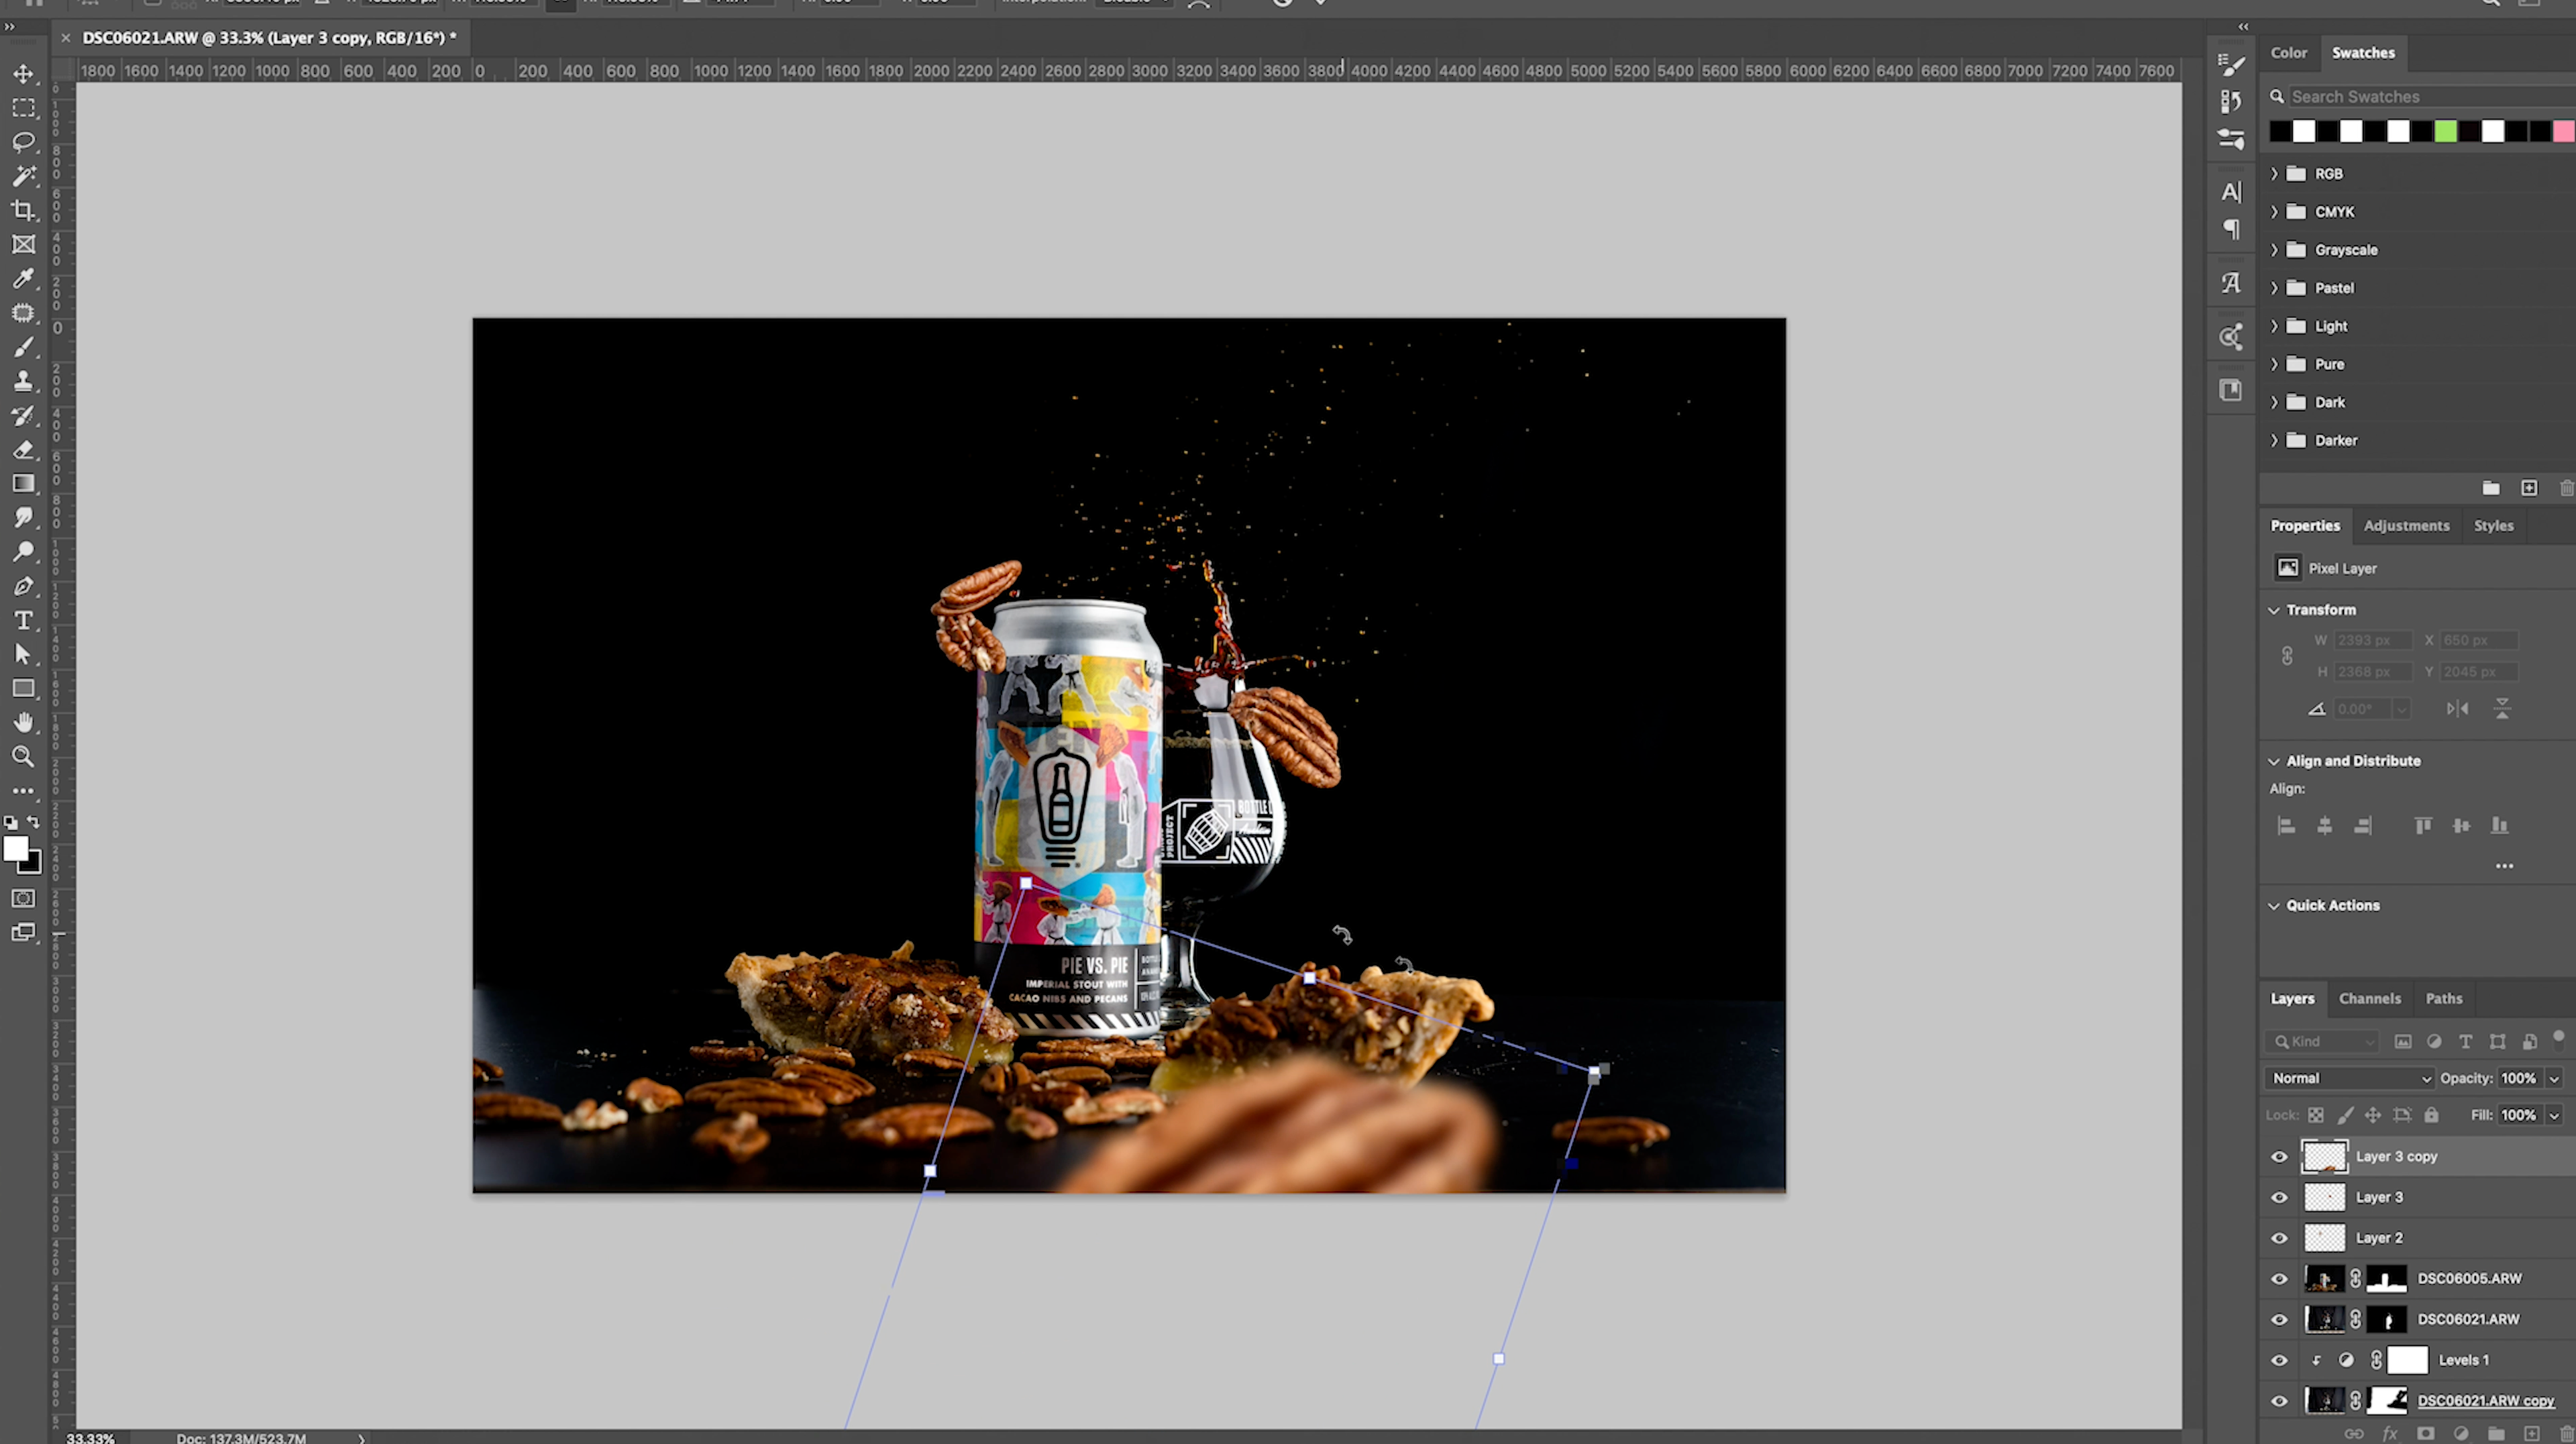
Once you've started adding in falling elements into your photo you're going to want to add a little bit of depth to your photo. You can do this by duplicating any of your elements and blowing them up nice and large. Then applying a nice "Gaussian Blur" to them, then making sure to place them in the foreground or around the edges of your image to help add some depth and to make them feel like they're flying towards the camera.
Go ahead and repeat these steps filling out the frame using about 5-6 of the same elements, just duplicating, repositioning, flipping, and rotating them to help diversify our shot. But just be mindful that you aren't drawing too much attention away from our main subject, which in this case is the beer. The whole point of this is to add movement and depth to your photo, as well as help guide your viewers eye to the subject.
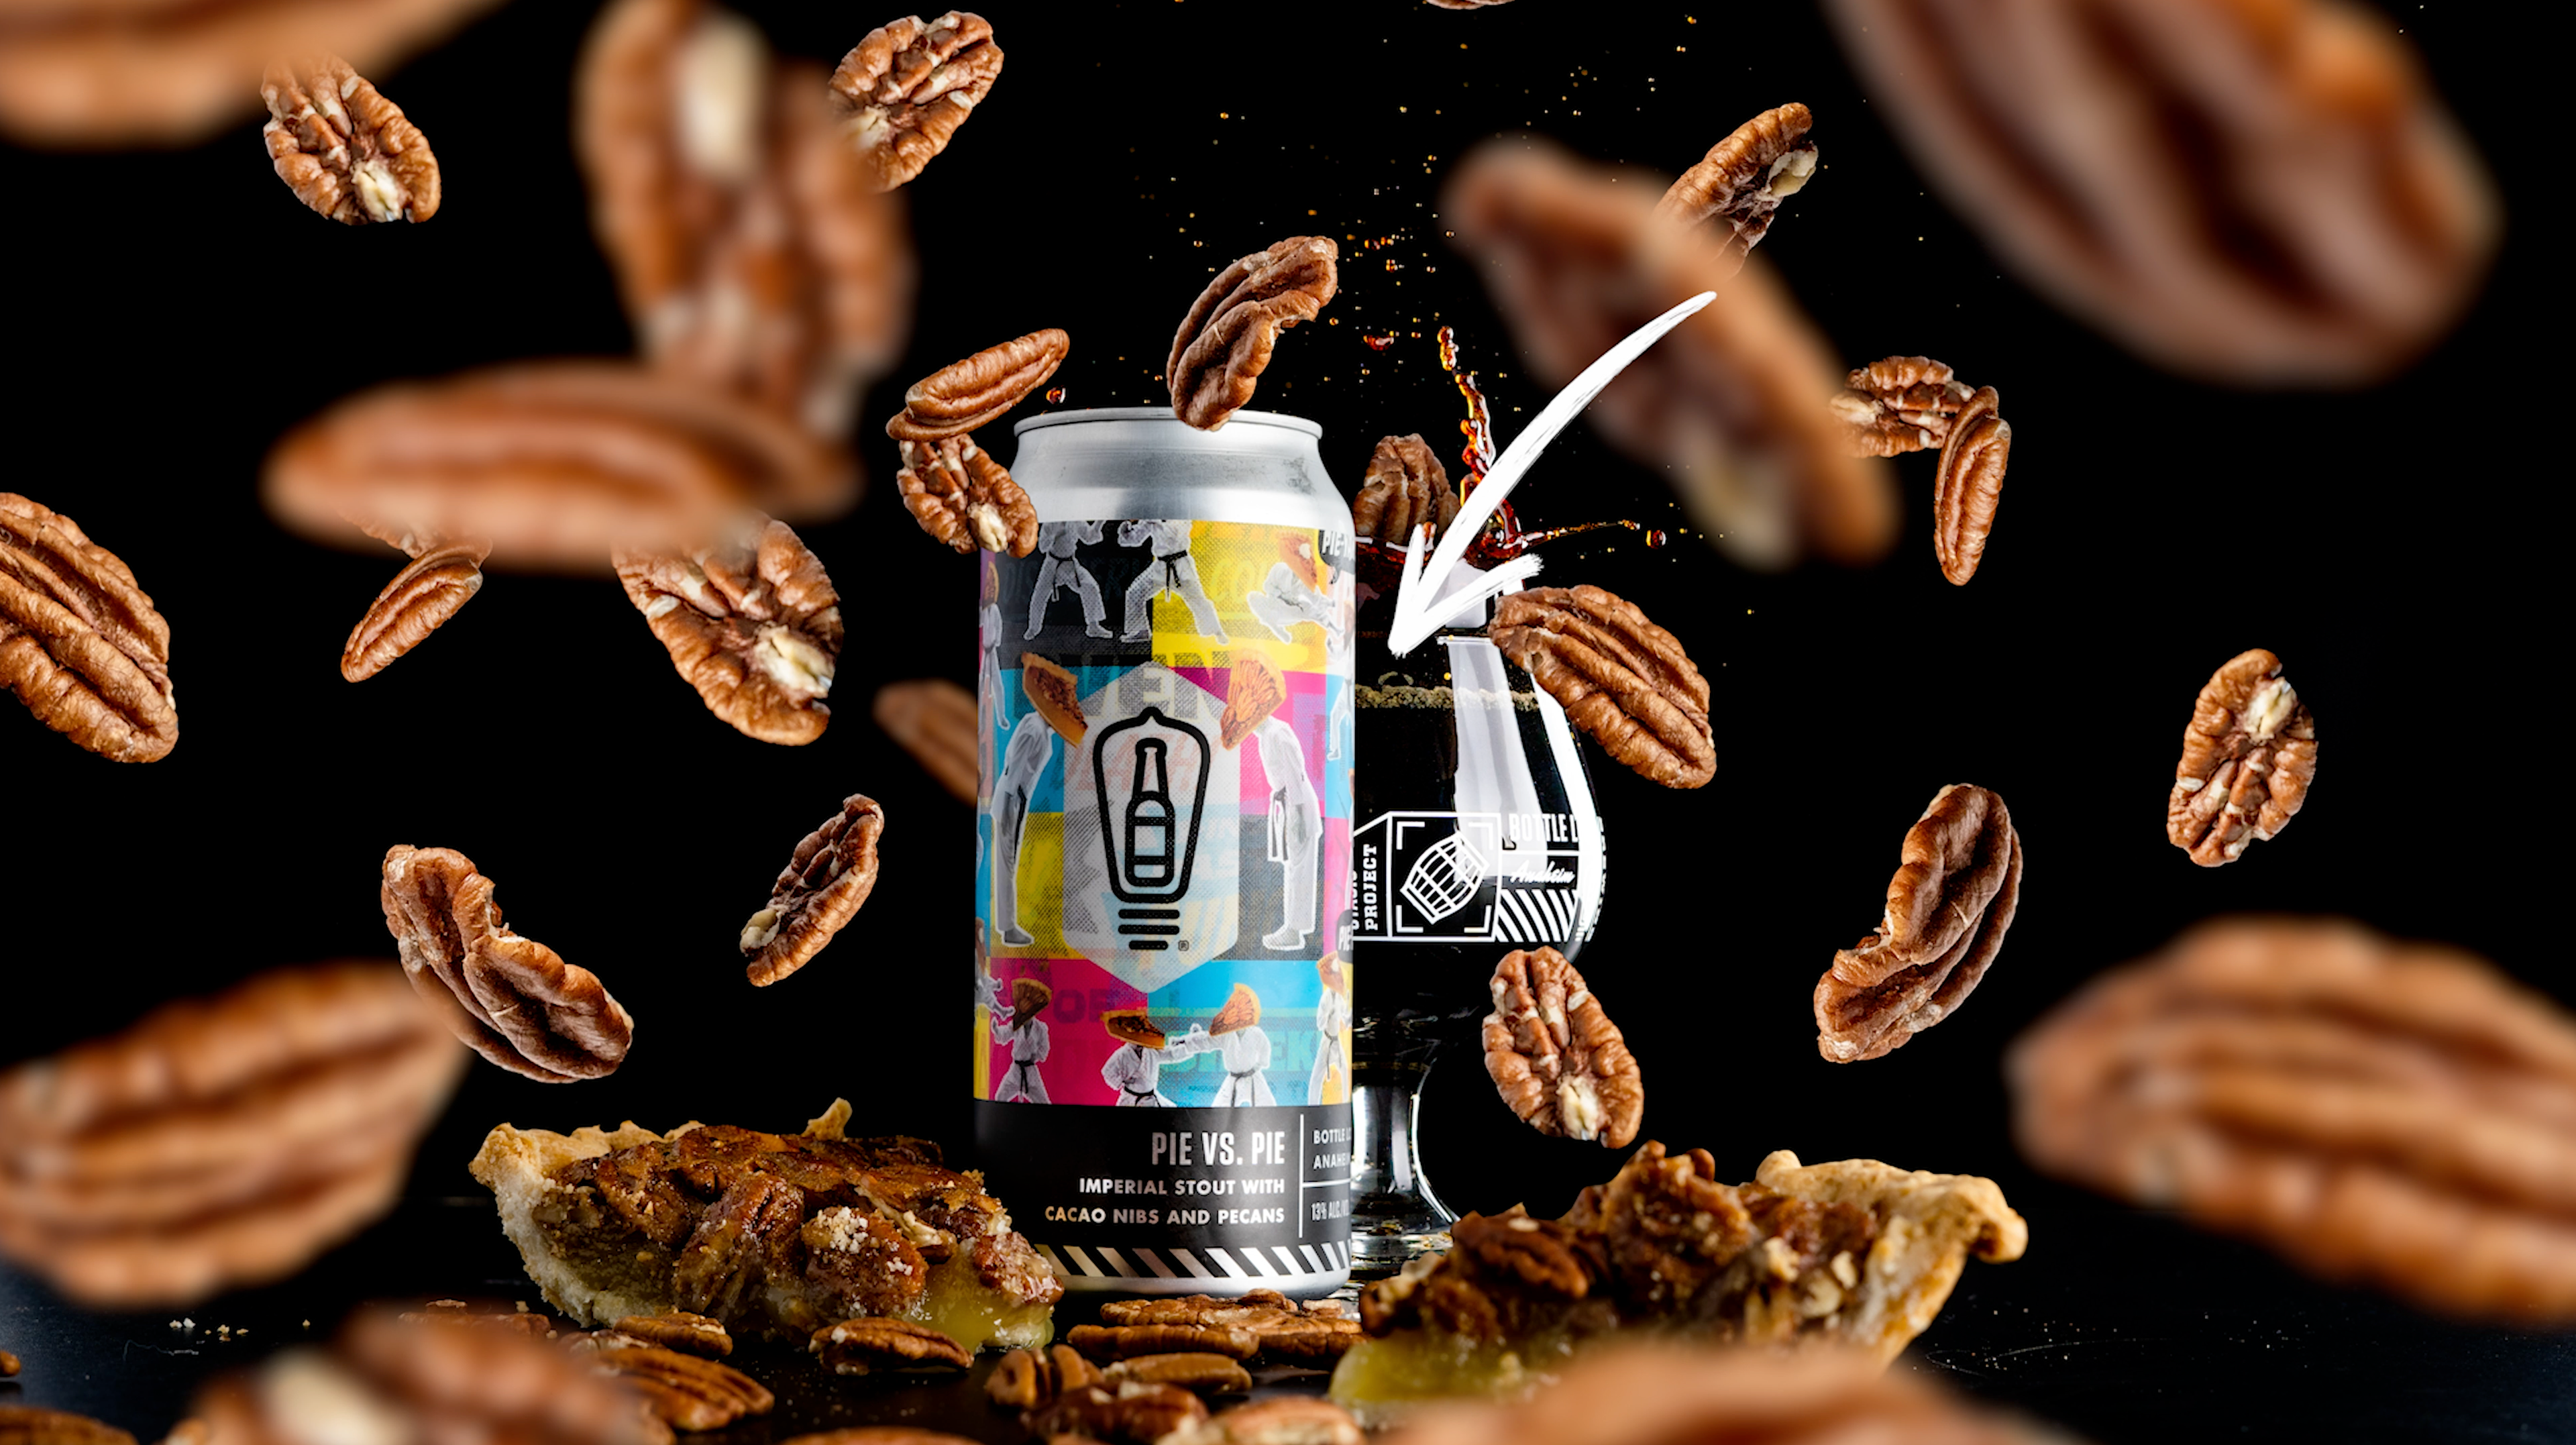
Photo Clean Up
Once you've got a good feel for your photo go ahead and take a step back and see if anything needs fixing. Like right here in the glass where there is kind of a weird line from where the foam was. It kind of makes me feel like the glass is dirty. So let's go ahead and remove that using the "Patch Tool" (J). All you need to do is draw a "Lasso" around what you want to remove then drag to what you want to "Replace" it with. This tool doesn't work every time so you may need to switch in between the "Patch Tool" and the "Stamp Tool" to achieve the cleanest look as possible.
Once you've got a good feel for your photo go ahead and take a step back and see if anything needs fixing. Like right here in the glass where there is kind of a weird line from where the foam was. It kind of makes me feel like the glass is dirty. So let's go ahead and remove that using the "Patch Tool" (J). All you need to do is draw a "Lasso" around what you want to remove then drag to what you want to "Replace" it with. This tool doesn't work every time so you may need to switch in between the "Patch Tool" and the "Stamp Tool" to achieve the cleanest look as possible.
Now that we've got that line removed let's go ahead and remove any specs of dust or anything weird we may be seeing using the same method, just to help clean things up.

Cropping Your Image
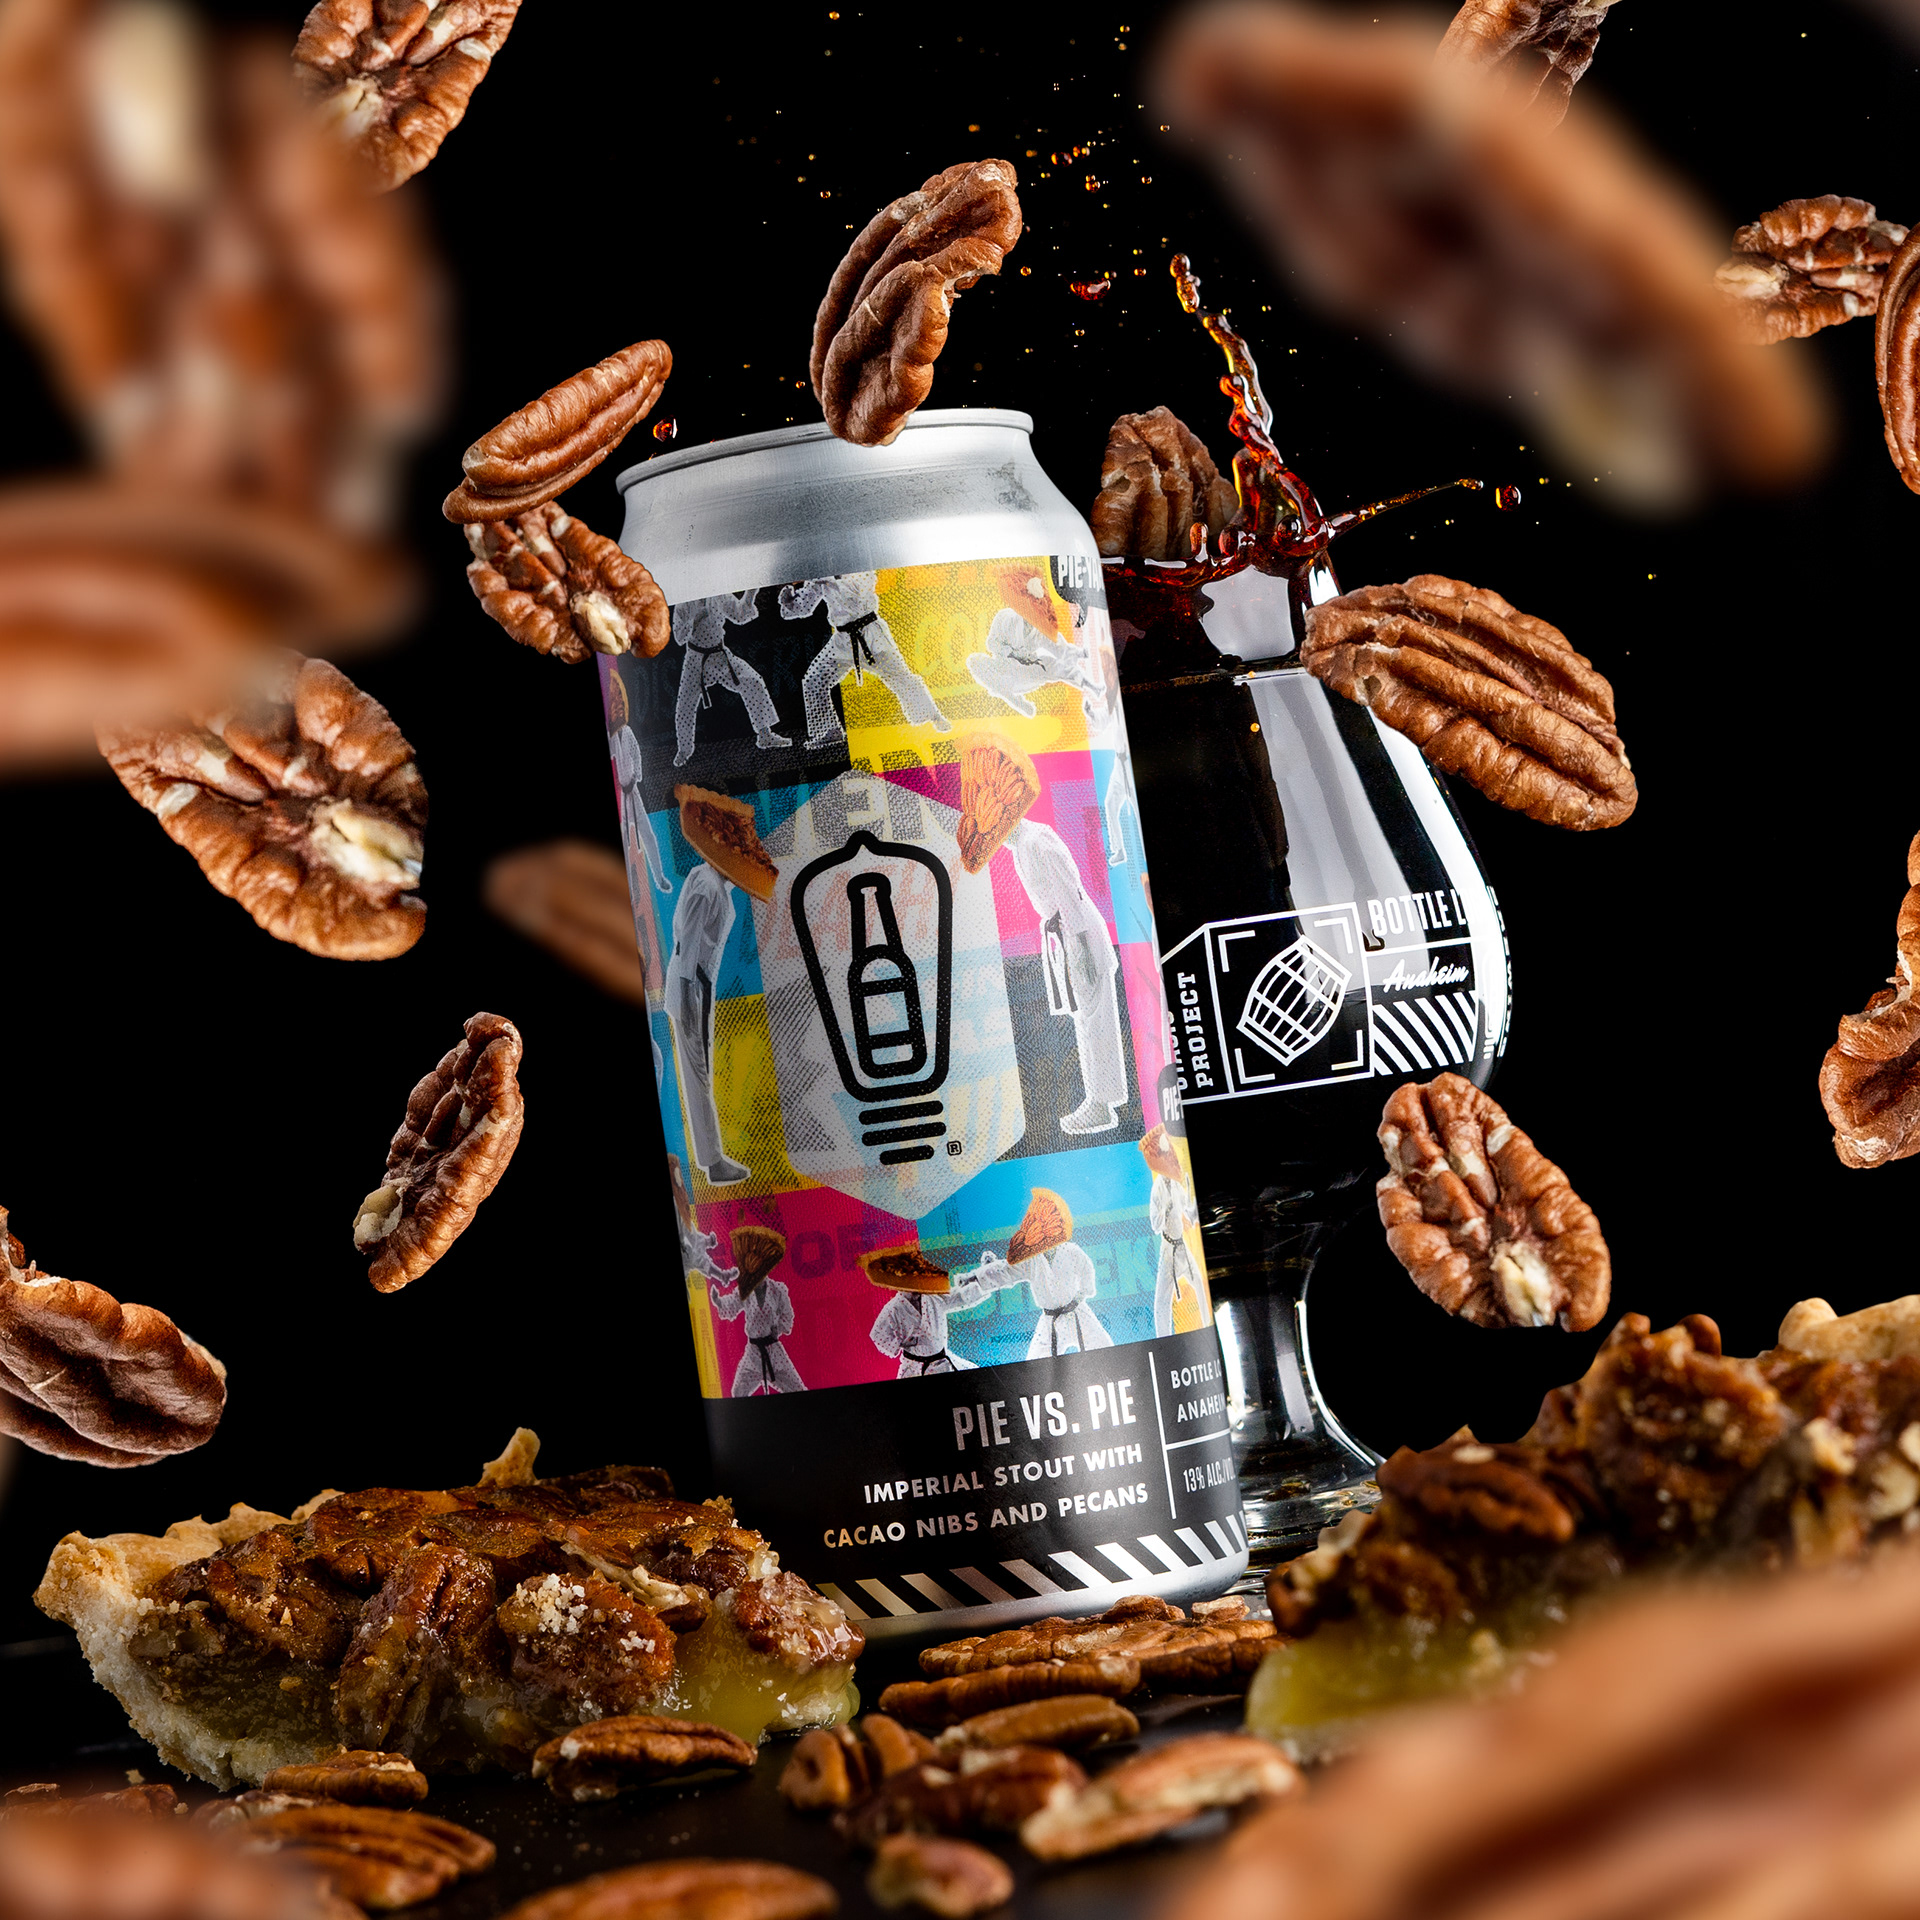
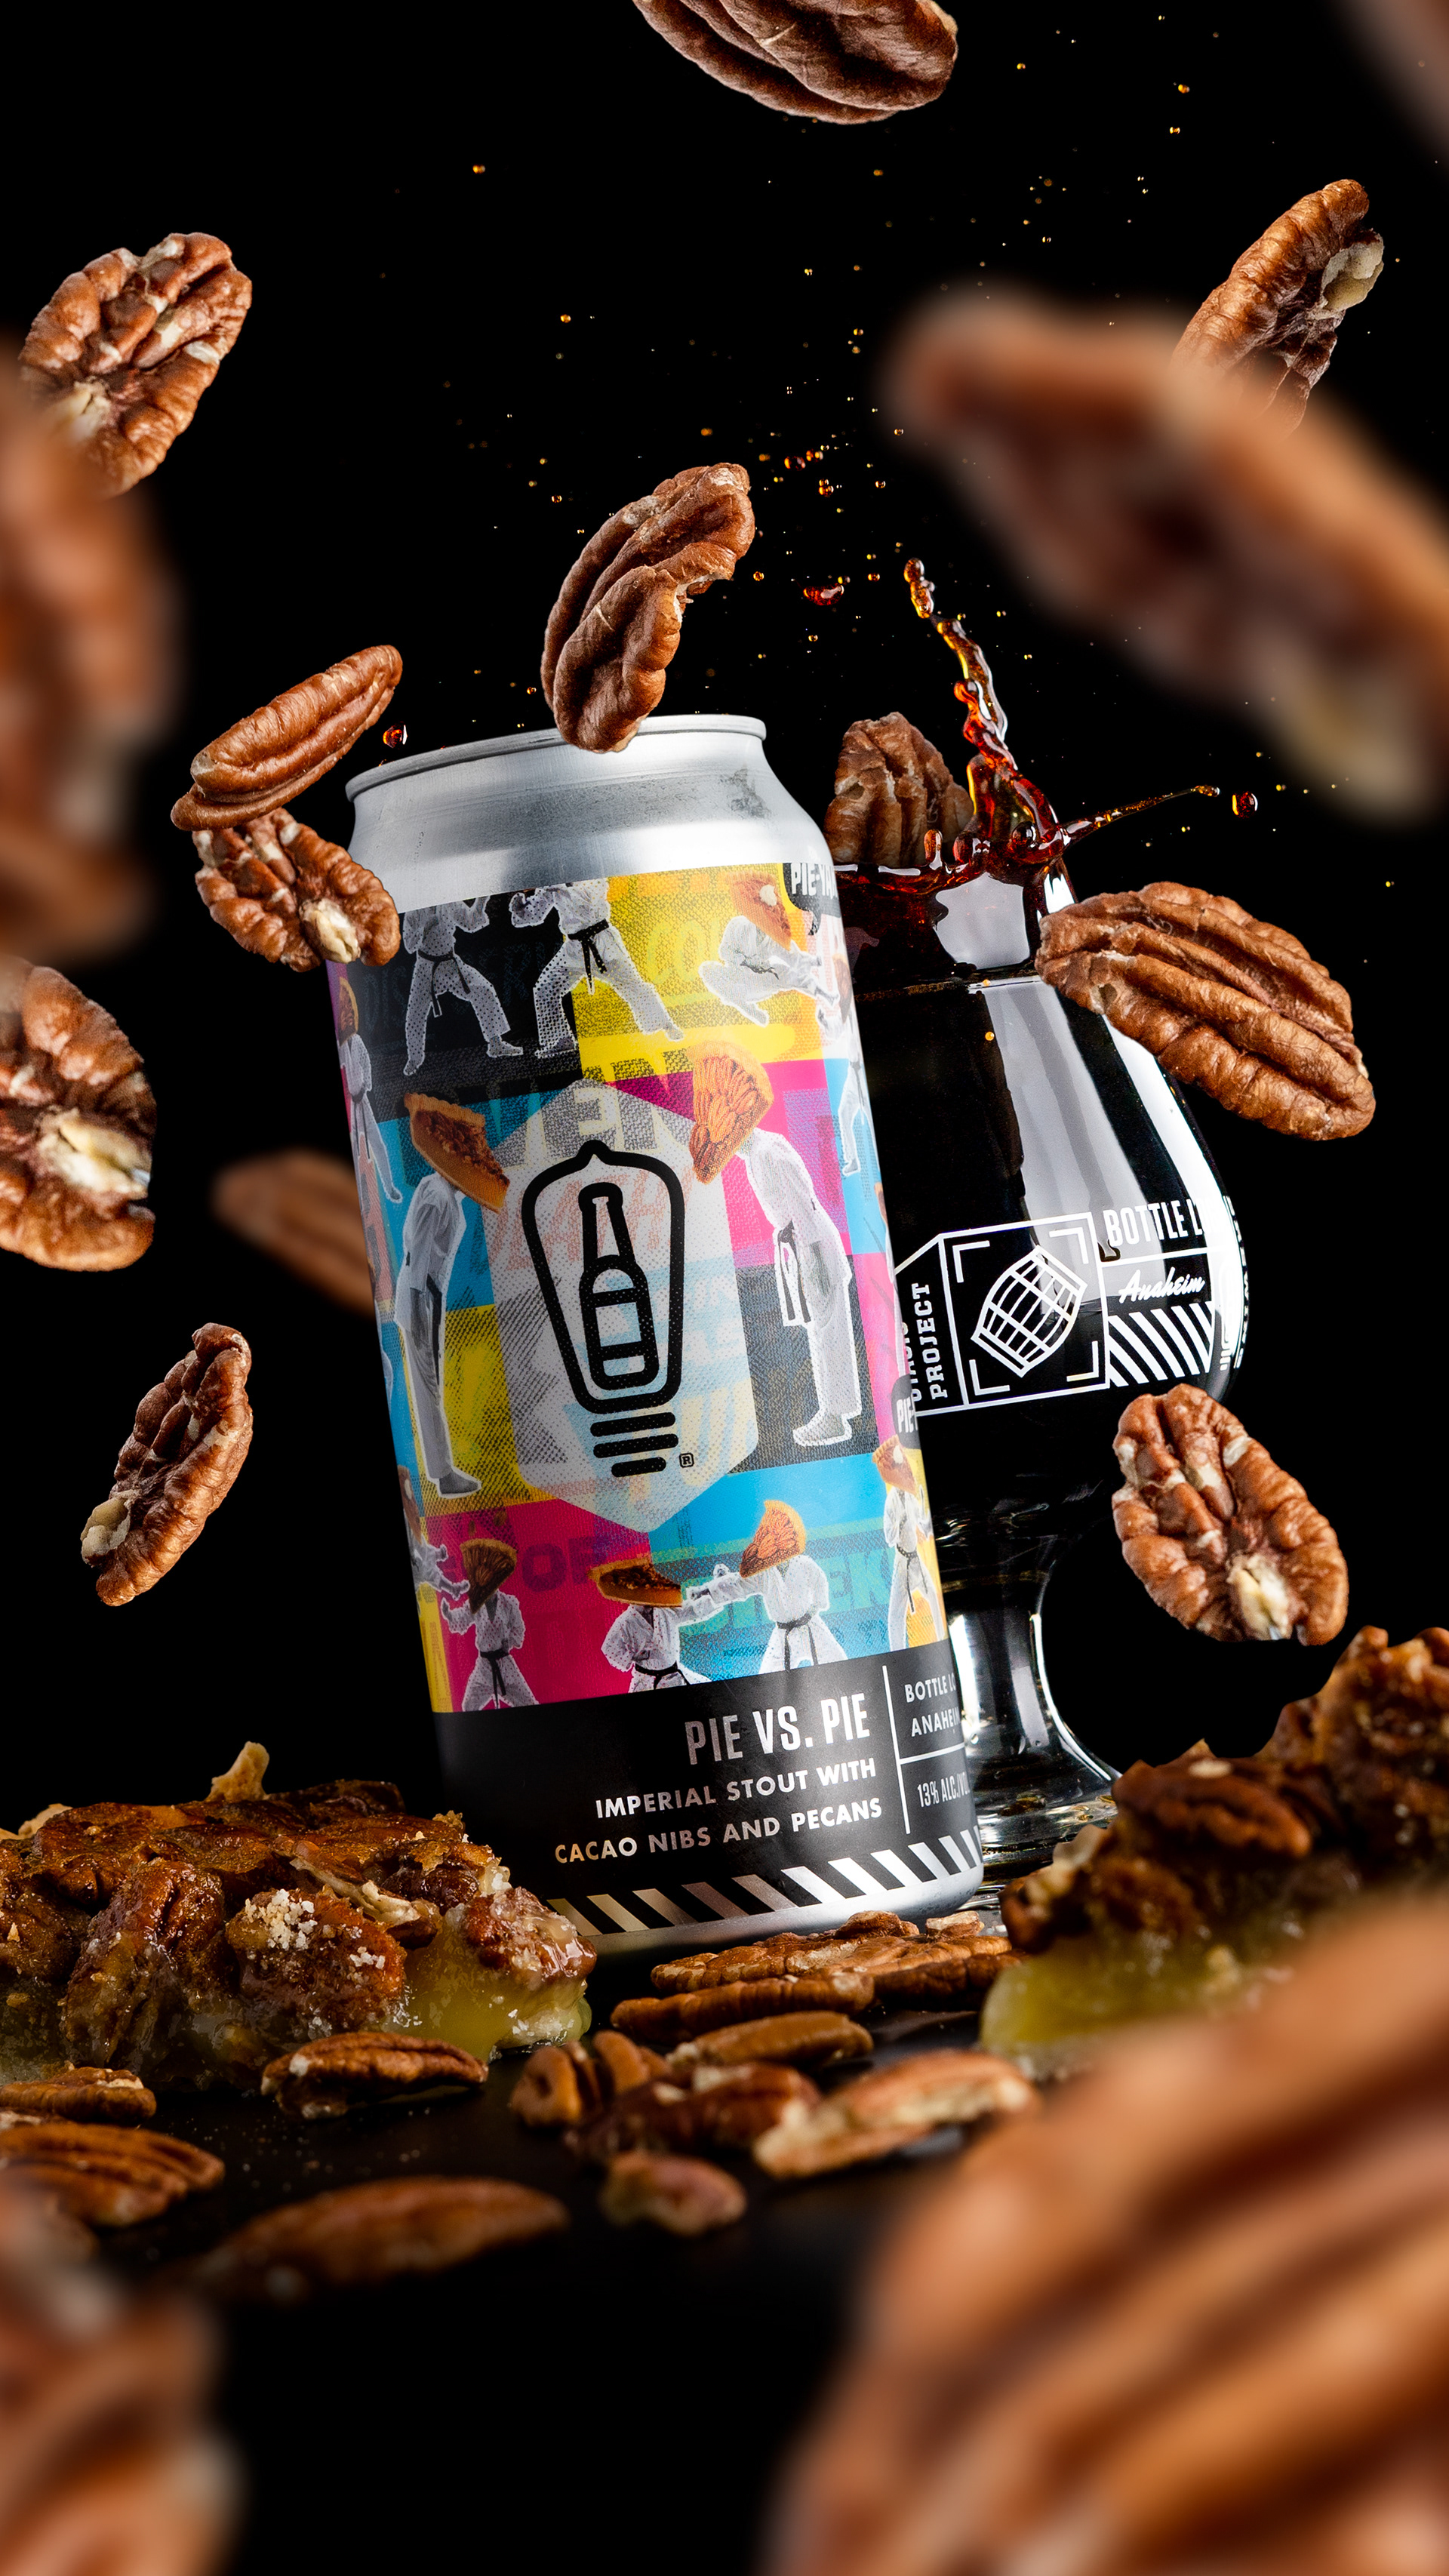
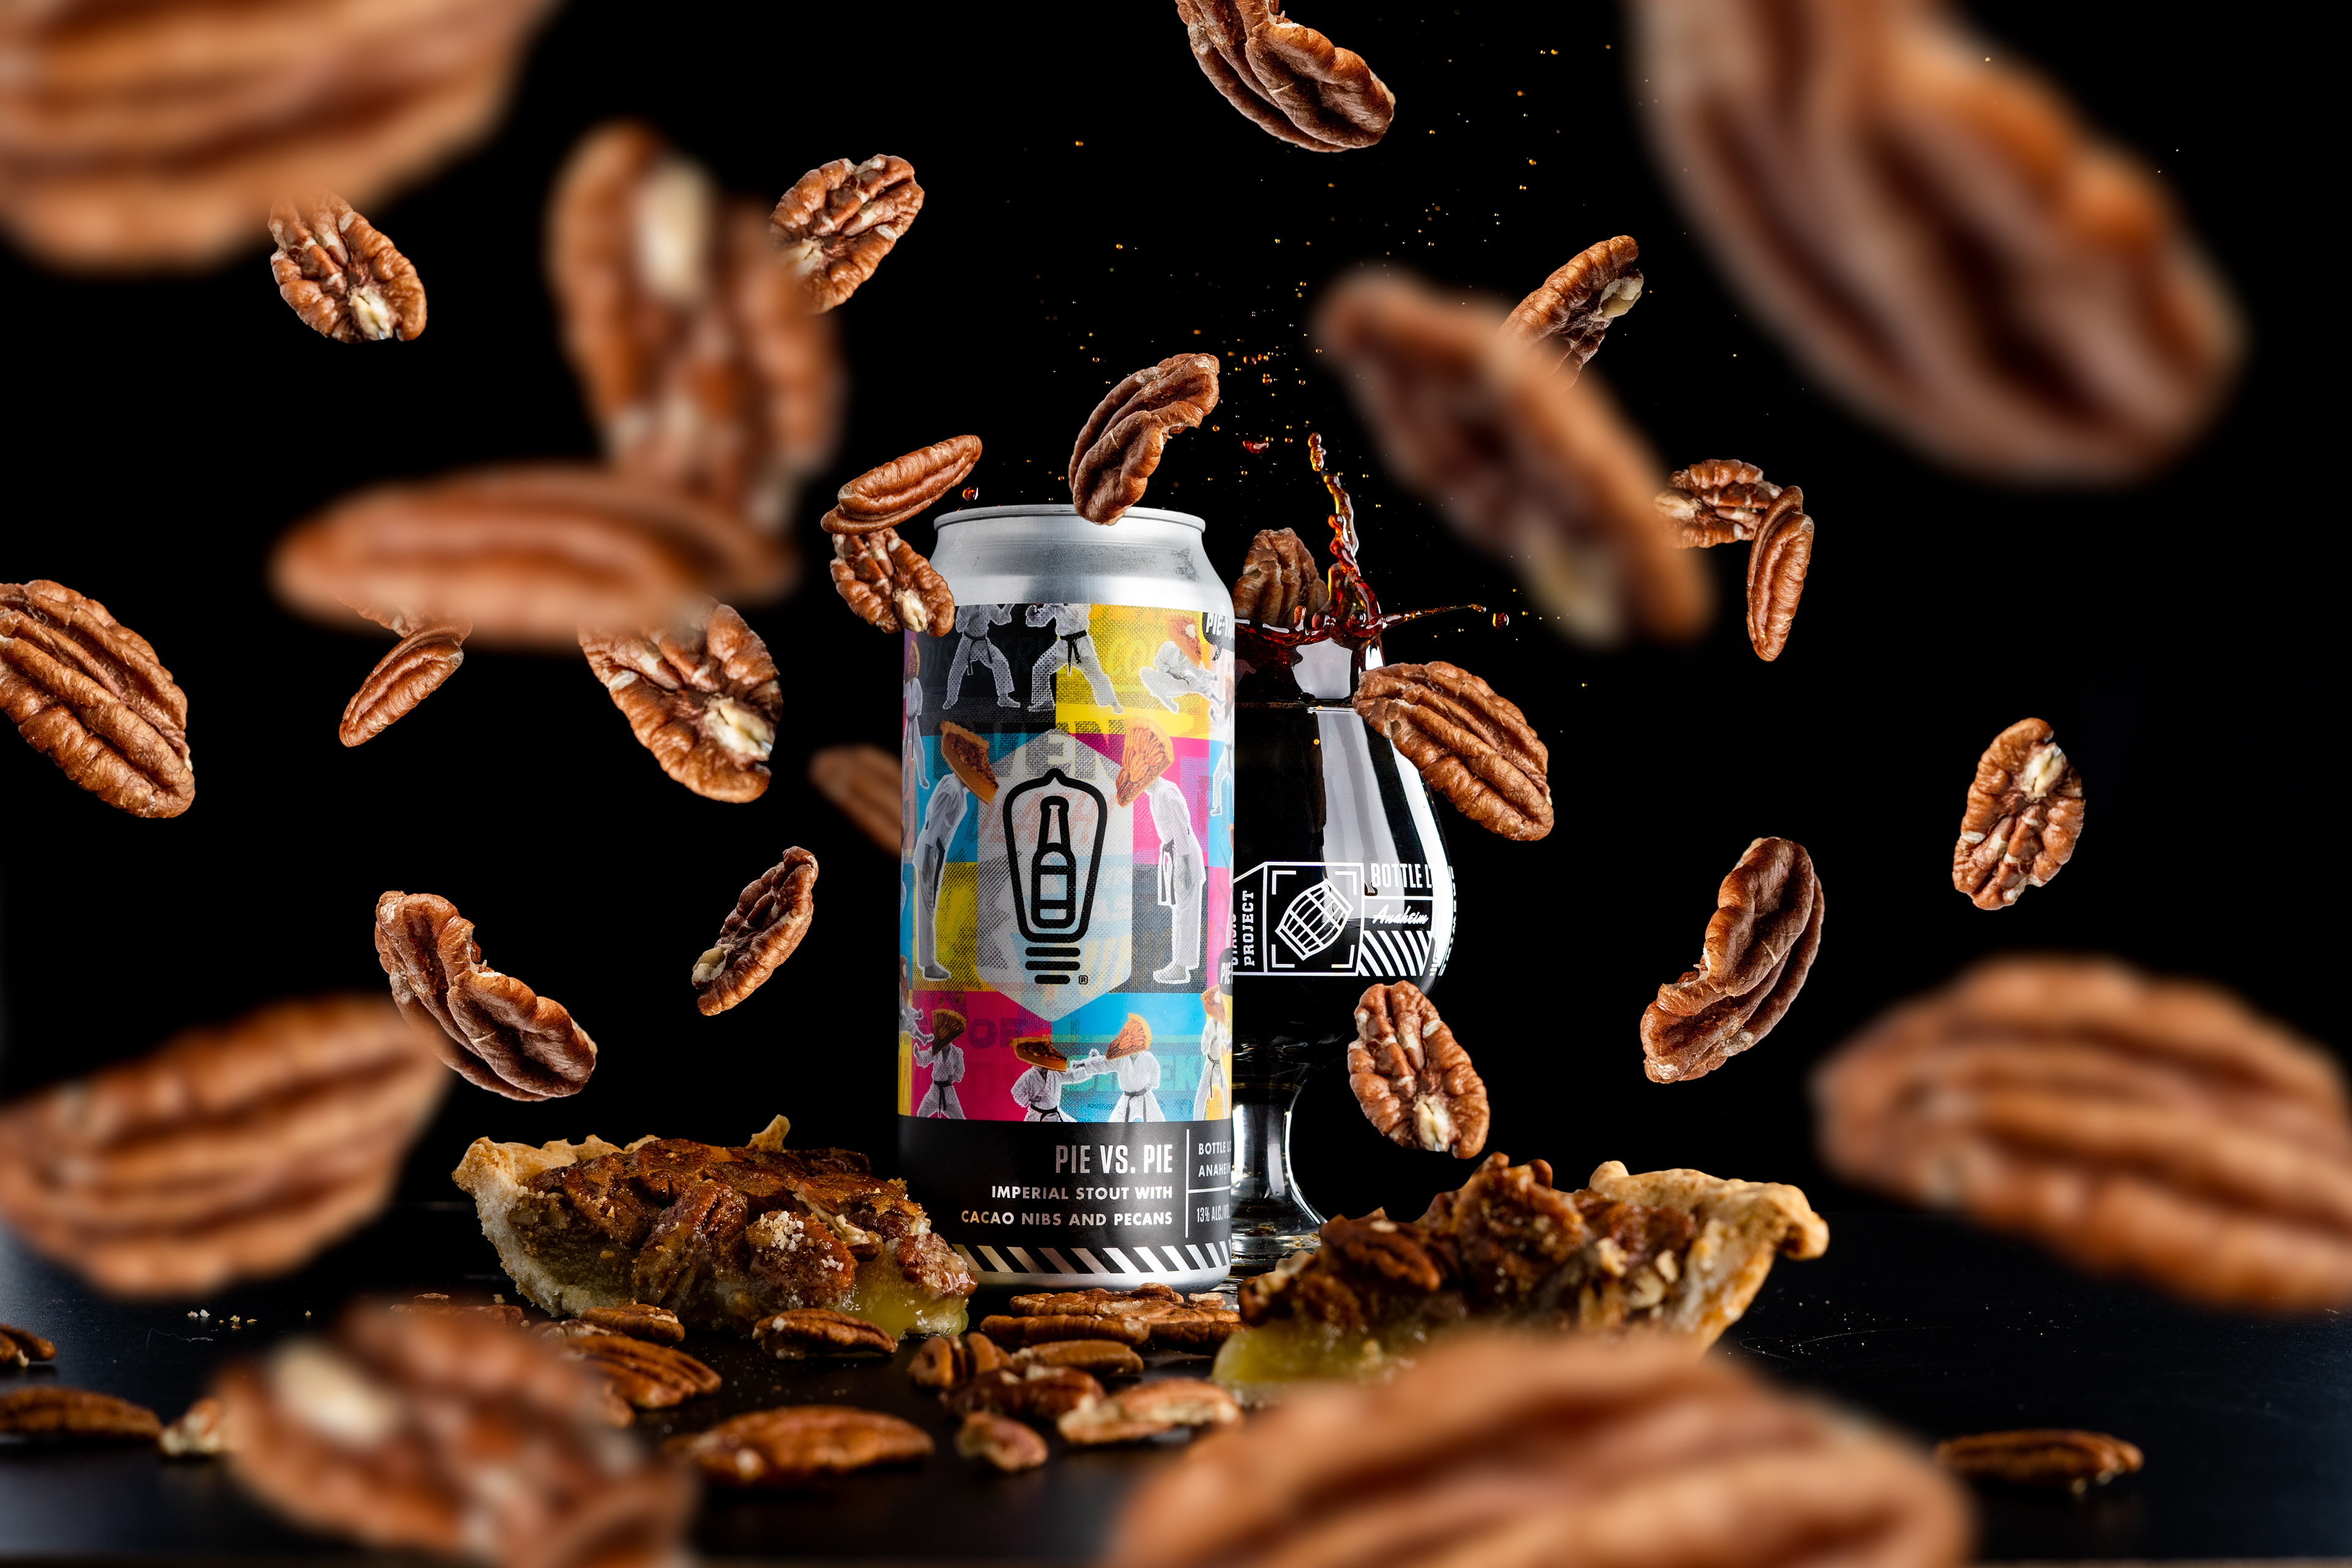
Once you've finished cleaning up your photo, here comes the easiest part, which is the crop. For this photo since it's primarily going to be used on Social Media. I like to provide my clients with a 1:1 or a 4:5 to use for social media post then a 9:16 for stories and then a full frame shot that can be used for their website, press releases, or anything else they may want to use it for.
Once you've finished cleaning up your photo, here comes the easiest part, which is the crop. For this photo since it's primarily going to be used on Social Media. I like to provide my clients with a 1:1 or a 4:5 to use for social media post then a 9:16 for stories and then a full frame shot that can be used for their website, press releases, or anything else they may want to use it for.
And as I'm cropping I like to add slight tweaks, like tilting my photos to help add a little style as well as help with that eye drawing effect were after.
Once you've finished your crops and exporting your photos, go ahead and send them to your clients and see how STOKED they are! Or if they're for yourself, post them on Social Media and hopefully you get flooded with a ton of positive feed back. There's nothing better than getting positive feedback on something you've worked so hard on. That being said, I hope you found this tutorial helpful!
I know not everyone knows these tools as well as I do so please let me know if you have any questions, as I would love to help you! You can leave me a comment with any of your questions on the video for this tutorial. Until then I will see you guys in the next one!