
Thanks so much checking out my first video. This is my approach to product photography and all the steps and techniques I use to achieve the photos I capture. On my YouTube channel you will find me shooting a variety of different products, but in this video I will be shooting beer.
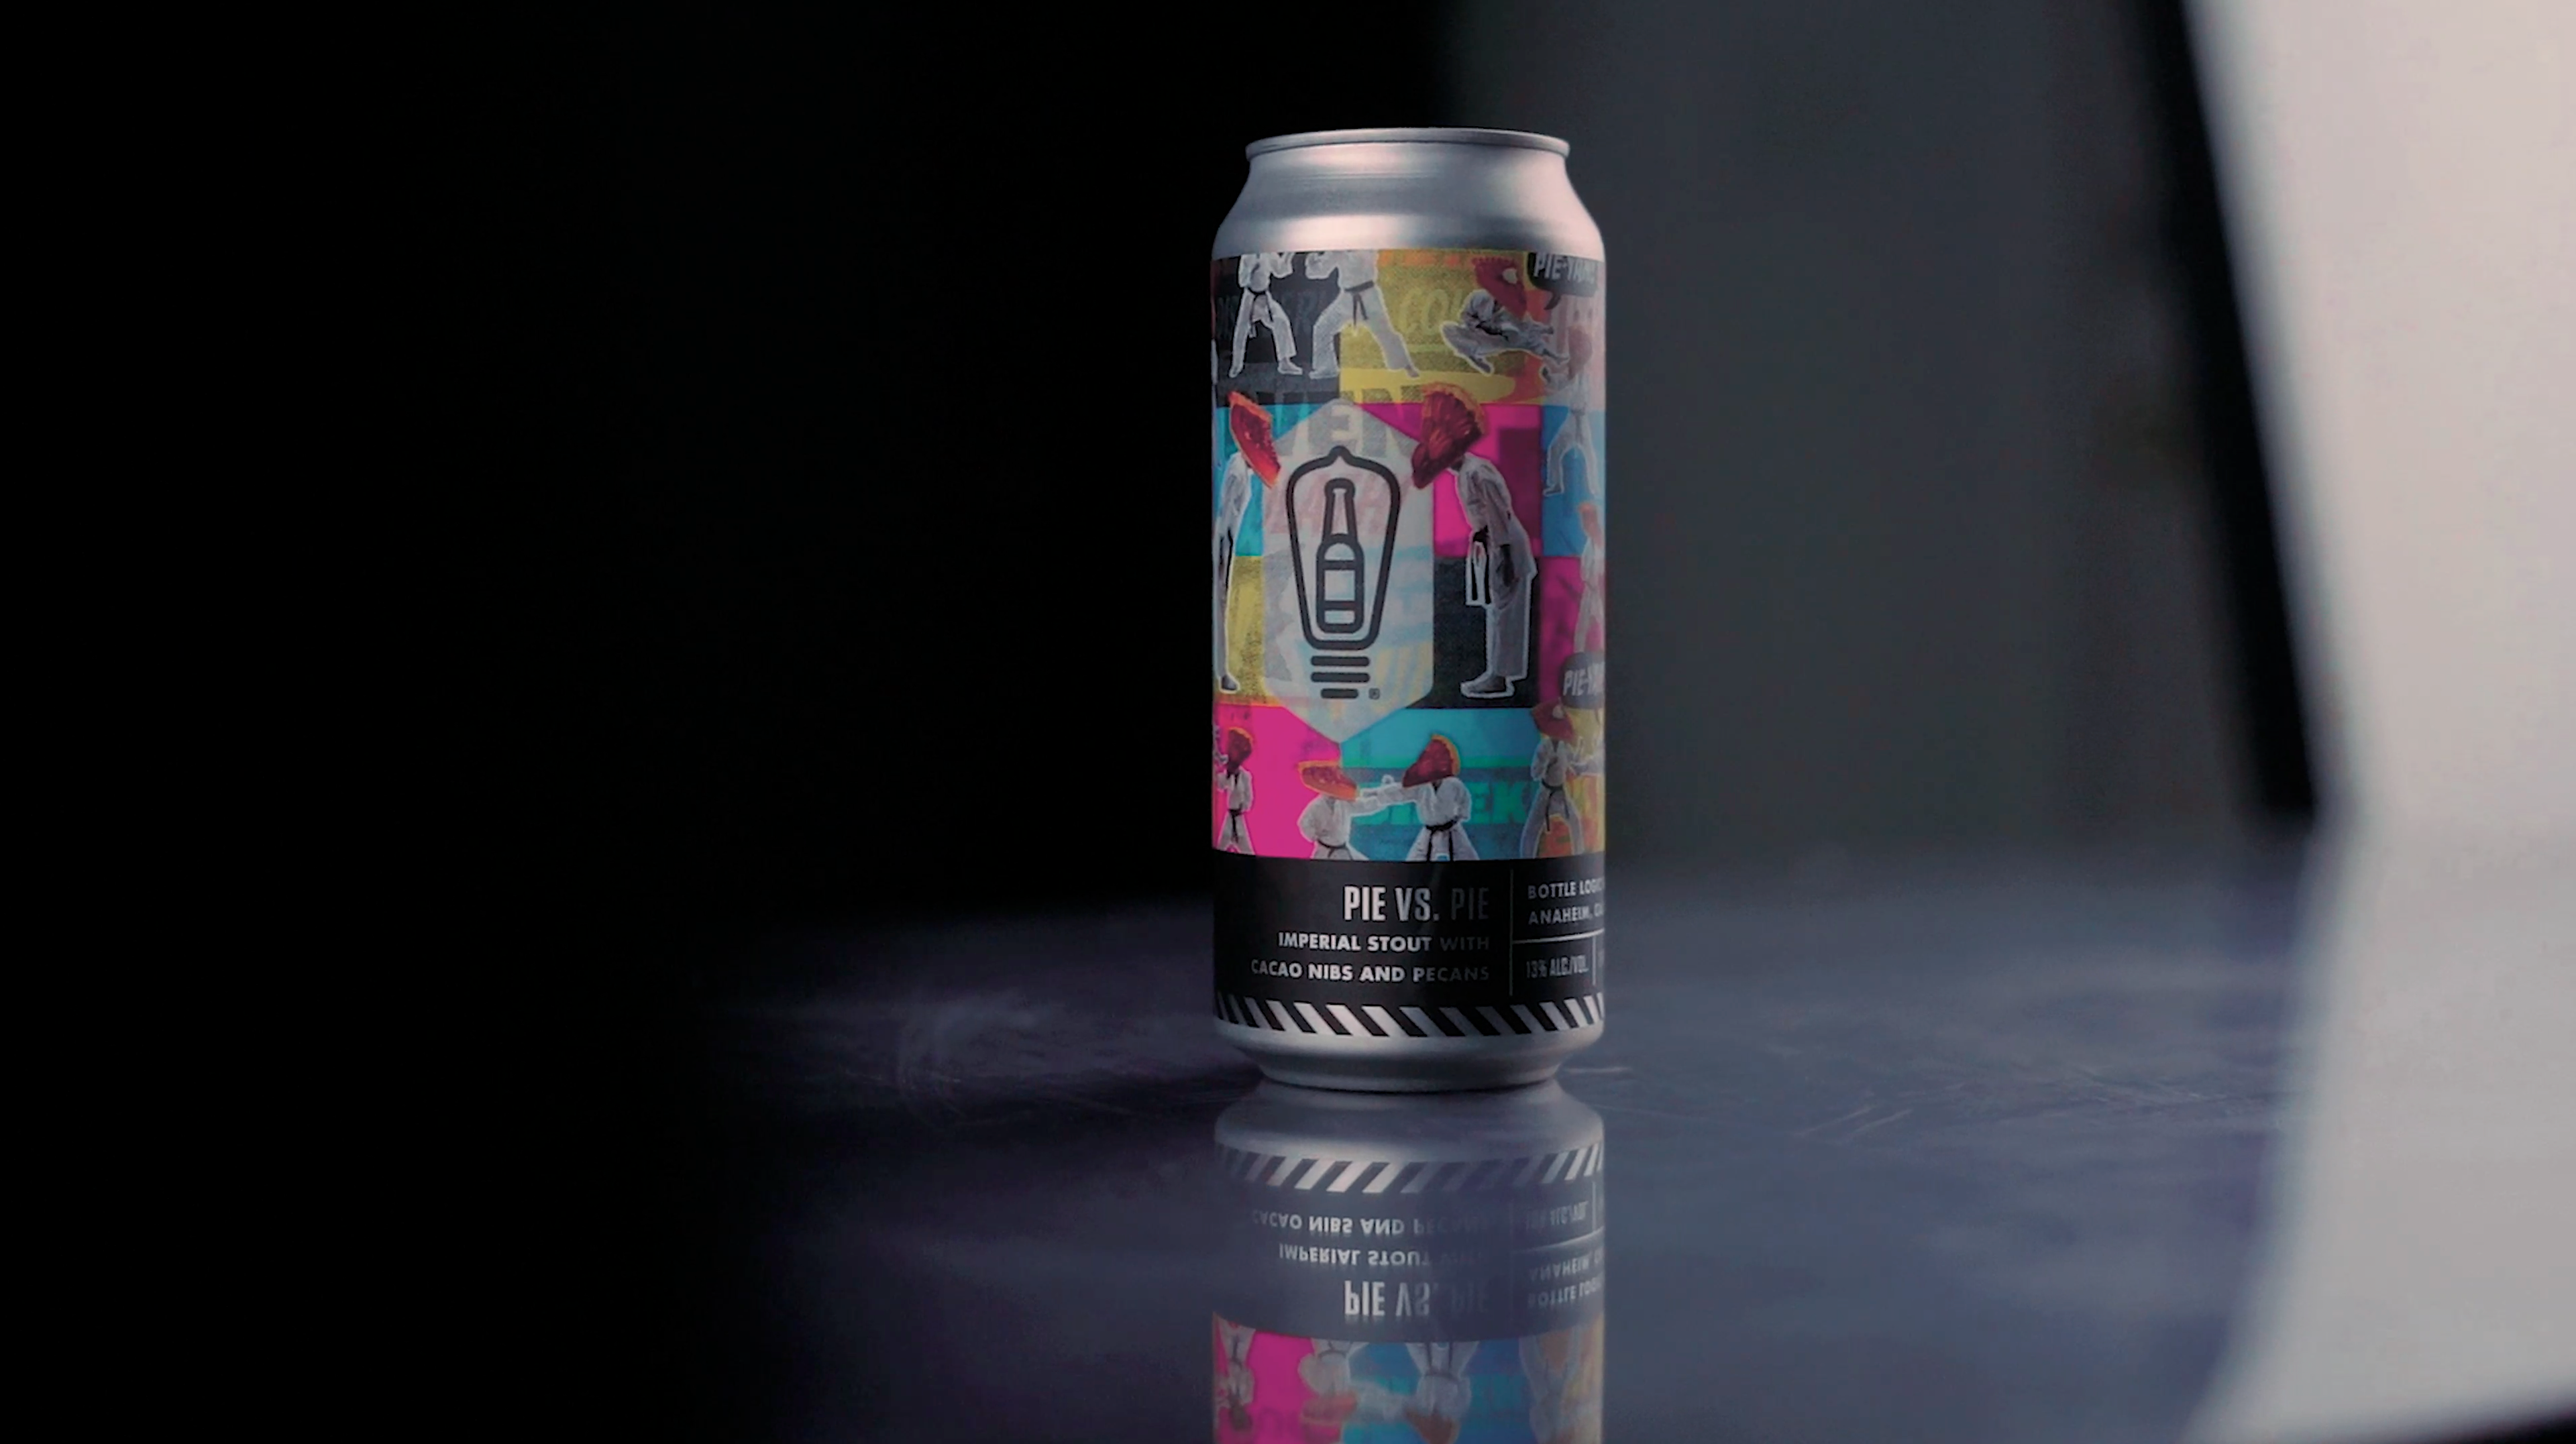
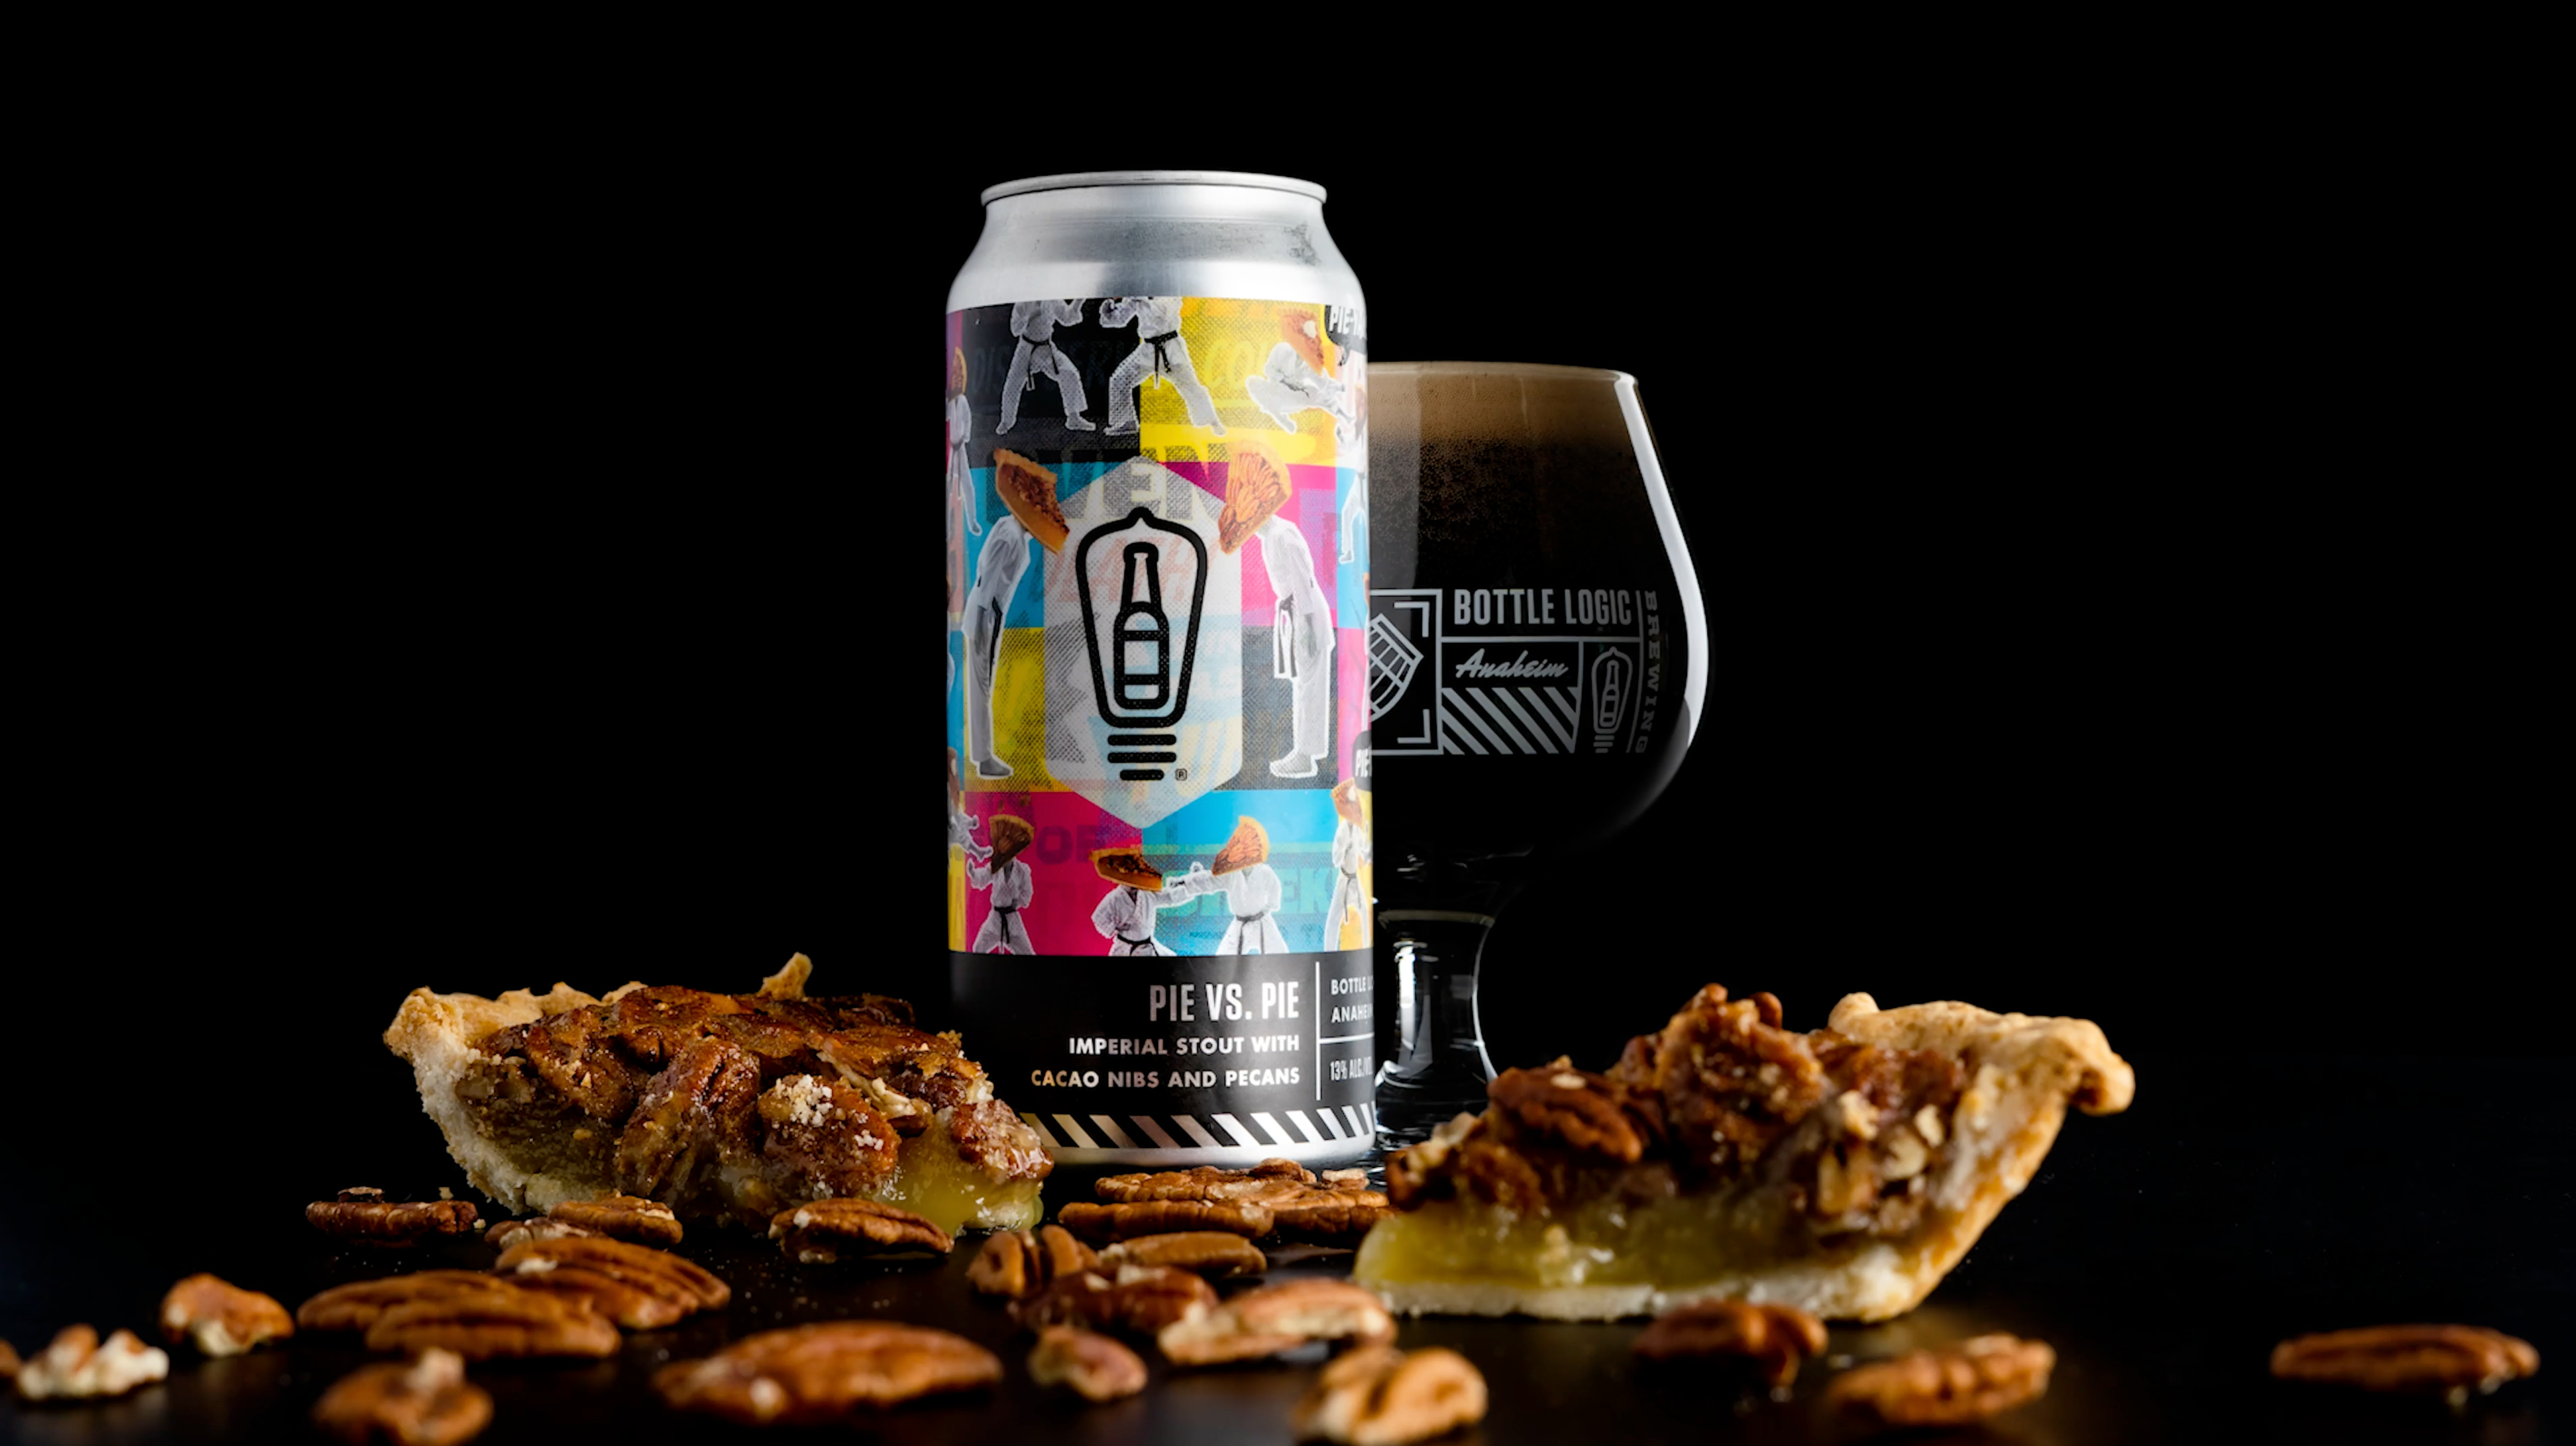
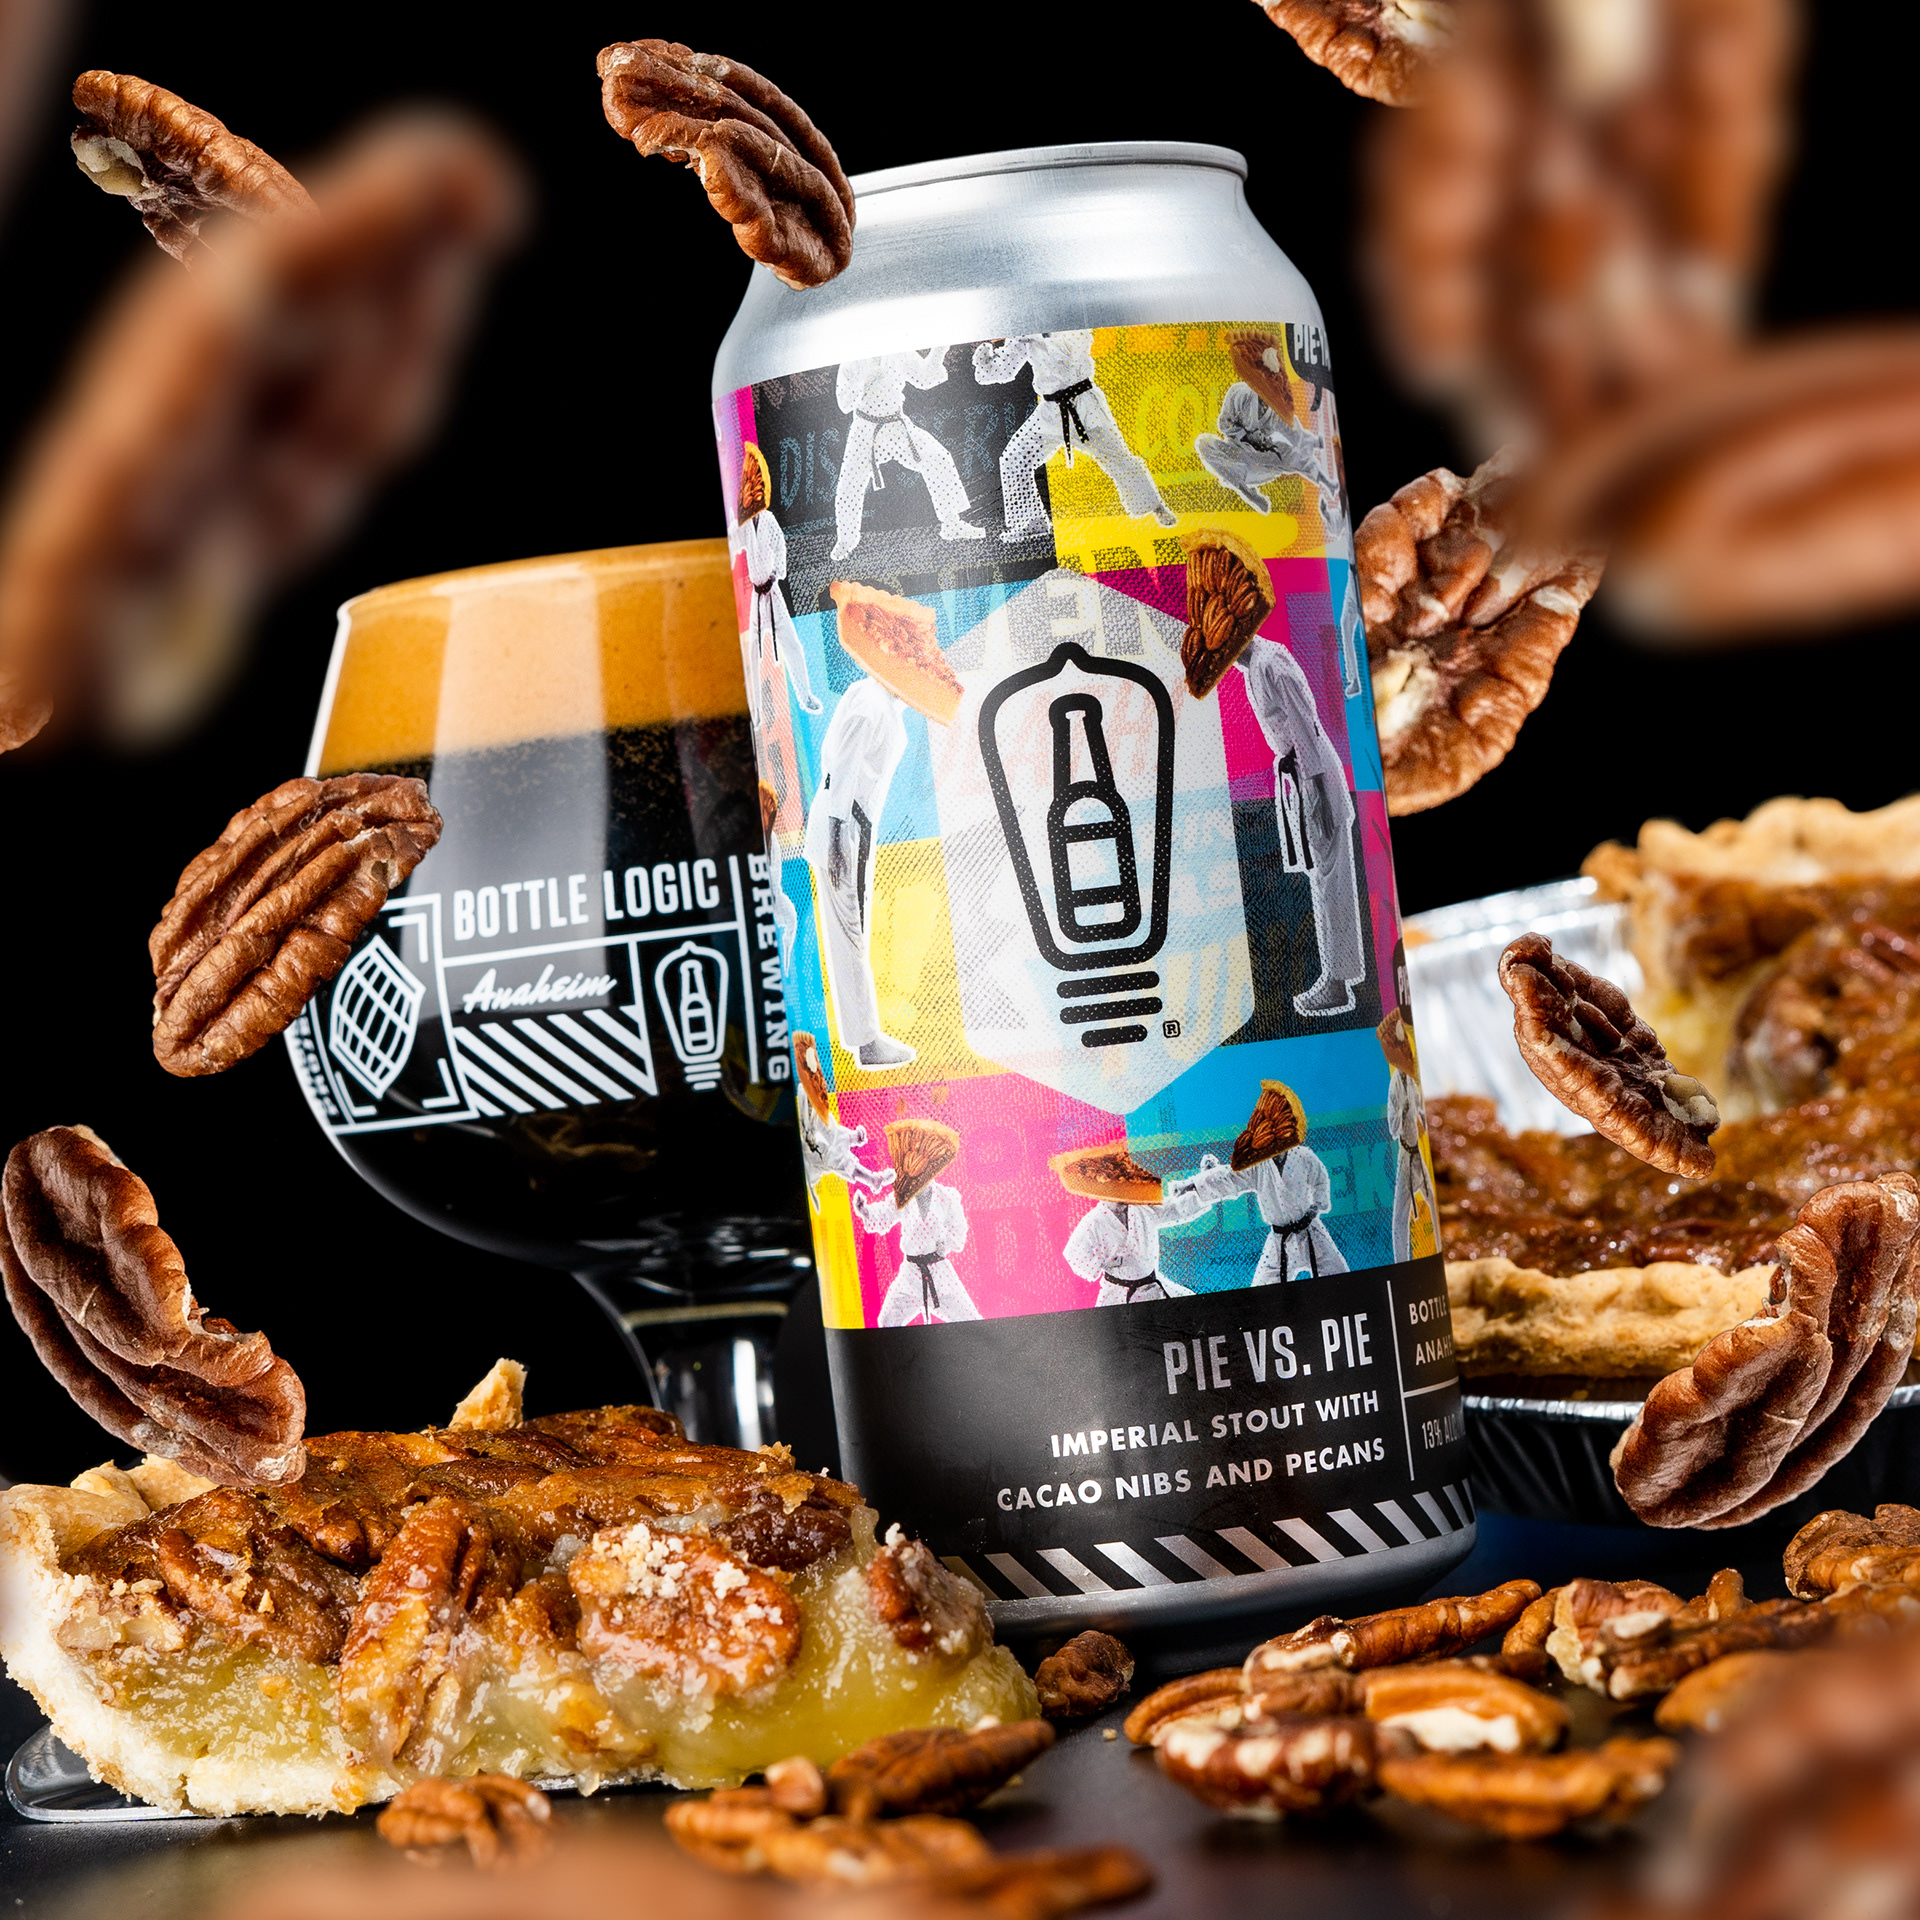
The beer that I am going to be shooting in this video is a Pecan Pie inspired Imperial Stout brewed by Bottle Logic Brewing based out of Anaheim California. The goal of this shoot is to make the beer stand out and to let the viewer know what they can expect when tasting the beer which is pecan pie.
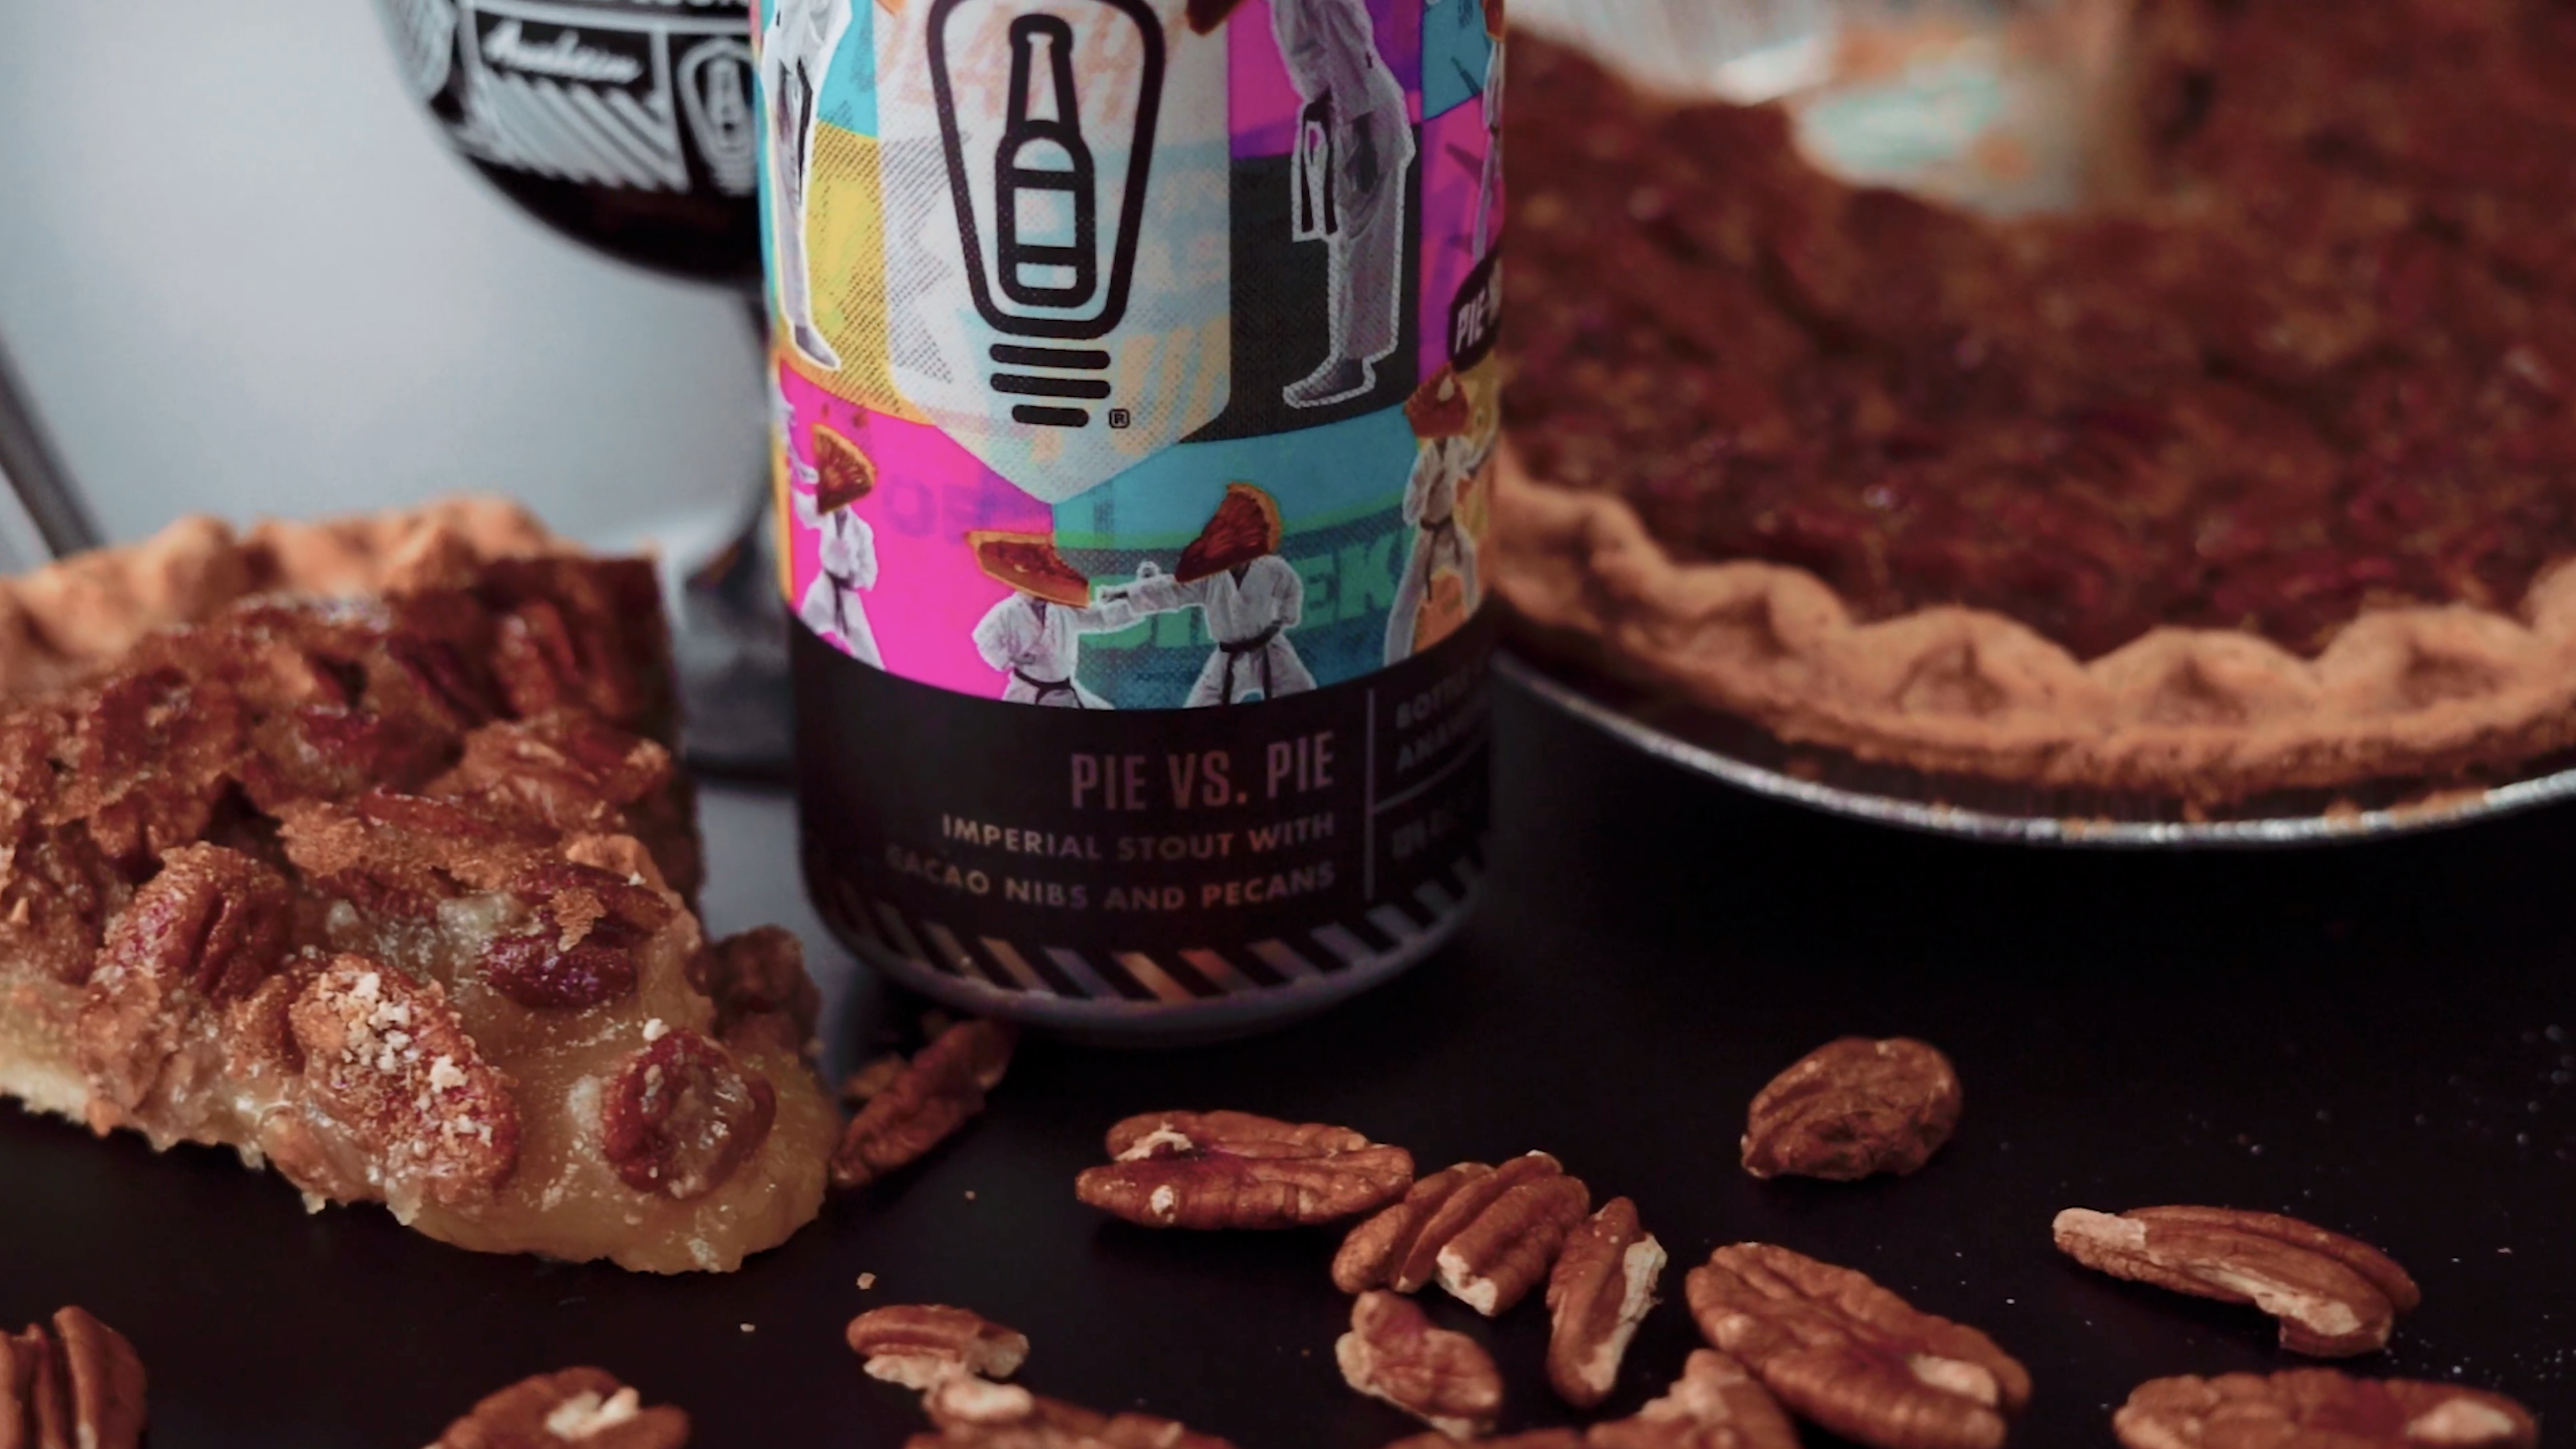
One of the key things I love to do in my product photography is to use props. Using props can help add visual details to help tell your story as well as add a little bit of eye candy for your viewer.
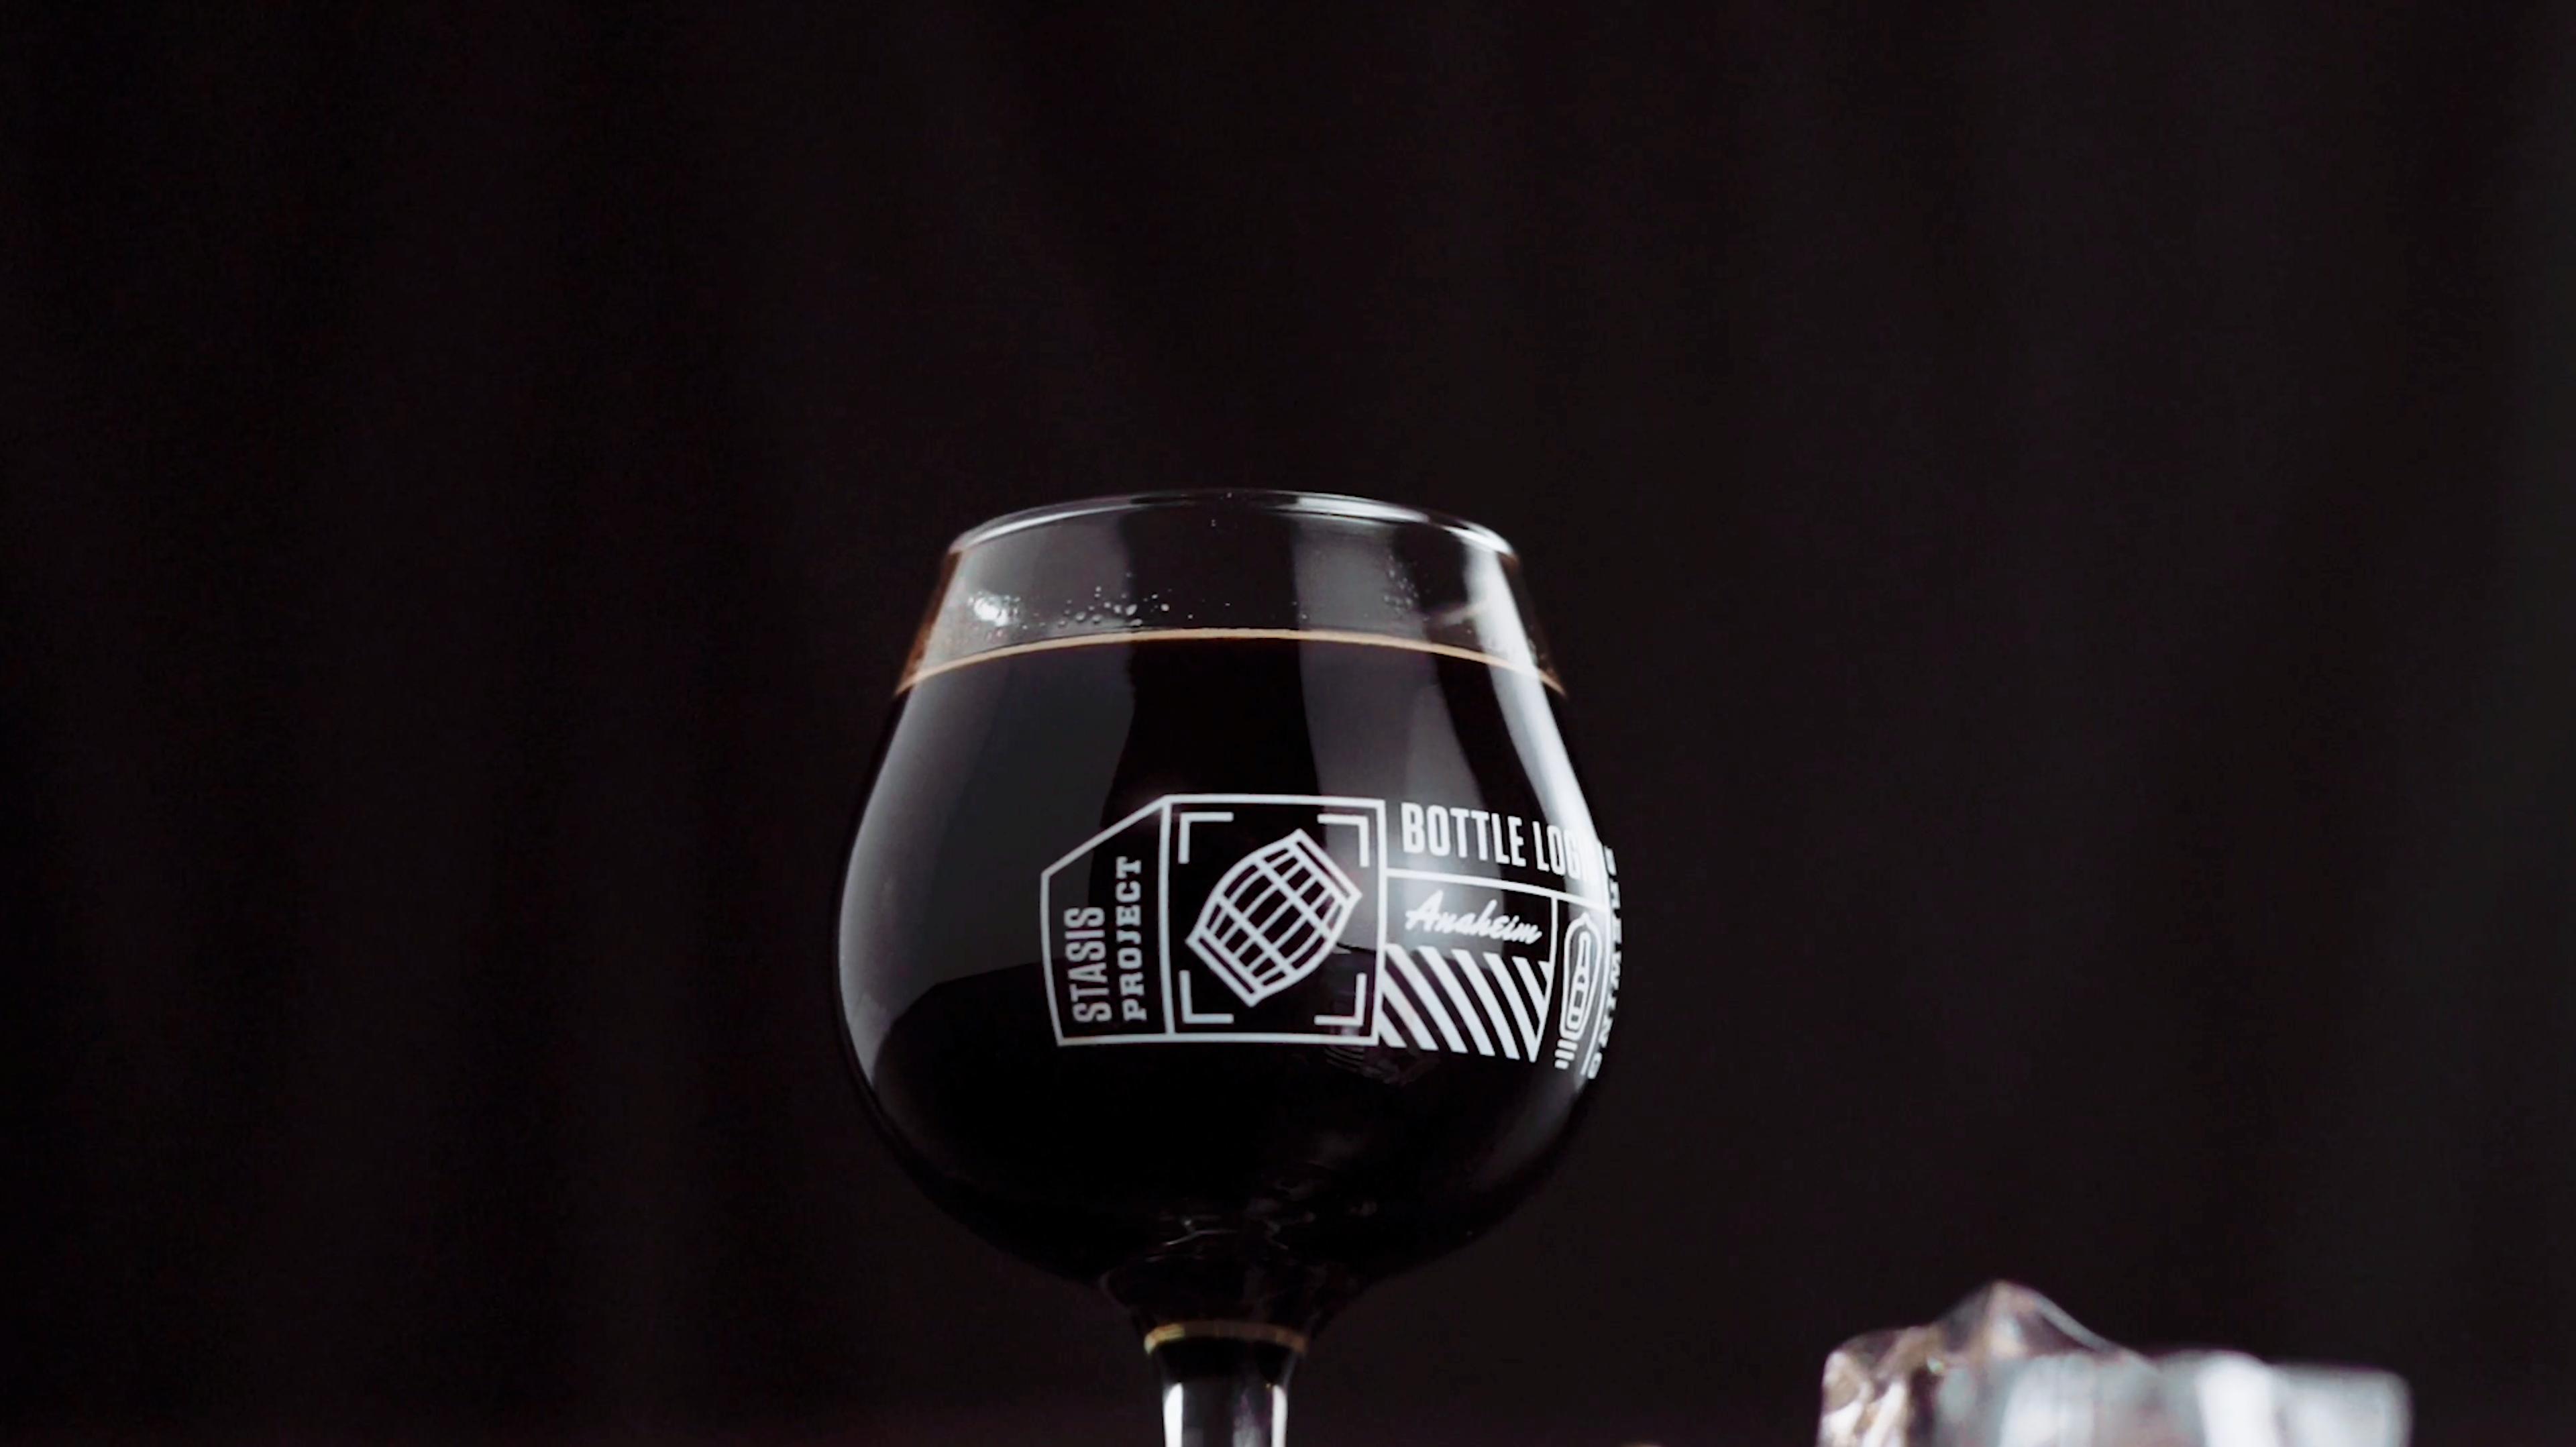
Another thing to keep in mind when shooting beer is to use proper glassware. The style of glass you use will ultimately determine the style of beer you are shooting and potentially the quality of the beer.
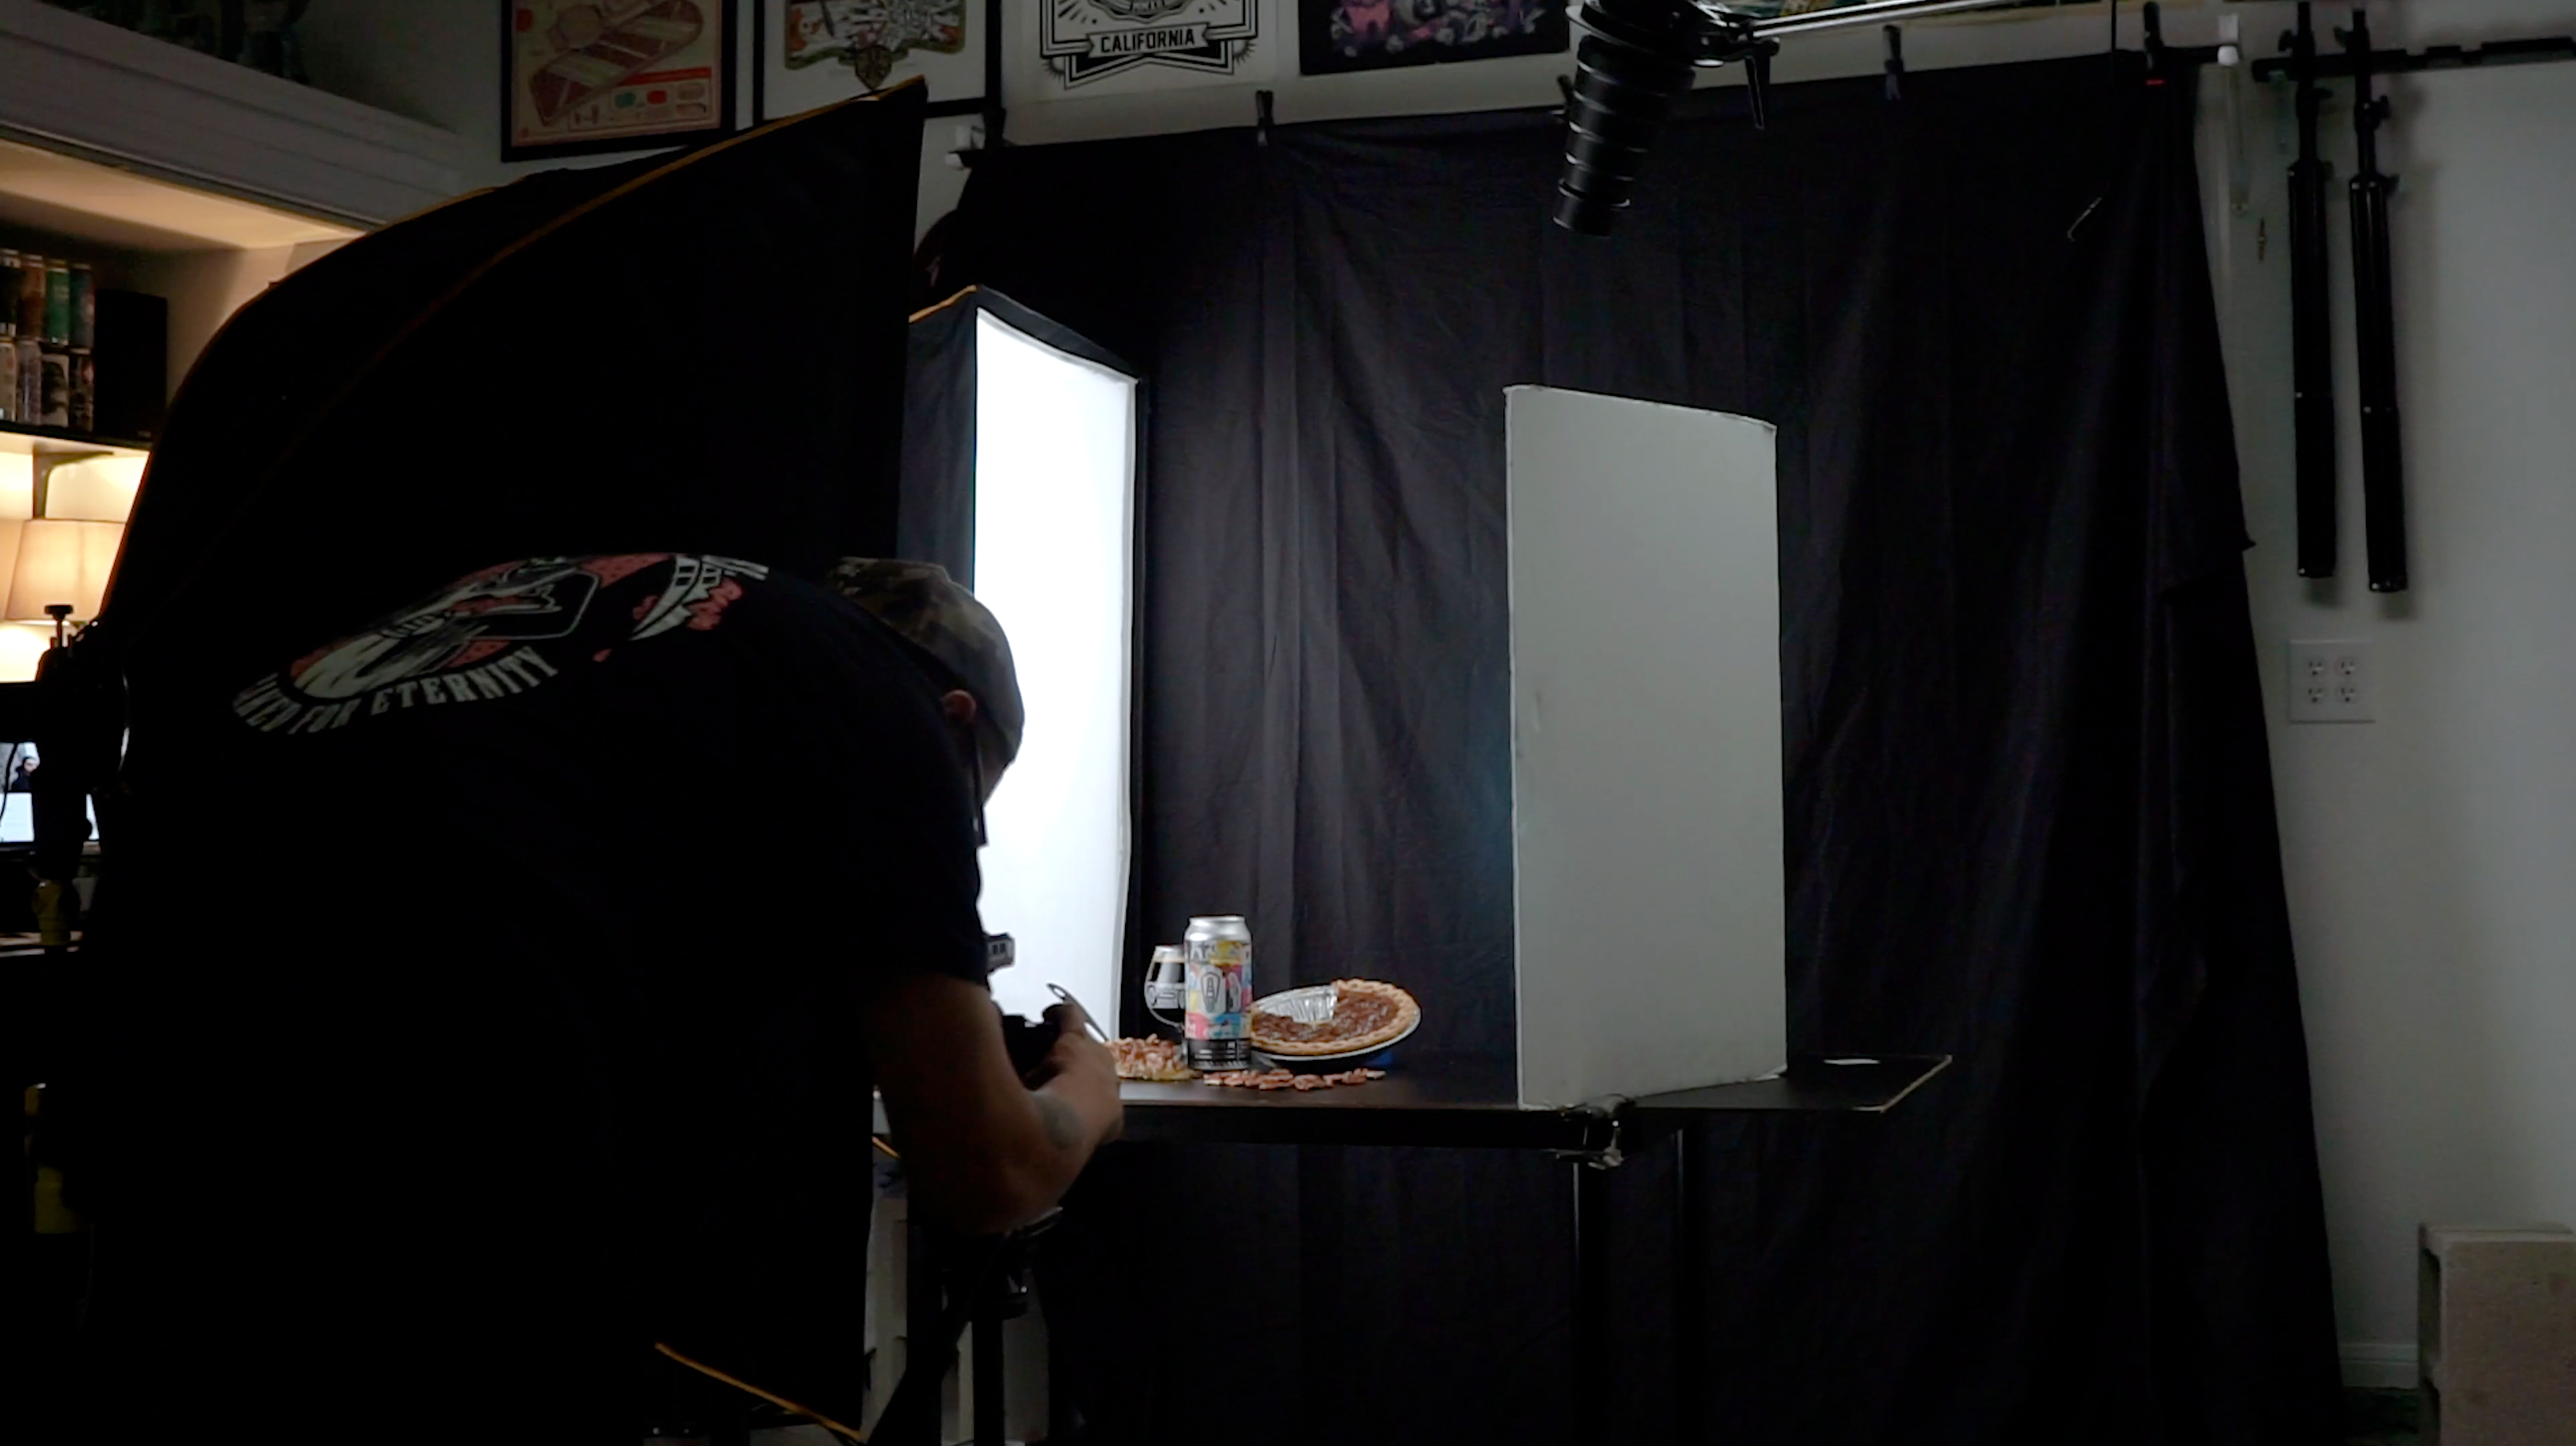
For this shoot I will be shooting on my Sony A7iii with a 50 mm 1.8 and two Flashpoint AD200s with two large rectangle soft boxes that will help provide me with nice clean highlights onto my subject. All gear will be linked below if you are interested in checking out anything.
Gear Used In This Shoot:
Sony A7iii: https://amzn.to/3oEvSKH
Sony 50mm 1.8: https://amzn.to/3nIqFjX
Flashpoint AD200: https://amzn.to/2LDDXRo
Softboxes: https://amzn.to/2XvgYuf
Lightstands: https://amzn.to/2XsR6zn
Sony A7iii: https://amzn.to/3oEvSKH
Sony 50mm 1.8: https://amzn.to/3nIqFjX
Flashpoint AD200: https://amzn.to/2LDDXRo
Softboxes: https://amzn.to/2XvgYuf
Lightstands: https://amzn.to/2XsR6zn
Settings:
Aperture: F/10
Shutter: 1/160
ISO: 100
Flash: 1/8
Aperture: F/10
Shutter: 1/160
ISO: 100
Flash: 1/8
Lighting:
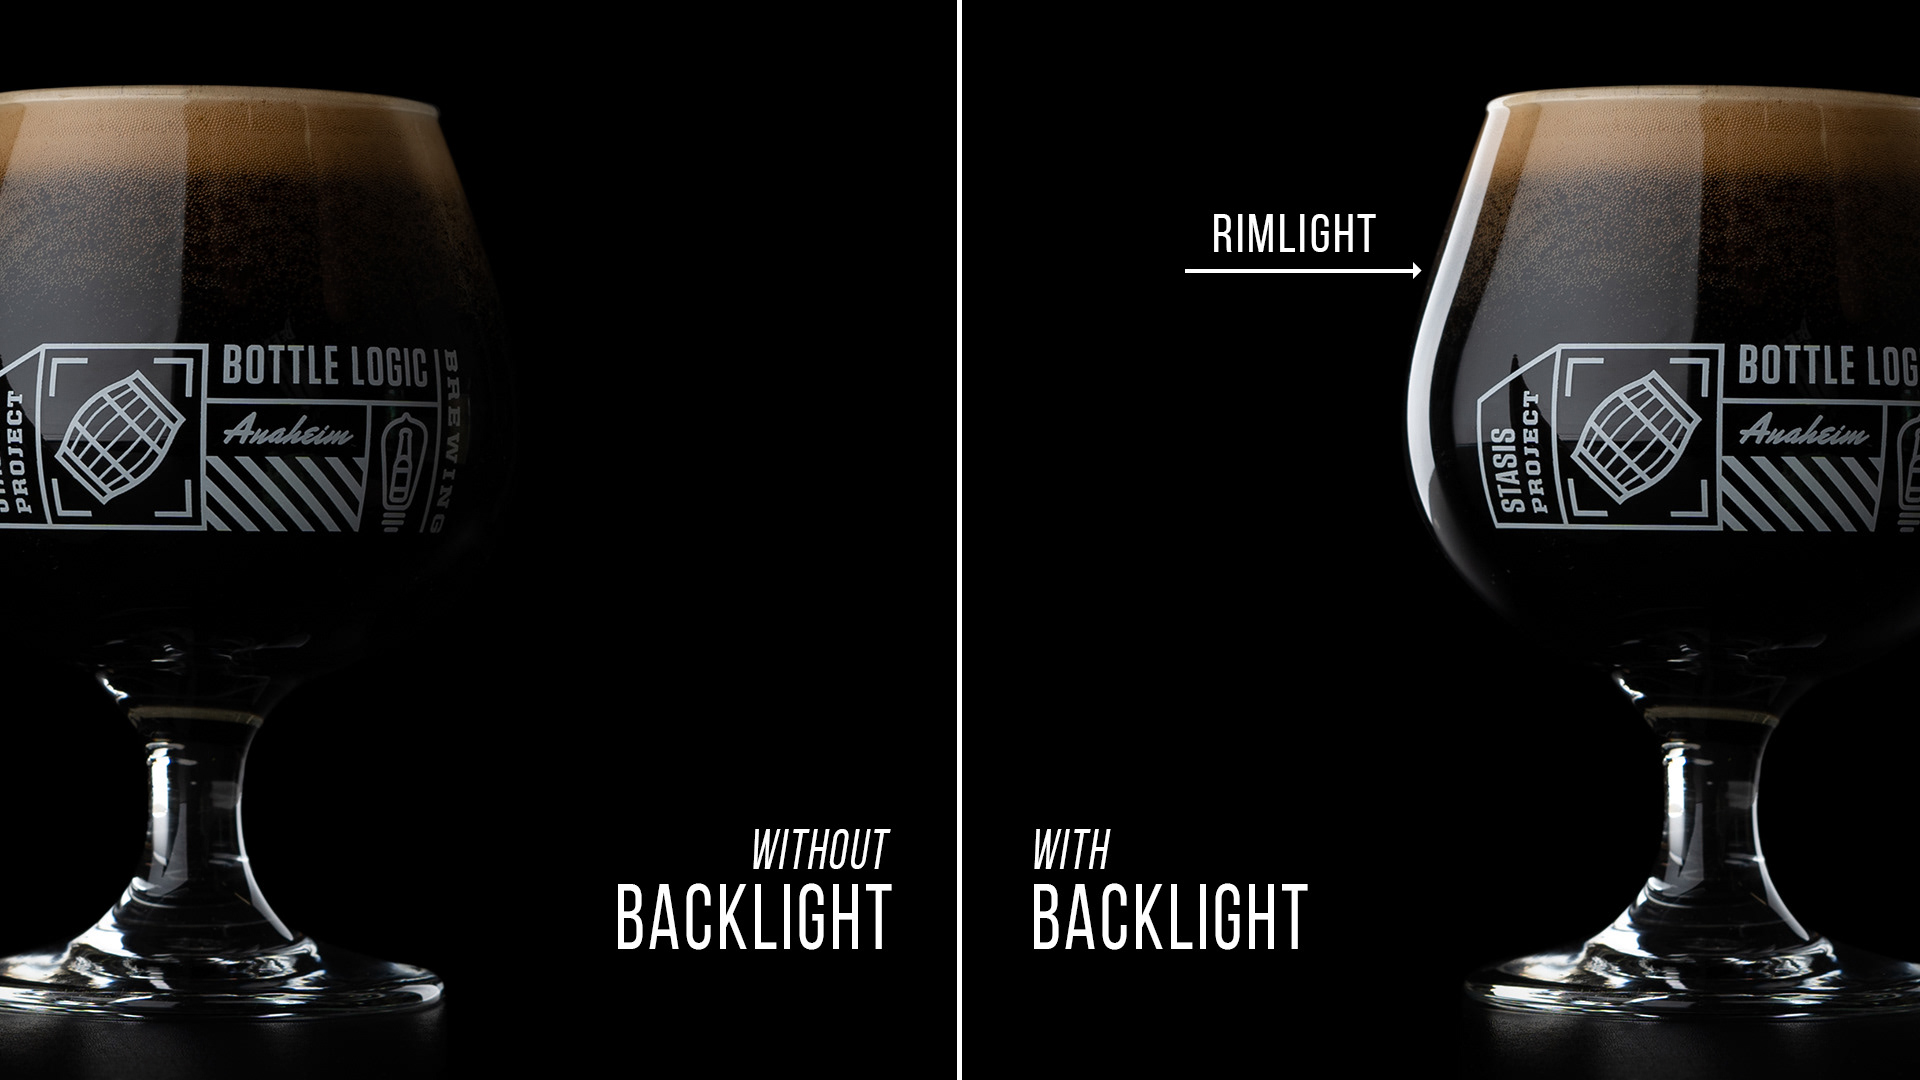
As for my lighting I like to add as much dimension as possible. I do this by setting up my first light at about a 45 degree angle from my subject then placing my second light behind my subject which helps add a nice rim light to help separate my subject from the background.
As for my lighting I like to add as much dimension as possible. I do this by setting up my first light at about a 45 degree angle from my subject then placing my second light behind my subject which helps add a nice rim light to help separate my subject from the background.
Here is a quick example of how big of an impact that backlight can make. As you can see on the image on your left is shot without a backlight and the image on your right is shot with a backlight adding a nice rim light helping separate your subject from the background.
Composition:
Once you have all your lighting setup the next most important thing I like to focus on is my composition. Which is trying to find a nice balance inside your frame thats pleasing to the eye. This is where you props can play a huge roll to help you fill the frame as well as guide your viewers eye to the subject.
Once you have all your lighting setup the next most important thing I like to focus on is my composition. Which is trying to find a nice balance inside your frame thats pleasing to the eye. This is where you props can play a huge roll to help you fill the frame as well as guide your viewers eye to the subject.
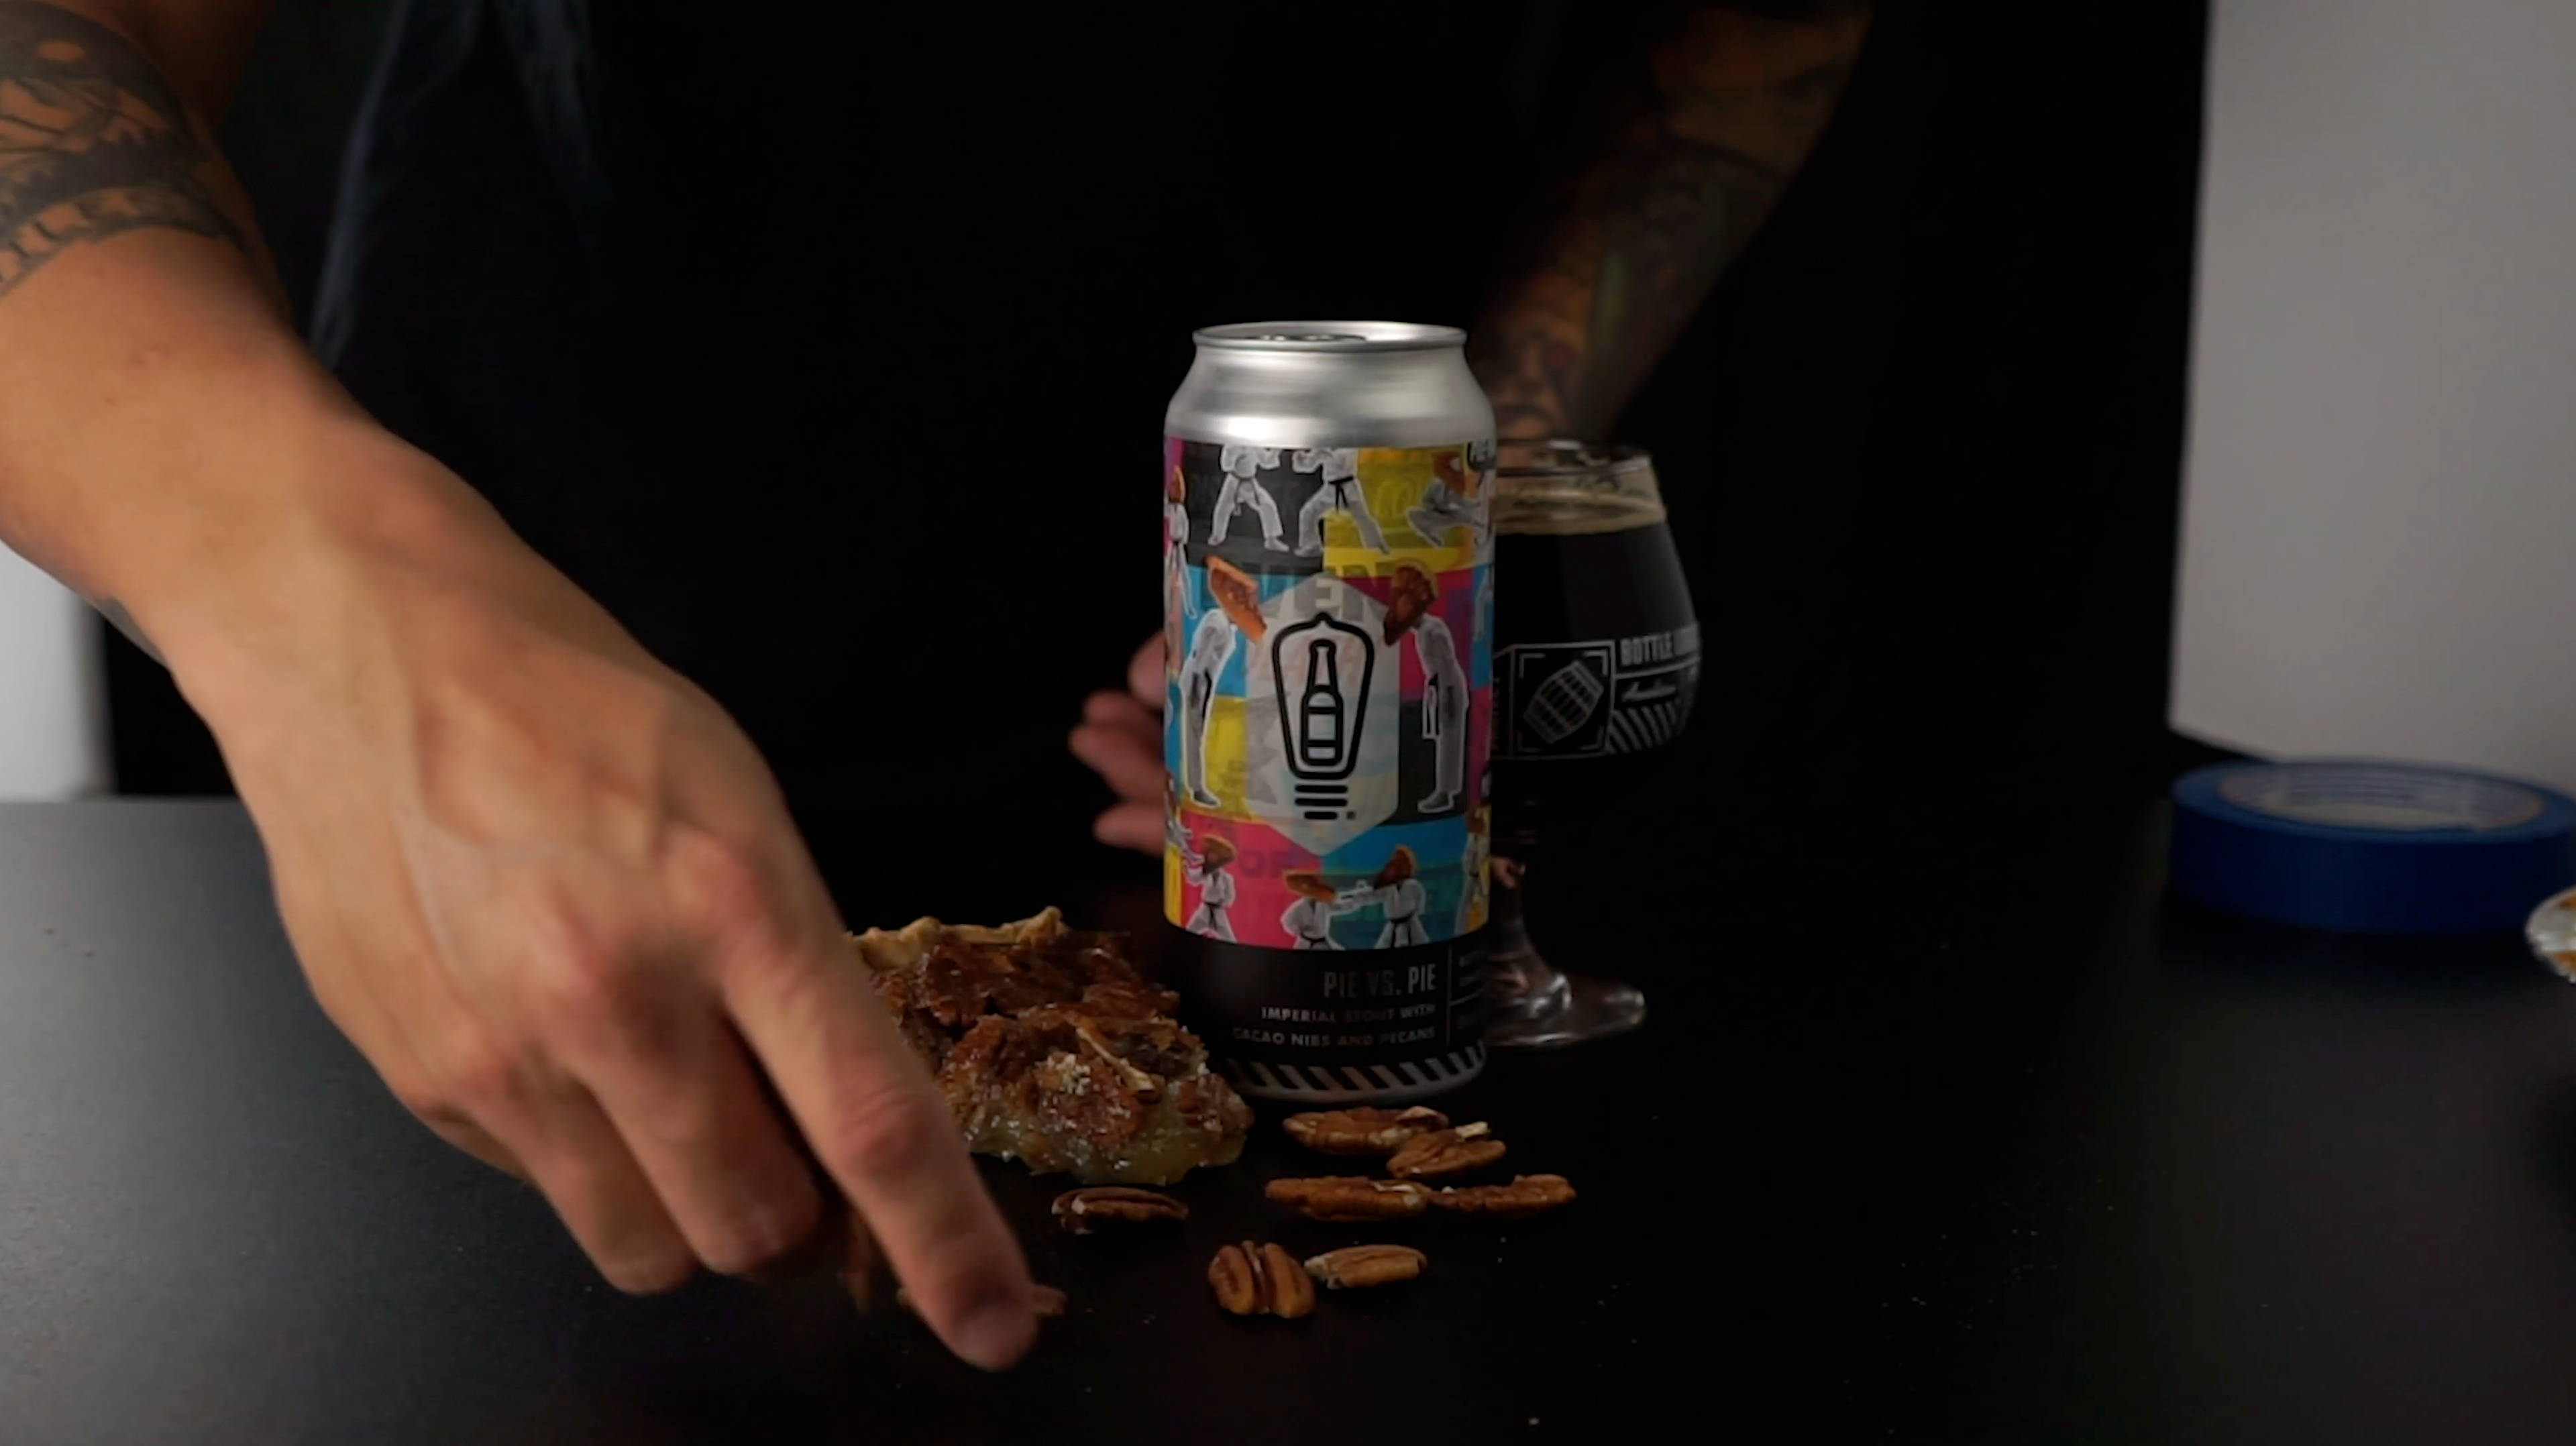
For this photo I wanted to place the pie slices facing towards the center of the frame then adding in the pecans in the foreground, which helps guide my viewers eye to the the main focus of the photo which is the beer.
Shooting:
Once you have your composition dialed in go ahead and snap a few photos.
Once you have your composition dialed in go ahead and snap a few photos.
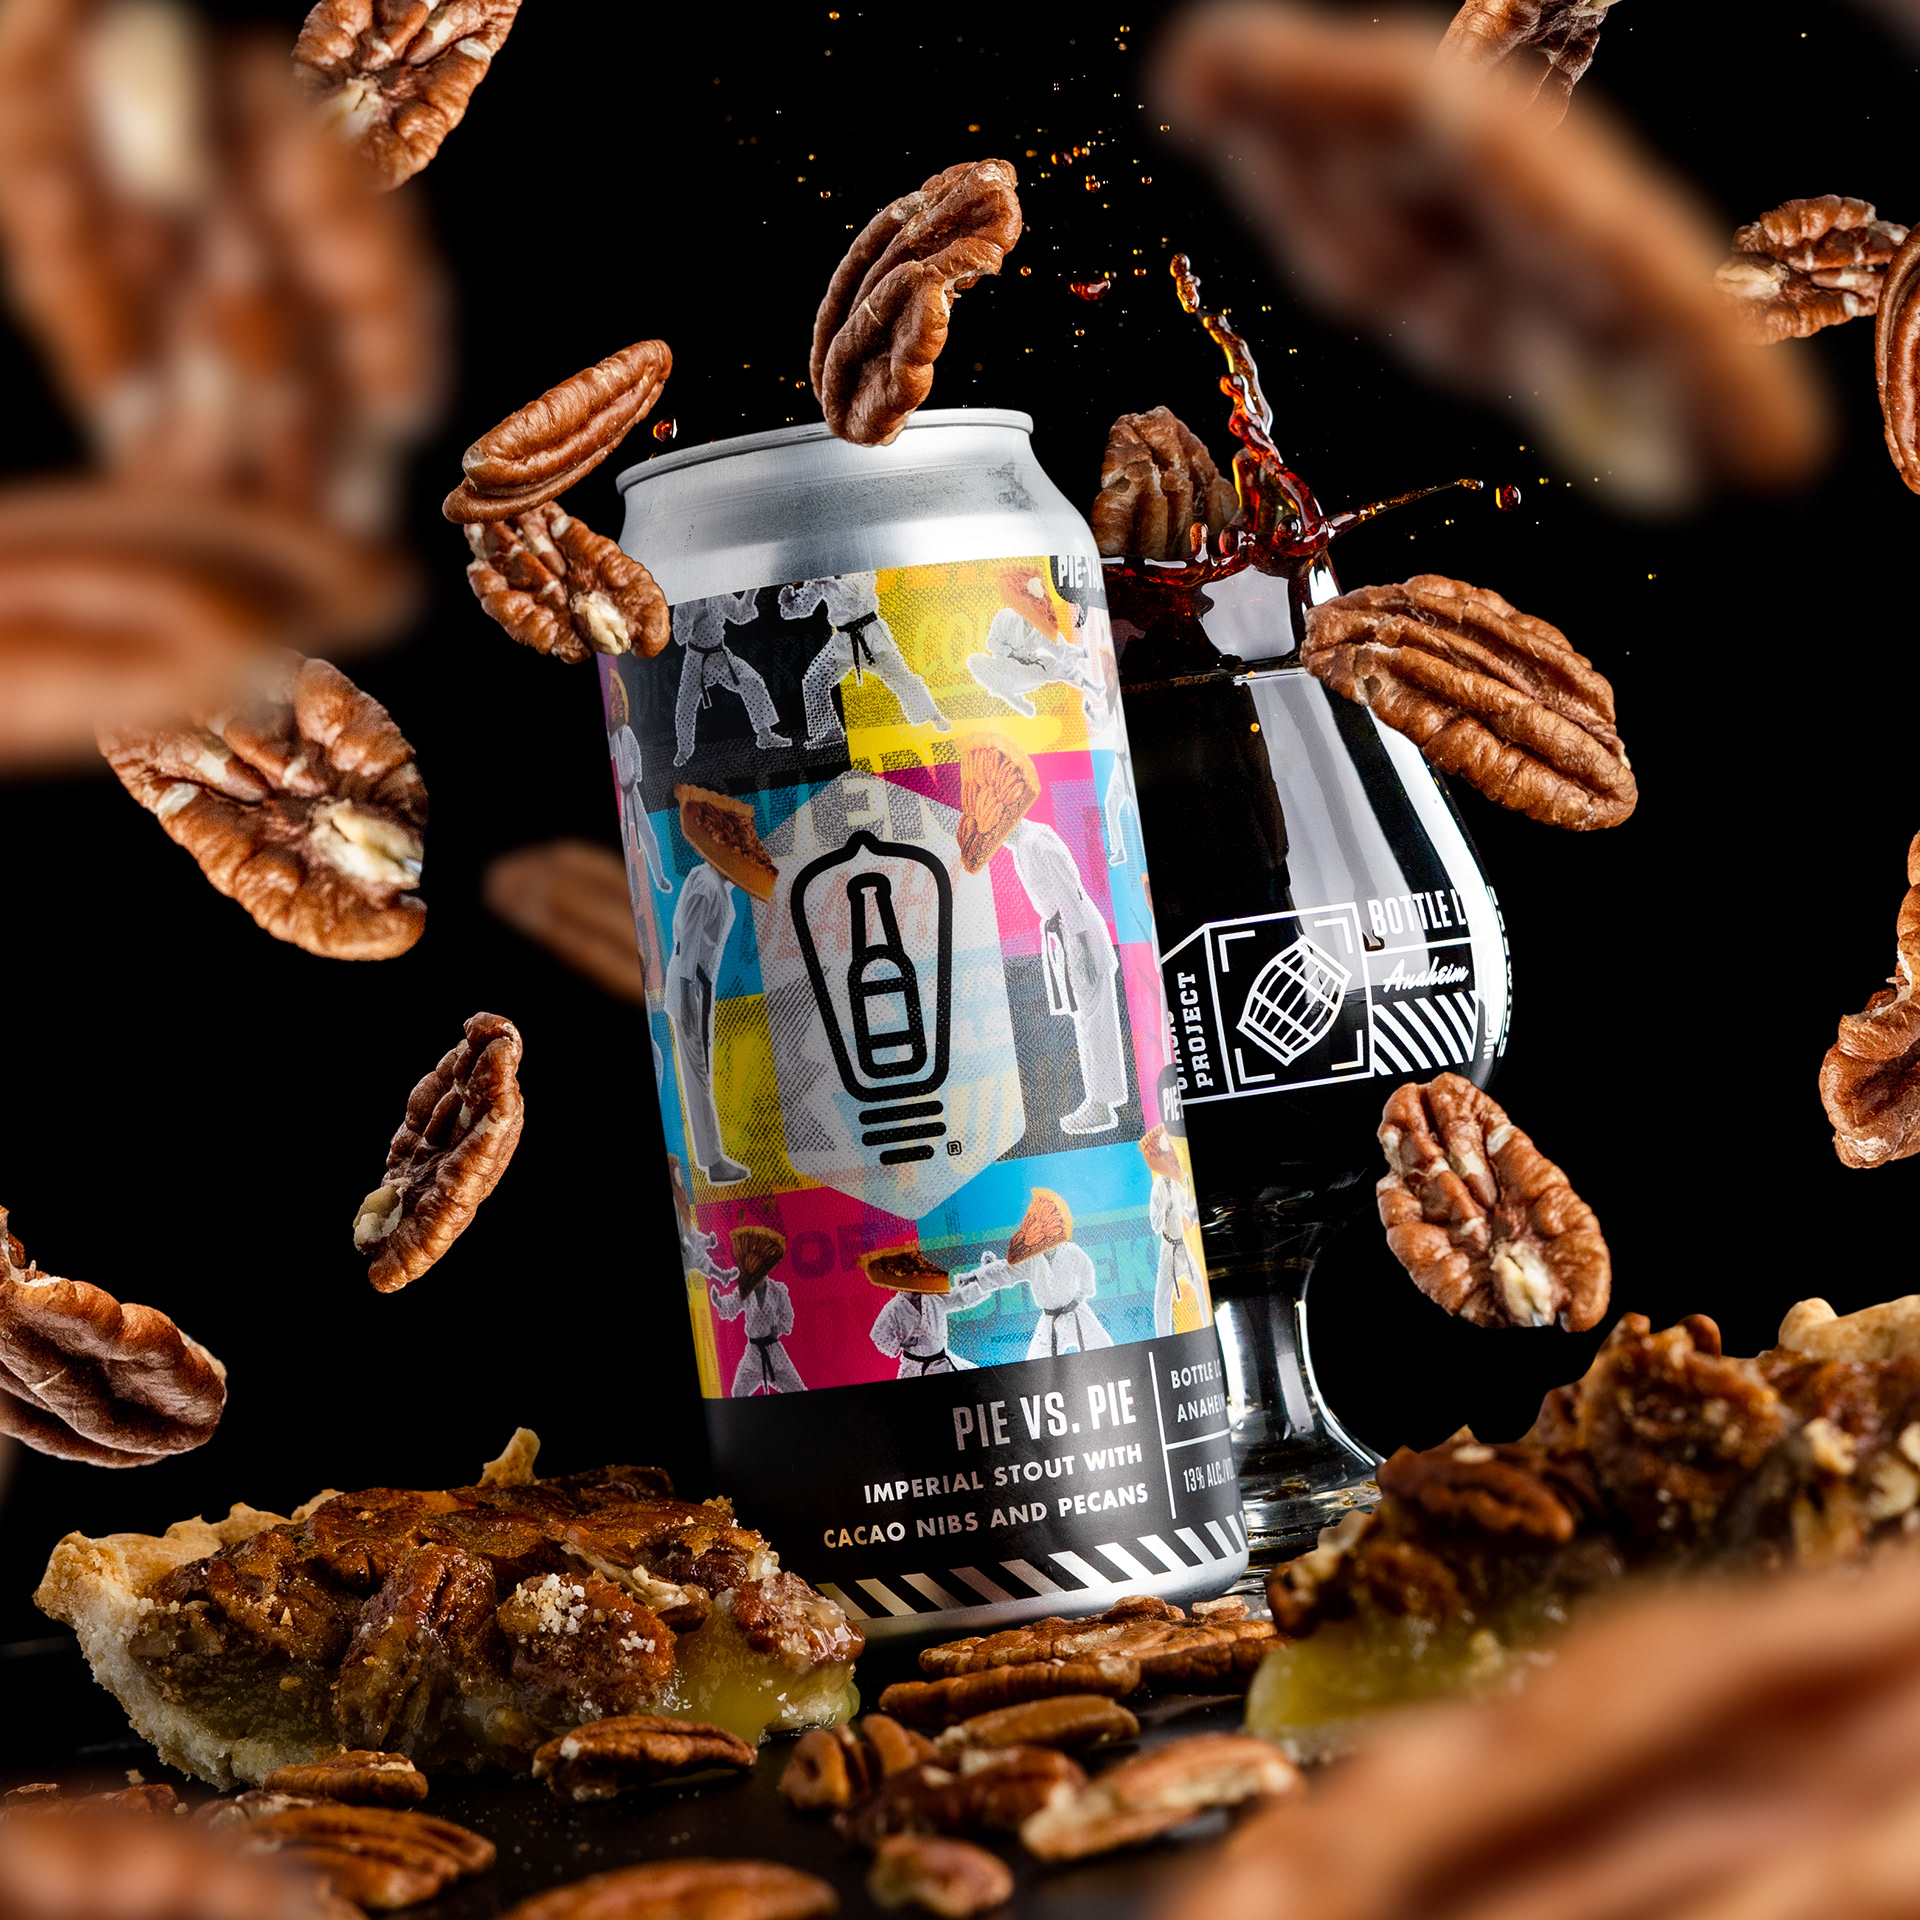
So here is the photo I just took it's starting to look pretty cool already, but it just doesn't feel epic enough to me. So what I like to do is add a little movement to my photos whether its tilting the can, throwing objects through the frame or making the liquid splash. Let's go ahead and add a splash to this one.
I start by removing all my props from the frame leaving just the glass in the photo. The reason I do this is so that I don't damage any of my props or waste any food during the process as it tends to get pretty messy. To create my splashes I like to use these fake acrylic ice cubes that I bought off of Amazon. They have just enough weight to create a splash and so far haven't broken any of my glassware.
So let's go ahead and check out some of the splashes I just captured. I usually will repeat this process 2-3 times maybe even more if I can't capture the right splash that I am looking for, but I think these look great.
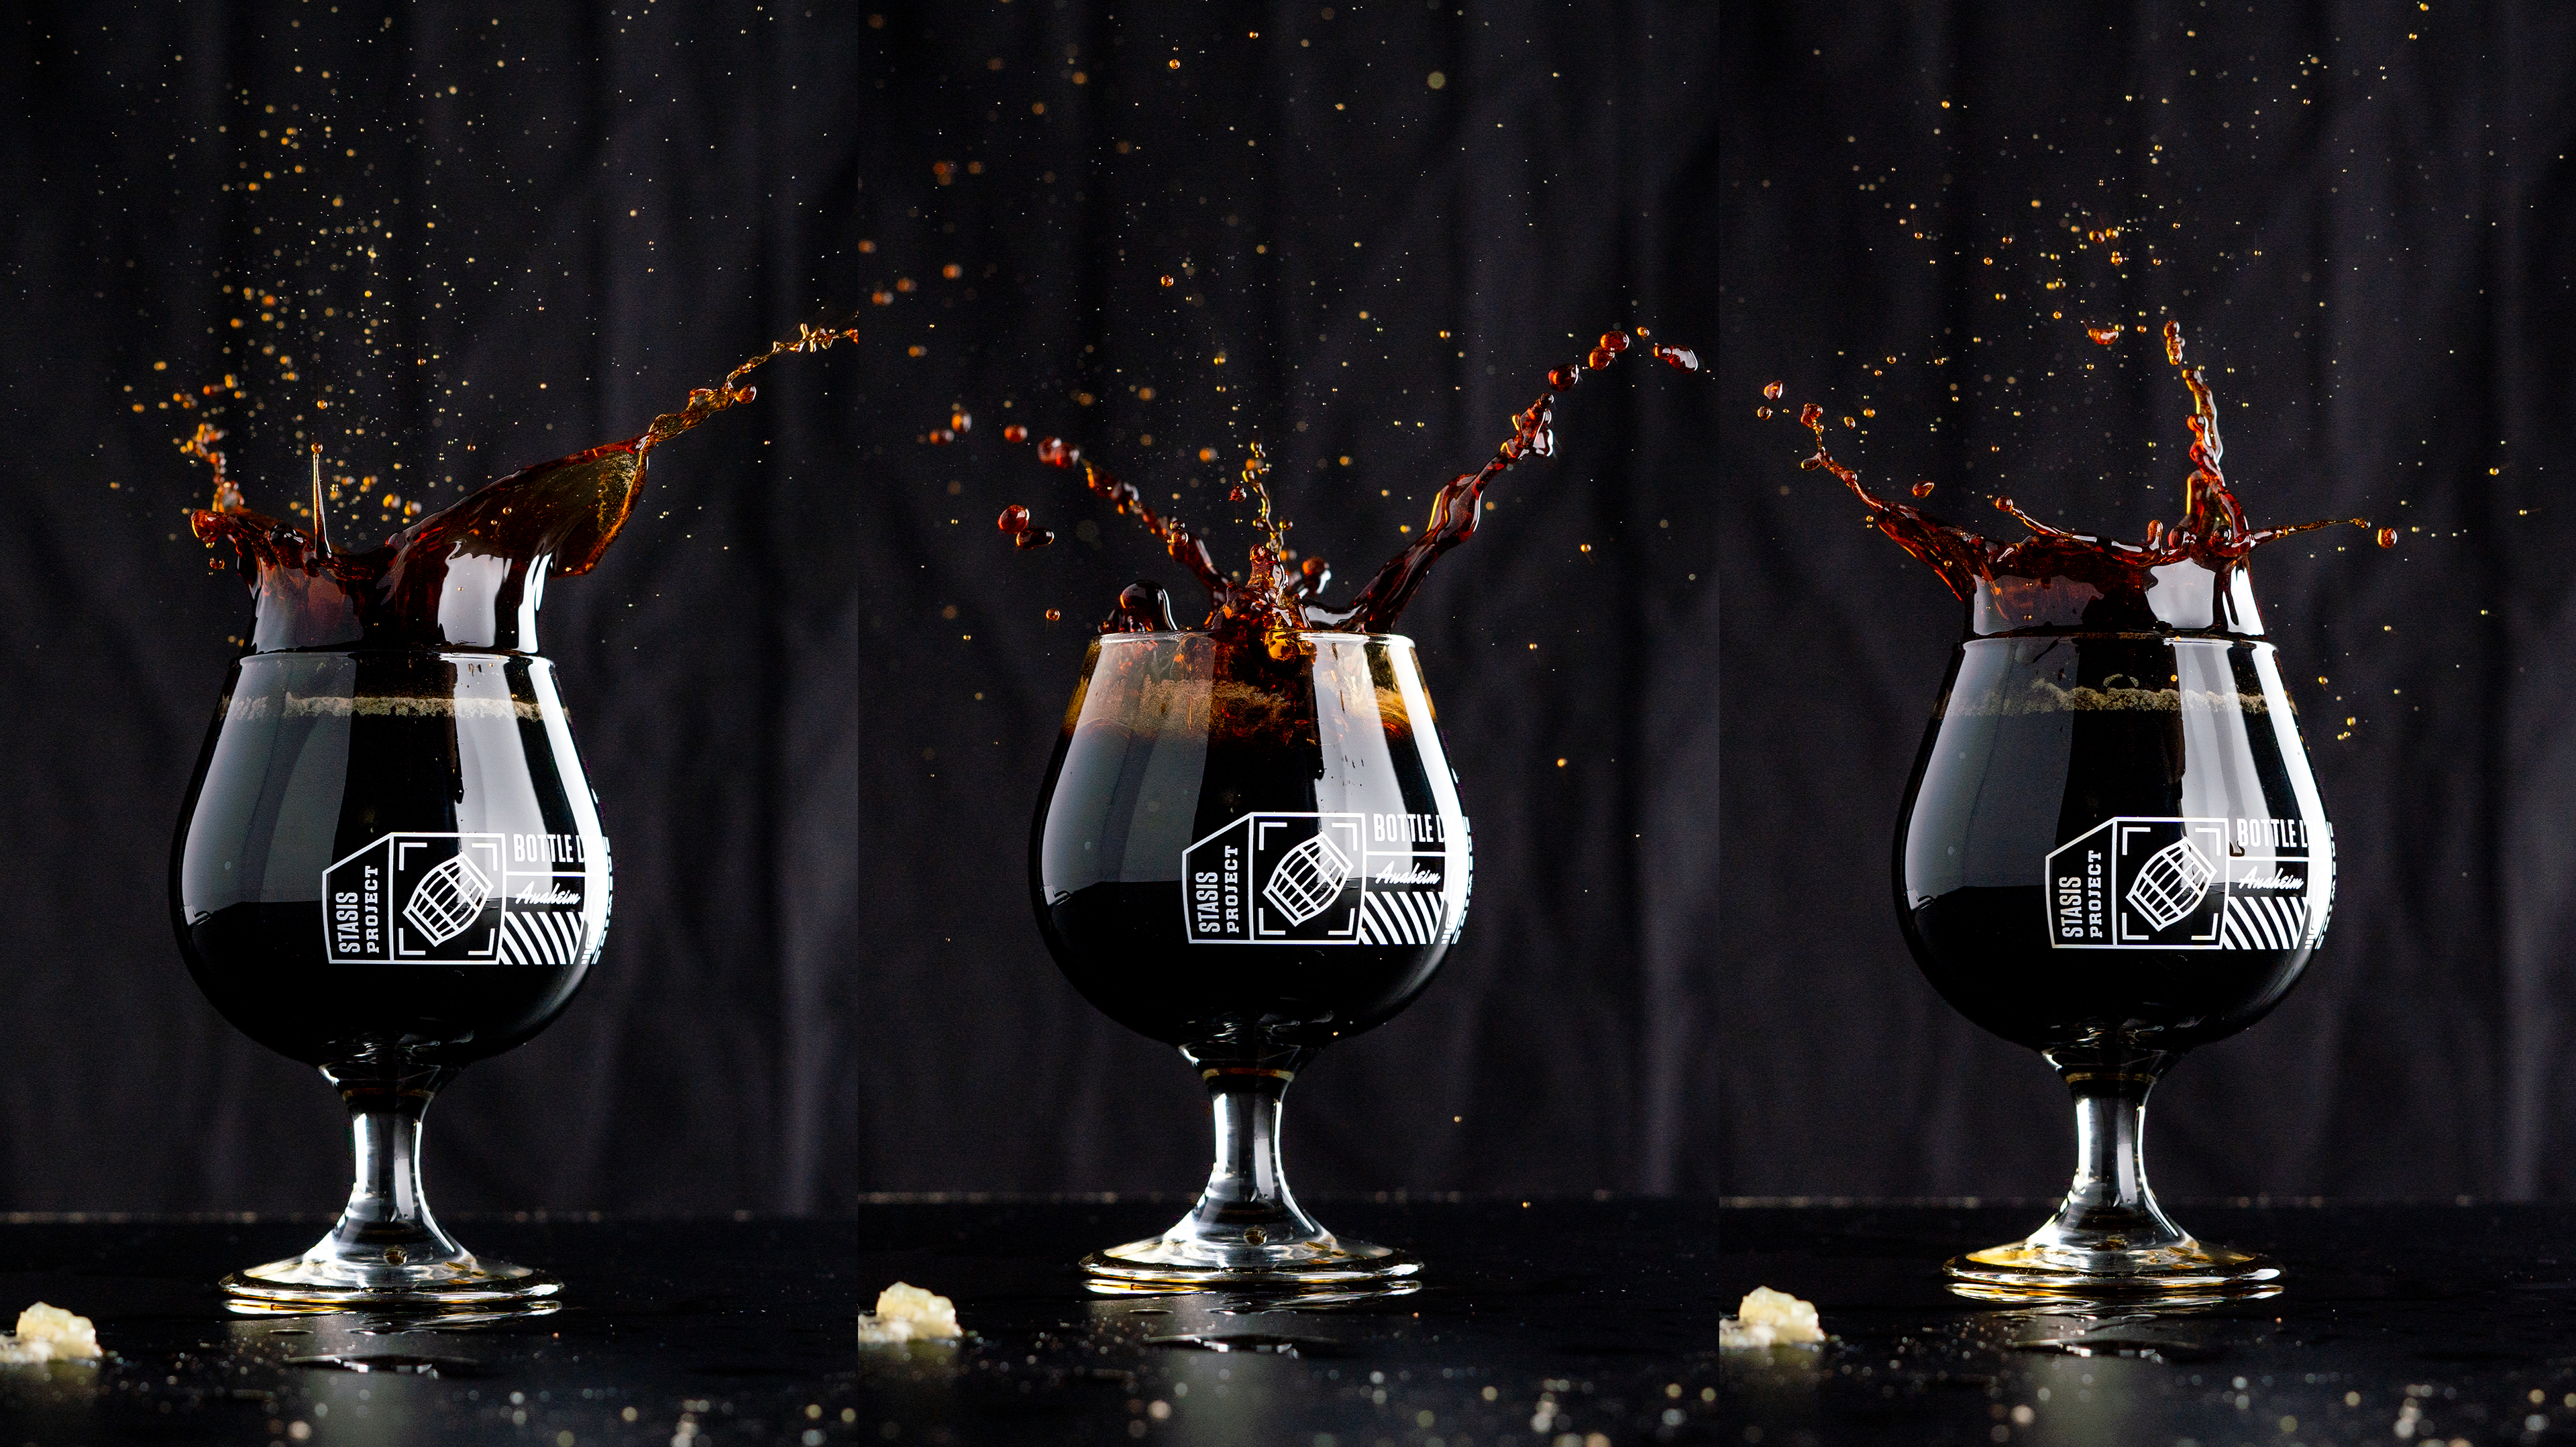
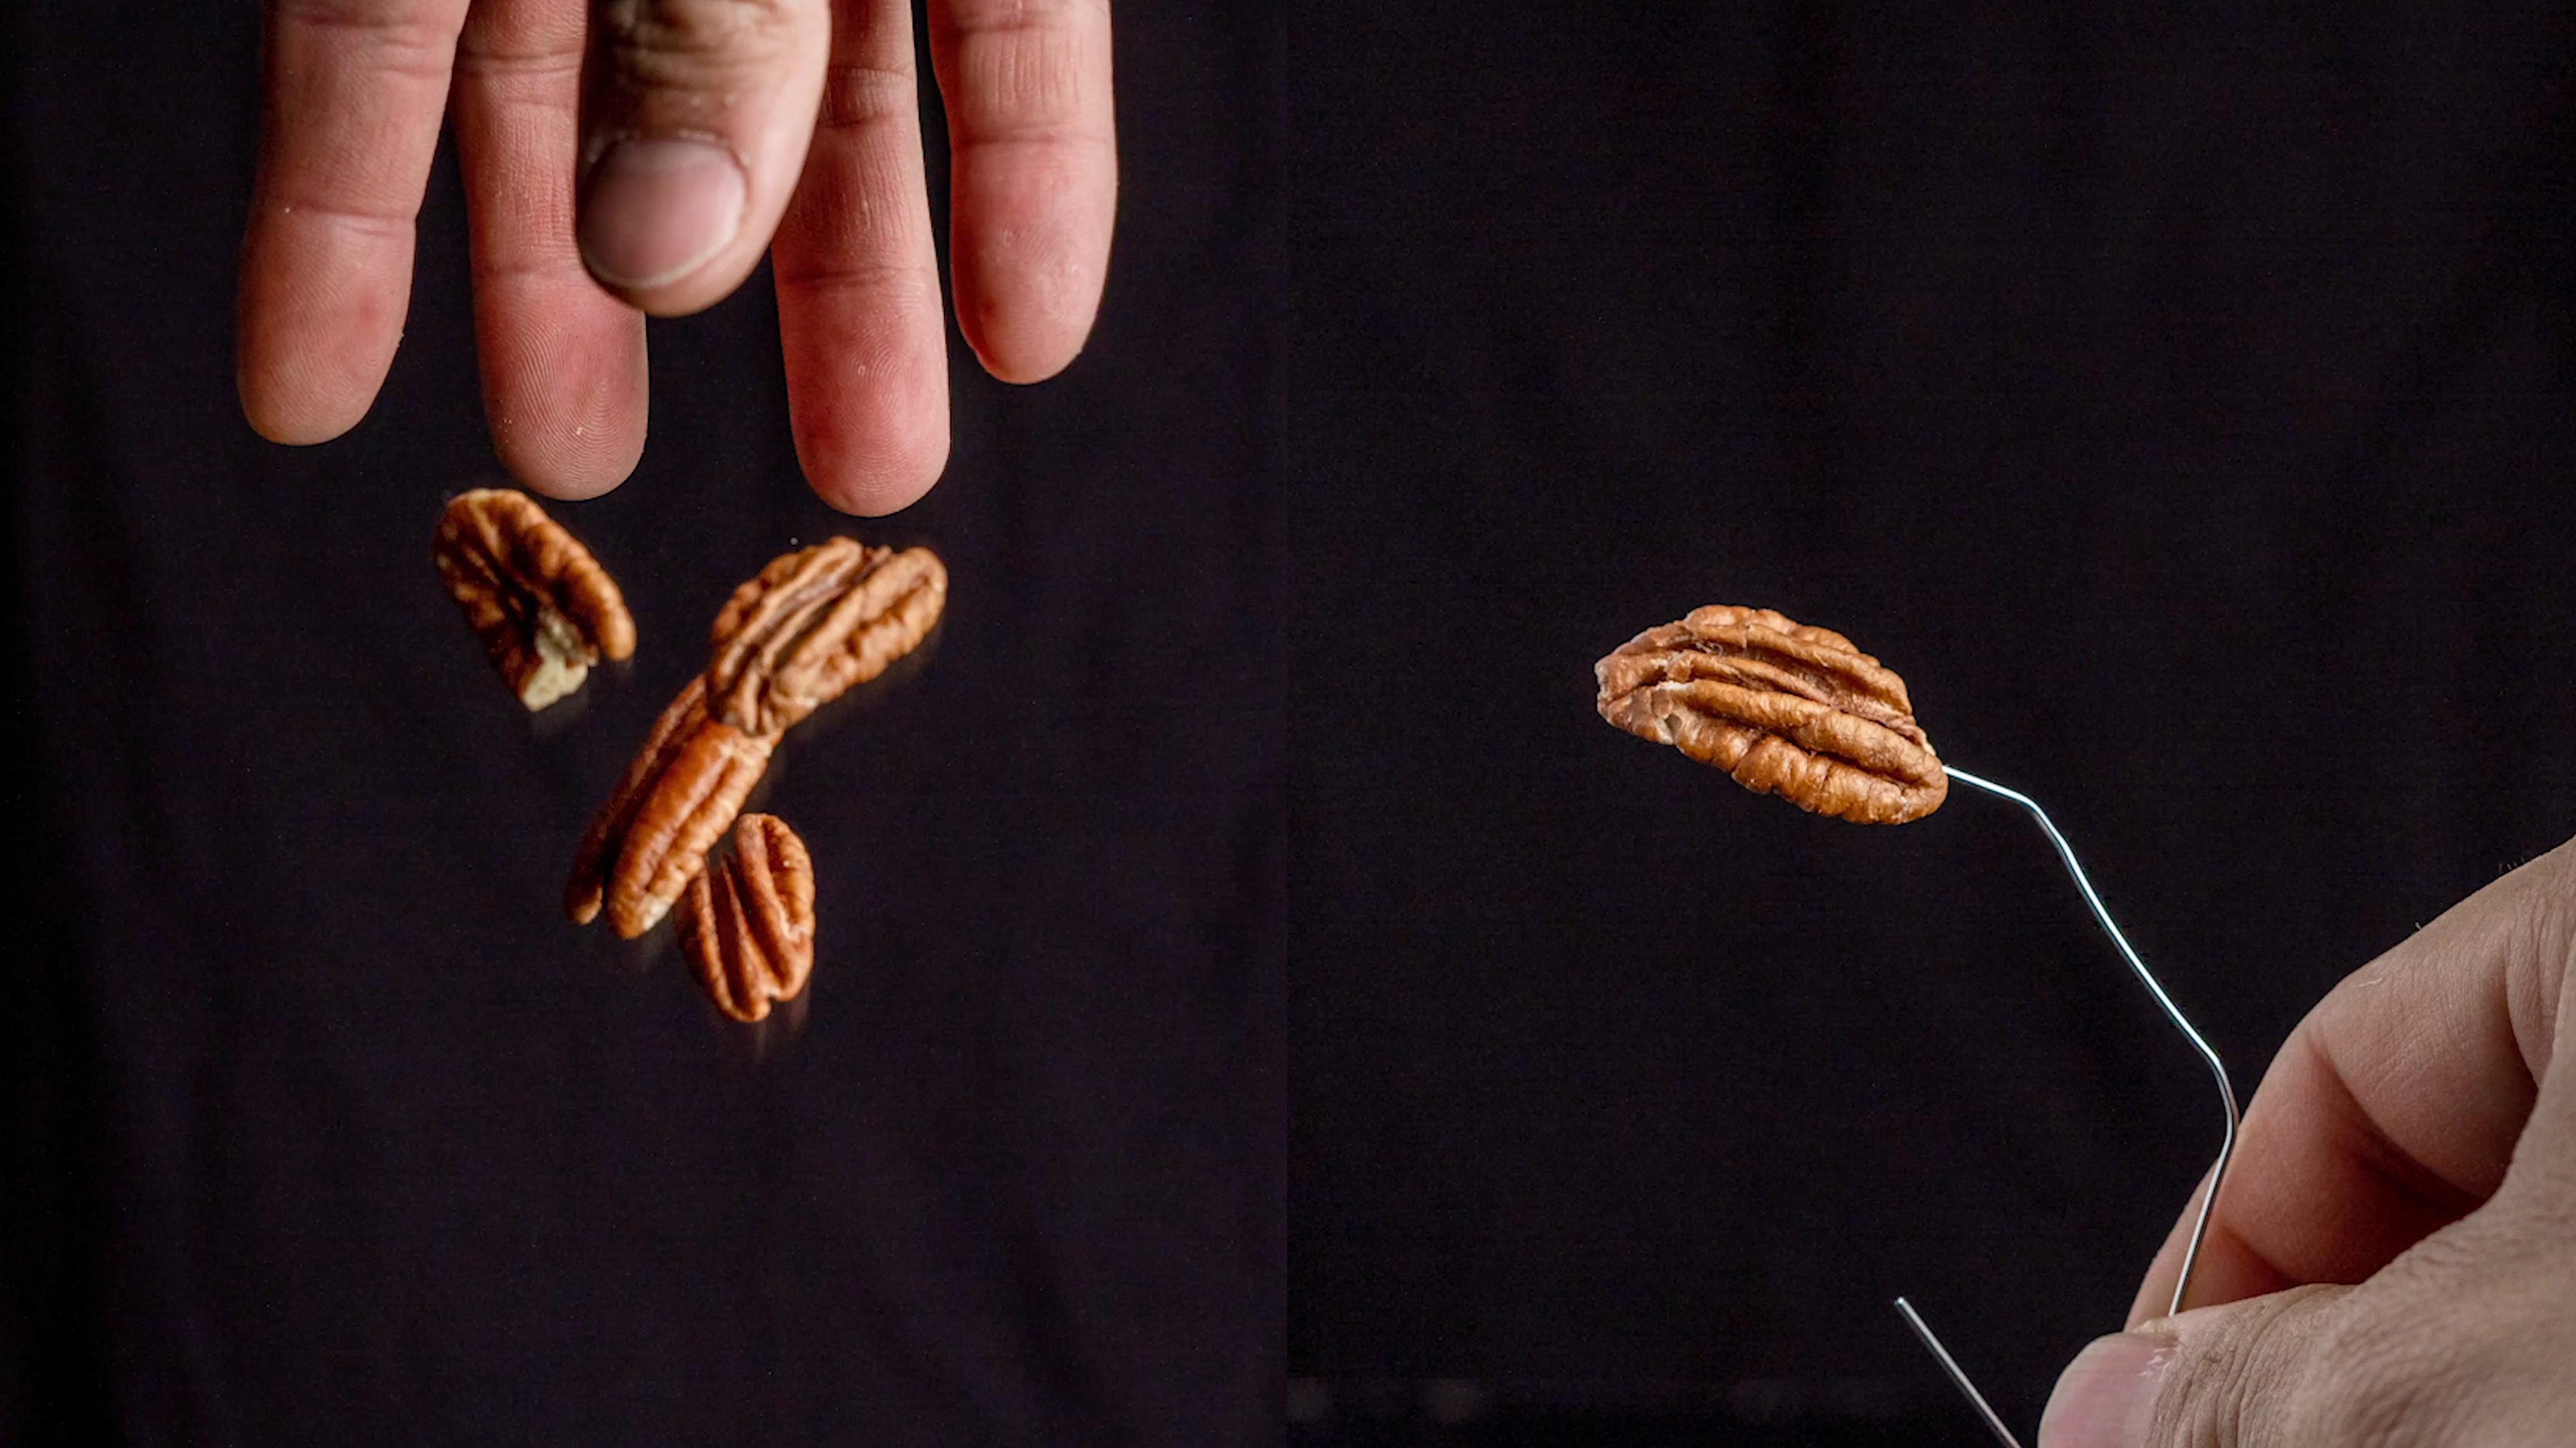
So now that I've captured our splash the last thing I want to do for this photo, is add some of the pecans falling through the air. You can do this by simply dropping handfuls of the object you want to capture or if you want to make sure you get the sharpest focus possible you can put them onto a string or wire and shoot them that way.
Once you've captured all the photos you need to composite your final image take them into Lightroom and Photoshop, and you'll be left with images like these:

I hope you guys found this behind the scenes look of how I approach product photography helpful. These are just the steps and techniques that I use and have found helpful for my workflow. I know there are a ton of different ways to execute photos like these, so if you guys have any suggestions I would love to hear them! Please feel free to leave a comment on my video.
And if you guys want to see a breakdown of how I would edit these photos I will be posting a video about that very soon! I hope you decide to stick around and check out more of my videos, if you do please make sure you like, comment, and subscribe, and until then I will see you in the next one!
Disclaimer: Some of the links in this blog are affiliate links that allow me to earn a small commission (at no extra cost to you!) and help support my YouTube Channel.